


gazmelb61’s photostream on Flickr.
View some of my photos of flickr

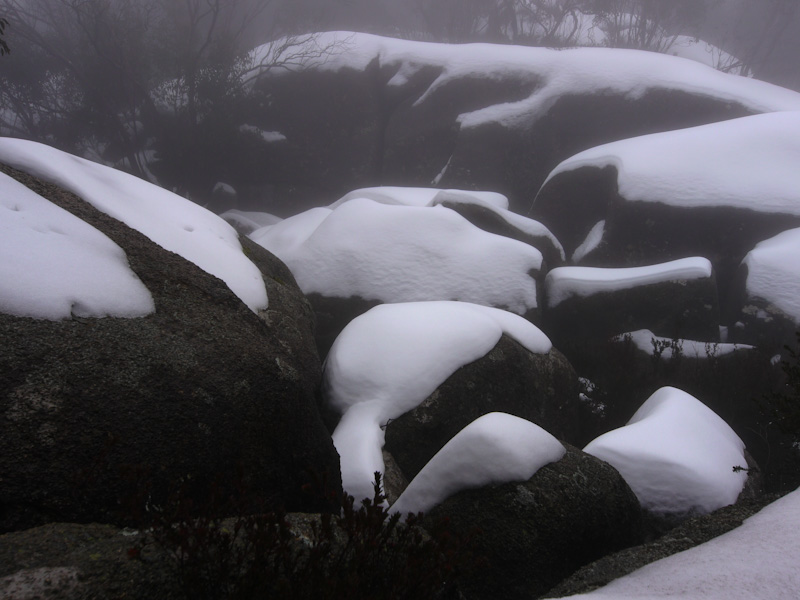
Alpine snow regions in Australia are confined to the south-east and have a relatively short season from June-September.
Snow mainly falls down to altitudes of 1400m, but on the uncommon days of very cold Antarctic blasts, snow may fall to as low as 900m.
During the snow skiing season, photographers have limited access to these regions as snow ploughs clear the road and heap snow on the sides of the roads preventing ability to park your vehicle other than at designated areas – not very helpful for photographers!
Most of Victoria’s snow fields are within 2-4 hours drive of Melbourne, but those with 2WD vehicles will need to use snow chains once they reach the snow, while those with 4WD vehicles will need to carry snow chains.


What have you learned from the above images?
1. you don’t need ISO above ISO 400 so any modern cropped sensor camera will handle this scenery well – don’t get yourself worried about all those camera tests comparing ISO at 12,800 – high ISO shooting is really only needed for certain niche photographers. The landscape photographer, like most photographers, generally shoot at low ISO and preferably with a tripod.
2. the limiting factor is not the camera or lens, but YOUR ability to adjust the camera’s settings effectively and to ensure the lens glass remains clear.
3. don’t forget your tripod and polarising filter for those waterfall shots.
4. in the cloud, an ultra wide angle lens comes into its own while a telephoto has limited utility, but try to avoid getting too much brighter cloud in your image, as viewer’s eyes tend to go to bright areas, and this cloud will have little detail to warrant the viewer’s attention, and thus generally will detract from the image.
5. with more endeavour and time, a number of different imagery styles could be derived from the initial base images, and these could be further “enhanced” because the initial exposures generally included the full dynamic range that was important with minimal if any blown highlights. Note I have intentionally under-exposed a couple of the above for effect.
As an aside, I am really looking forward to a weather-proof Olympus Pen Pro with built-in EVF and image stabiliser to use with the very nice new Olympus 12mm f/2.0 lens, so please Mr Olympus, bring it on!
My last photo blog on my trip to New York.
All photos taken with Panasonic GH-1 Micro Four Thirds camera.
One of the few photos I took with the Olympus 7-14mm lens – New York’s Flatiron building:

Empire State:

Only the tourists look up:

Custom built burgers:

Reflections:

Greenwich Village:

Farewell New York, I had a great time, thank you.

I could not resist catching a 1 hour train to Philadelphia and taking a 20min walk in the rain to Philadelphia’s Museum of Art – made famous by the Rocky movie when Rocky trained by running up its steps.
Now the train to Philadelphia from New York’s Penn Station is ridiculously expensive – it cost my $49 one way and $89 on the way back, and that wasn’t even the express train! Furthermore, you will need photo ID such as passport or driver’s licence to purchase your tickets as your photo ID may be checked on the train – not the time to leave it in the hotel safe!
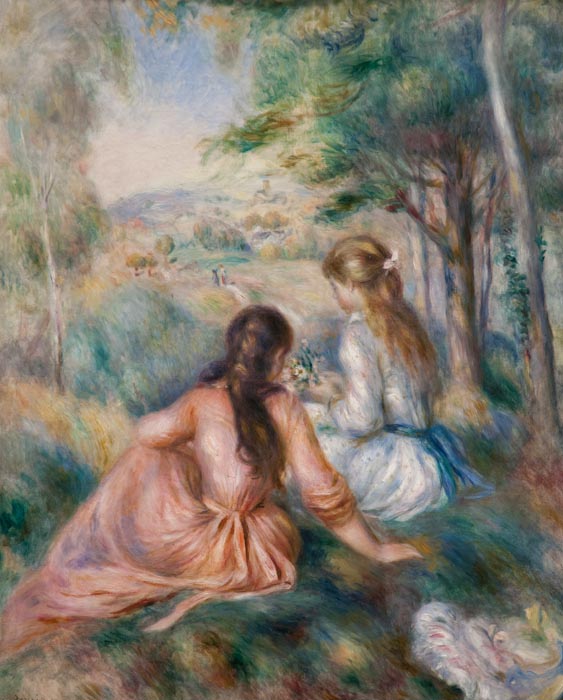
The day I visited the gallery, it was fortunately very quiet allowing me plenty of time to relax and take in all the wonderful art works, especially the Renoir’s which are my favorite. They also have a very nice restaurant in which to indulge yourself half way through your browsing.
Here are a few of the paintings taken with my Panasonic GH-1 Micro Four Thirds camera and Leica-D 25mm f/1.4 lens.
Two girls by Renoir c1892:

Large bather by Renoir 1905:

This one is probably the best large painting in the gallery and takes pride of place – Renoir’s Large Bathers (1884-7):


And one of the many Monet’s:

Salvador Dali’s 1936 comment of the Spanish Civil War’s destruction of his country:

Georgio de Chirico’s The Poet and his Muse from c1925:

Statue of Diana in the main hall by Augustus Saint-Gaudens 1892-4:

And the steps outside the gallery:

and Philadelphia CBD:

next post – New York farewell.
New York’s MOMA art gallery placed not far from Times Square contains mainly 20th century art, and is well worth a visit.
Here are a few taken with my Panasonic GH-1 Micro Four Thirds camera with Leica-D 25mm f/1.4 lens:
Picasso’s Three Women At The Spring from 1921:

The Starry Night by Van Gogh in 1889:

The Storm by Edvard Munch (1893):

Girl in a mirror by Hirschfield in 1940:

Sculpture in the outdoor garden:

Metropolitain sign outside the museum:

See more of my pics from MOMA here.
It would be very easy to miss catching a subway train to Brighton Beach and seeing little Russia by the Sea, on a beautiful warm June day when it is just delightful to walk along the Brighton Beach boardwalk down to the Coney Island amusement park and the pier.
The following were taken with Panasonic GH-1 Micro Four Thirds camera:
Brighton beach boardwalk:

Coney Island amusement park from the jetty:

Taking in the sun outside the aquarium:

Russia on the beach – on your walk back, have lunch at Tatiana’s restaurant on the boardwalk – very reasonably priced and nice food too!

A perfect way to spend the afternoon is catch a couple of trains to get you to Brooklyn Museum station and you can spend a relaxing afternoon at Brooklyn’s art gallery which has a very nice collection of ancient Egyptian artefacts as well as American paintings.
Here are a few:
Out of doors study by John Sargent, 1889:

Nude with apple by William Glacken, 1910:

Posing/passing by Kehinde Whey, 2003:

more from Brooklyn Museum of Art here.
next post – MOMA art gallery.
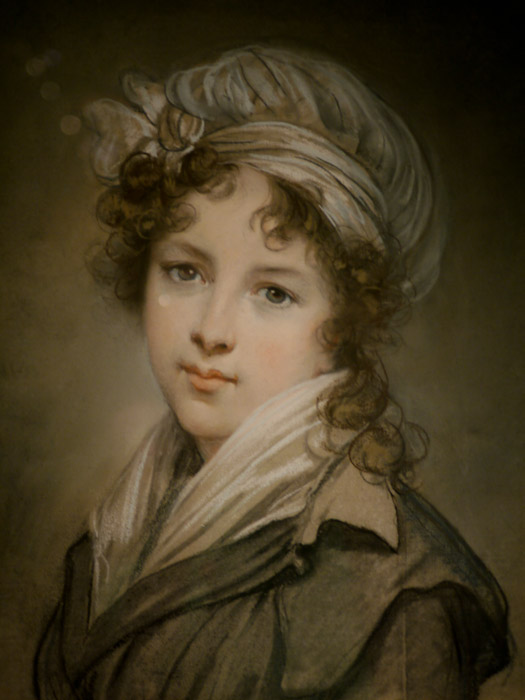
More from New York’s awesome Met art gallery taken with my Panasonic GH-1 Micro Four Thirds camera with Leica-D 25mm f/1.4 lens:
Perhaps my favorite painter of all is Renoir – it seems someone forgot to tell him blue and green should never be seen together!
Let’s look at a few beautiful paintings of his found at the Met:


There is much, much more to see at the Met, here are some of my favorites
Next, on to part VI of my New York photo blog.
One of THE MUST SEE things in New York is the absolutely amazing Metropolitan Museum of Art (the Met) on Central Park.
This art gallery is New York’s answer to the Louvre and you need to allocate at least 6 hours to wandering around the massive amount of quality art works.
When visiting New York’s Met or MOMA art galleries you must check your back-pack into the cloak room BUT you must take all valuables including cameras and lenses with you – hint – only take 1 camera and one lens – a wide aperture f/1.4 or f/2.0 lens – leave the rest in your hotel safe.
Let’s take a little tour of a few taken with my trusty, quiet, Panasonic GH-1 Micro Four Thirds camera with Four Thirds Leica-D 25mm f/1.4 lens and NO FLASH:
Nydia, the blind flower girl of Pompeii by Randolph Rogers in 1859 (marble, sepia toned in Lightroom):

Magnolias and Irises a lead light window by Louis Comfort Tiffany in 1908:

Winter by Houdon, 1787:

Self-portrait by Rembrandt in 1660:

The absolutely delightful self-portrait in pastel by Elisabeth Le Brun in 1789 (apologies for the glass reflections):
And in stark contrast, this brilliant portrait of his uncle by Cezanne in 1866:

Cezanne showing off his versatility with this painting of a house with cracked walls in 1892-4:

Corot’s 1871-4 painting of a woman gathering faggots:

And from a time when women were appreciated even if they didn’t have a 6 pack or look malnourished and poor – Degas and one of the bathing women series from 1885-6 – women as nature meant them to be:

Likewise, Ingres painted a new version of his famous Odalisque in 1824 showing a woman and her beautiful form even though her body may not sell many bikini’s in Time Square advertisements today:

Even Pissarro in 1895, was comfortable showing a woman is beautiful even if she does have a pot – we have much to learn in our society of accepting people for who they are instead of placing ridiculous pressures upon them to conform to some unobtainable ideal, to the extent they spend all their life in a gym, or all their money at the plastic surgeons – art has much to teach us:

This is further reinforced by Henri de Toulouse-Lautrec’s, 1897 curvaceous Woman at the Mirror:

and now for some modern art:

don’t be fooled, the above painting is by the legendery El Greco, painted in 1608-14!
next post – more from the Met.
As with all my New York photos from this trip, these were taken with the lovely, compact Panasonic GH-1 Micro Four Thirds camera – a great travel camera (although the 3rd generation cameras are even better – the GH-2, G3 and Olympus E-PL3), and I didn’t miss not having my big Canon 1D Mark III dSLR once!
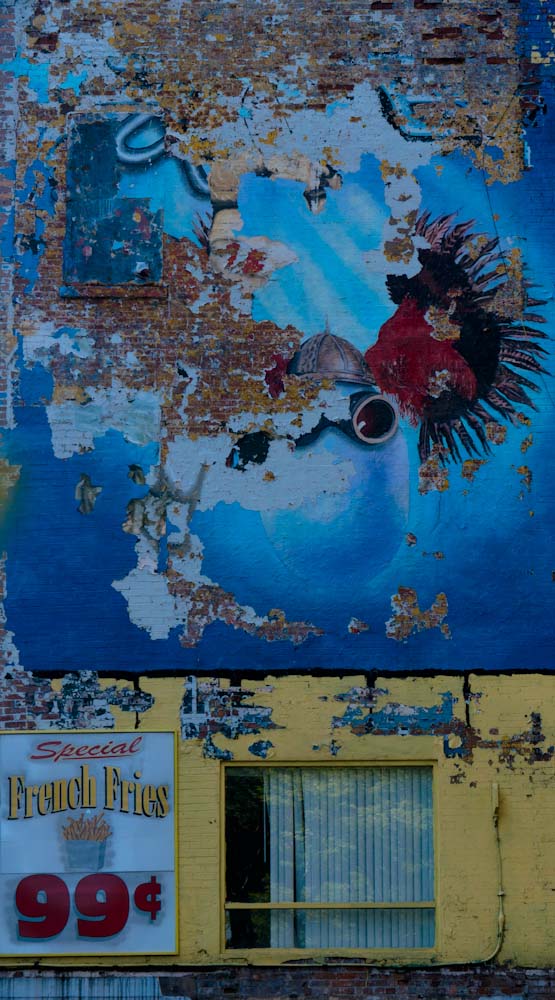
Peeling paint:
Prince at Madame Tussaud’s using the 25mm f/1.4 lens and available light:

Chicago at night with 25mm f/1.4 lens hand held:

Brooklyn Bridge:

Central Park:

Chrysler building:

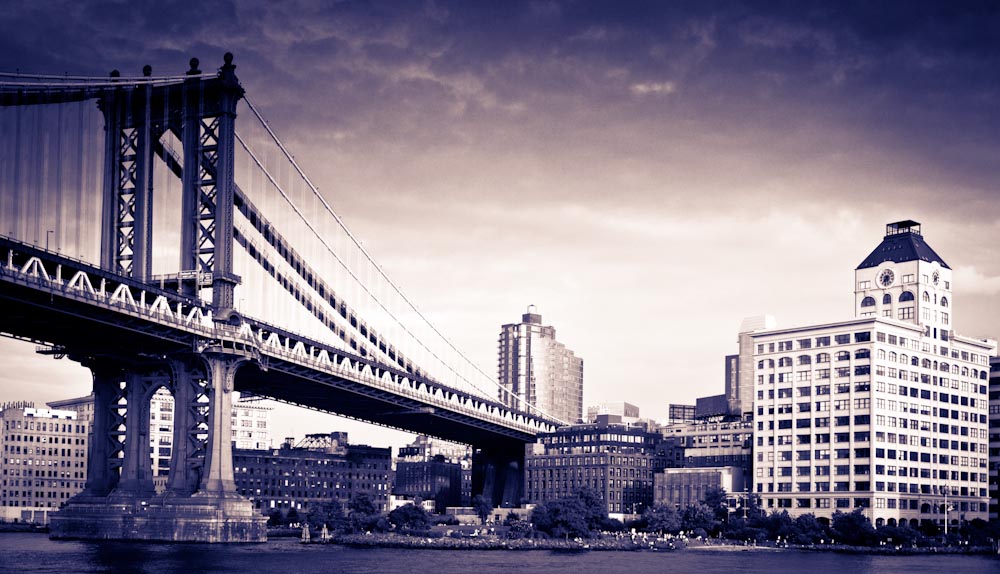
Manhattan Bridge:
Pier 17:

Greenwich Village:

Empire State and Chrysler Buildings at dusk hand held with Rokinon 85mm f/1.4 lens:

New York, like most great cities, just demands to be walked and walked to explore it, but beware of New York, even walking 8 hours a day, keeping up your fluid intake in the warm humidity of June, there is the not so hidden danger – food, specifically, very high calorie count food which will never be walked off no matter how hard you try – so choose your food wisely!
If you really must go pizza, choose a thin crust pizza – if you are near Times Square and don’t mind an often noisy ambience, the very efficient service at John’s Pizzeria between 7th and 8th Avenue in 44th street (I think), is not a bad spot when in doubt – just don’t eat a whole pizza by yourself!
If you are near Times Square and can afford to indulge yourself, then Shula’s Steak Restaurant at Westin Hotel on the corner of 8th Avenue and 43rd Street produce a high quality petite steak in a 3 course pre-theatre dinner special between 5-7pm for about $50 plus wine and gratuity. The ambience is very quiet and subdued, just what you need to escape from the crowds.
If you want a better quality restaurant experience than is generally offered in the busy tourist zones of the theatre district near Times Square or Little Italy, head down to Greenwich Village or Tribeca.
Let’s get back to walking the city.

The multitude of billboards juxtaposed with abstract buildings make for interesting imagery.

And not so abstract.

The vehicles also often carry interesting signs, and invariably, the trucks such as this one, and the old styled school buses appear built like tanks. Seems fuel economy has not entered the American psyche given their pump prices are about a quarter that of the rest of the developed world.

And don’t forget the people, after all, apart from the massive buildings, Broadway and the Met, what else would really make NY interesting to visit?
Now, I’m not sure if these ladies saw me taking this image and realising I would be publishing it on the web but it was good of them to try to straighten their hair for the shot.
As for the guy on the bike, did I mention NY in June was very warm and humid, even hotter in the sun? I don’t blame him for cycling without his shirt in the middle of the city. What I couldn’t cope with his having to wear a suit in that climate!

Yes, I’m afraid ladies, not all have a 6 pack like this one:

But you can find real ones, even if they are still a boy at heart and insists on showing off his body by skating:

All of the above photos were taken with the Panasonic GH-1 Micro Four Thirds camera with Lumix 14-140mm kit lens.
Go to next post on New York for more pics.
| M | T | W | T | F | S | S |
|---|---|---|---|---|---|---|
| 1 | 2 | 3 | 4 | 5 | ||
| 6 | 7 | 8 | 9 | 10 | 11 | 12 |
| 13 | 14 | 15 | 16 | 17 | 18 | 19 |
| 20 | 21 | 22 | 23 | 24 | 25 | 26 |
| 27 | 28 | 29 | 30 | |||


