A photographer’s guide to exploring central Australia Part II – Alice Springs

Written by Gary on August 5th, 2015

Following on from my introduction to the Red Centre which covered why go, getting there, accommodation and car hire issues, for many the first major stop in central Australia will be the remote semi-arid township of Alice springs which is half way between Darwin and Adelaide – 1,500km from each.

The airport is some 20km from the town and taxi fare will cost about $35 into town although some car rental companies may offer personal pick up, and in addition there are regular shuttle bus services which will cost about $17 per person.

The Ghan train between Adelaide and Darwin does stop in Alice Springs and this may be an attractive alternative to getting there.

Most of the main accommodation resorts are on the east side of the dry Todd River in the “golf course precinct” and are about 2km from the shopping centre which is on the west side of the river and towards Anzac Hill in the north.

Once in Alice, cycling and walking are common modalities if you can’t catch the shuttle buses and you don’t have a car.

The Alice Springs shopping centre has most items you would need including a camera shop but is certainly not a shopping destination – although given a population of 28,000 one would not expect it to be.

There are very few historic buildings in Alice but it is worth checking out The Residency which was the Governor’s house, and you may wish to cycle or drive to the Alice Springs Telegraph Station a few kilometres north of the town.

Things to do in Alice Springs

Relax and explore the many native flora in the Olive Pink Botanical Gardens and climb the hill for nice views across the town to Anzac Hill and to Mt Gillem.

view from Botanical gardens hill towards Anzac Hill

The view of main township from Botanical gardens hill over the dry Todd River bed and towards Anzac Hill.

Relax by the pool in the lovely winter sun at your resort.

Walk through town and check out indigenous art works and learn about their culture.

Learn about the wonderful Royal Flying Doctor Service.

Climb Mt Gillen (see below).

Explore the old road trains and Ghan train at the National Road Transport Hall of Fame

See the desert wildlife at the Desert Park.

Cycle to Simpson’s Gap.

Day trips to the East or West Macdonnell Ranges and explore their gorges.

Day trip to historic Hermannsburg (a 19th century Lutheran missionary community) and Palm Valley (if you have a high clearance 4WD and you can take it on the very rough roads).

Day trip on unsealed roads to Chamber’s Pillar.

Climbing Mt Gillen

Mt Gillen is the tallest peak near Alice Springs and climbing it is like a rite of passage for those staying in Alice Springs.

It is named after ethnologist, Francis James Gillen.

It is a challenging walk which rises over 360m from the start of the walk at the John Flynn Memorial on Larapinta Drive some 7km from town, on often steep, slippery gravel paths requiring reasonable fitness and coordination skills along with stable knees and ankles. It is a very exposed walk and you will need sunscreen, sunglasses, water, a hat which will not get blown off your head, sturdy shoes, phone, and preferably at least one companion in case you do suffer an injury.

The last phase involves a near vertical rock climb of some 5-6m which is not for the faint hearted but provides a rewarding walk along the top to the beacon which provides glorious views over the ranges and of Alice Springs.

These views are best at sunrise or sunset when it is also much cooler (you will need a warm jacket and gloves if going at sunrise), and you should be carrying a headlamp to help to see your way along the path in the dark.


Mt Gillen climb

Perhaps 2/3rds of the way up Mt Gillem showing the top cliffs which need to be negotiated.


Mt Gillen climb

The wonderful view across to the West Macdonnell Ranges and Mt Sonder in the far distance.


Mt Gillen climb

After the relief of surviving the cliff climb, you look back to this view westwards.


Mt Gillen climb

A short walk from there across the top to the beacon gives a view to the north-east overlooking Alice Springs.

All images taken with Olympus OM-D E-M5 with Olympus mZD 12-40mm f/2.8 lens and circular polarising filter and essentially are straight from the camera other than resizing for web.

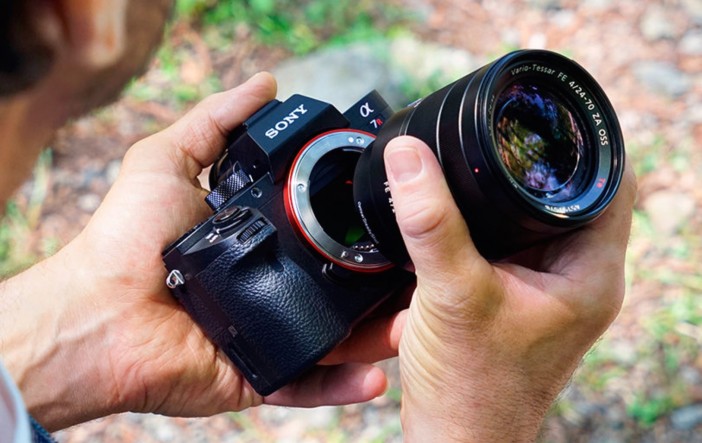
This very strenuous walk is NOT great for large, heavy dSLRs, especially if one is silly enough to carry a tripod as well – although I am sure you would get some nice pre-sunrise shots for your hike up the mountain in darkness – if you survive.

Towards an understanding of the plight of Australian indigenous peoples

Let me first state, that their issues are complex and I have only had a very brief introduction to them, and what I present here is my perception from what I have been told in a few days in Alice.

Firstly, they arrived in Australia some 40,000 years ago and developed a strong connection with the land and its sustainable management – that was until the British arrived in 1770 and subsequently colonised the continent, bringing diseases and substantial culture change to these people, and worse, bringing their arrogance of how they should live and often with very few of the rights and expectations that the whites had available to them.

It would seem the indigenous peoples in Alice Springs, of which there are some 4,800, do not wish to be assimilated into white culture, and wish to retain their own cultures and cultural identities. This has been extremely difficult psychologically with their loss of identity and respect in the white world – after all, by aboriginal laws, their indigenous destiny, society roles and responsibilities had been decided well before they were born, but these are rarely respected by the white people. This is part of the reason for the high alcohol abuse and resultant domestic violence, crime rates and imprisonment that is currently endemic.

This is further compounded by poverty (75% are in the lowest socioeconomic quintile compared with 10% of non-indigenous people) and poor access to well constructed housing, heating, food and water in a harsh environment with very cold winter nights and very hot summer days, the combination of which leads to very high endemic rates of disease rarely found in white people of Australia such as:

  • blindness due to trachoma which is partly due to inadequate washing of faces due to inadequate access to water, poor access to topical antibiotics and ophthalmology specialists
  • chronic childhood suppurative lung conditions which lead onto bronchiectasis (150/100,000 in children older 15yrs which is highest rate in the world and 40x rate of non-indigenous), which may be partly due to high rates of HTLV-1 infections as well as lack of access to nutrition, heating, running water and antibiotics
  • rheumatic heart disease affects 2-3% of adolescents and adults and treatment involves more than weekly penicillin injections for 10 years!
  • alcohol is responsible for half of fatal road trauma and over half of suicides, and complicates 40% of ICU admissions (4x that of non-indigenous ICU admits), recent public policy changes to restrict access to alcohol has also markedly reduced bleeding from stomach and pneumonia
  • increased mental health issues – aboriginals in remote communities have over 3x rate of mental health issues and completed suicide is 2x (female) and 5x (male) higher, this is compounded by substance abuse (historically both alcohol and petrol sniffing), and higher levels of organic brain injury
  • obesity due to reduced exercise, access to cheap high calorie foods, limited access to cheap quality food, intrauterine malnourishment, and structural issues.
  • diabetes (18% of those aged 45-54yrs and 35% of those aged over 55yrs – 3x the rate of non-indigenous people but 18x the rate when looking at 20-45yr olds!) and its many complications (19x the rate of end organ damage) including chronic renal failure (25% by age 45-54 and 35% in ages 55-64yrs – 4x rate of non-indigenous) with high rates of younger adults requiring renal dialysis. 50% of these diabetics have HbA1c levels > 10%!
  • sexually transmitted diseases such as syphilis
  • they do have differences in DNA, for instance, >10% have HLA-B*56:02 (rare in whites) which causes severe drug reactions (DRESS) when given the anti-epileptic drug phenytoin, and their genes are optimised for low caloric, high protein desert existence and curiously, may have lower mortality from severe sepsis than non-indigenous people.

Aboriginal presentations to the newly developed Alice Springs emergency department account for around 50% of all adult presentations and around 70% of all adult hospital admissions despite the aboriginal population being only 17% in Alice (although catchment area is 45,000 people and a third are aboriginal), while life expectancy is some 15 years shorter than non-indigenous peoples in the region at 63yrs for males and 69 years for females. Age adjusted death rates are 3.5x higher and hospitalisation rates are 6.5x higher than non-indigenous people. 70% of deaths occur before age 65yrs compared with 21% of deaths for non-indigenous people. The hospital has high re-admission rates of 28% within 30 days and high own discharge rates. Many indigenous people do not trust the white hospital system, and furthermore, many wish to die on their land rather than in hospital.

Infant mortality though has dramatically improved over the past 15 years falling from 14 per 1,000 live births in 2000 to about 5-6 per 1,000 live births which is almost the same as non-indigenous rates of around 3-4 per 1,000 live births.

The challenge is to find effective and culturally-appropriate models of care to reduce this disease burden which is compounded by the remoteness and poverty of many of these communities.

Road trauma issues in central Australia

The Northern Territory has the highest per capita rates of fatal road trauma in Australia (over half are due to single vehicle rollover accidents, and most are tourists aged 20-40yrs) which is due to a number of factors:
  • remote distances from medical care and longer times for discovery of accident increase death rates with average time to hospital from accident being 8hrs!
  • unfenced roads means more wandering wildlife including dingoes, kangaroos, camels, cows and horses – these are a particular issue at night and swerving to avoid animals is a major cause of  roll-over
  • narrow road shoulders, high rates of SUV/4WD vehicles with high centres of gravity, and unsealed roads means more likely to lose control of the car and subsequent roll-over at speed
  • high tourist population not used to driving on road conditions, often in a strange rental car and on opposite side of road to what they are used to, and potentially distracted by sights, multi-tasking and passengers.
  • high speed with minimal capacity for speed enforcement in the remote areas
  • high alcohol use
  • long distances resulting in driver fatigue, inattention and tiredness
  • tyre blowout is a significant cause of rollover accidents but much less than driver fatigue, speed and swerving to avoid animals


tire blowout

A blown out tyre on the remote Mereneenie Loop unsealed road between Hermannsburg and Kings Canyon.

Next post will be exploring the West Macdonnell Ranges.


A photographer’s guide to exploring central Australia – the Red Centre, Alice Springs, MacDonnell Ranges, Uluru and the Olgas – part I

Written by Gary on August 4th, 2015

I have just returned from just over a week’s brief explore of the red centre of Australia, and of course, I thought I had best share my experiences and tips, because you know you really want to go there!

Uluru

The last blue moon for 3 years and I managed to capture this one near Uluru, although from 30km west of Uluru, the moon was still too far south from Uluru to allow a telephoto lens to make it look larger and still capture it in the same image as Uluru. One is not allowed to just stop your car anywhere in the park so planning these shots are quite limited to certain locations. Olympus OM-D E-M5 hand held with Olympus mZD 12-40mm lens at f/5, 1/160th sec, ISO 200, 40mm focal length and Vivid picture tone.

Why go?

I must admit I was a Uluru sceptic who thought it was over-hyped and just a big rock, but walking around it is an awe inspiring feeling with a myriad of opportunities of different photographic imagery all varying with time of day and season.

Not only is it the largest monolith in the world and like an iceberg, we are only seeing the tip of it, it was formed millions of years ago by alluvium flowing from mountains to the south, and then gradually has eroded and in the past few thousand years has become a sacred site for the indigenous peoples who ascribe meaning to the many shapes created on its walls by erosion.

The region is just an awesome experience for anyone let alone the myriad of photographic landscape opportunities for the enthusiast photographer which include:

  • West Macdonnell Ranges near Alice Springs and its many rugged gorges, bushwalks (including the famous 200km Larapinta Trail)  and white ghost gum eucalypt trees
  • East Macdonnell Ranges near Alice Springs and its rugged gorges and Artlunga ghost gold mining town
  • learn about indigenous cultures at Alice Springs and view/purchase their art
  • Alice Springs Telegraph Station
  • Alice Springs Desert Park – allows you to see some wildlife that you are likely to miss out seeing on your trip
  • Alice Springs Royal Flying Doctor service
  • historic 19th century remote Hermannsburg German Lutheran missionary for indigenous peoples and nearby home of famous indigenous painter, Albert Namatjira
  • Palm Valley – this requires a high clearance 4WD as it is very rough driving along the creek bed and will take over 3hrs return from Hermannsburg
  • drive along the Mereneenie Loop Road to Kings Canyon from Hermannsburg and check out a very large comet impact site – Gosse’s Bluff
  • Watarraka National Park (Kings Canyon) and bushwalks to the rim of the canyon as well as to the valley
  • Rainbow Valley Conservation Reserve
  • Henbury meteorite craters – asteroid impact sites via the unsealed Ernest Giles Rd which is another alternate route to Kings Canyon from Alice Springs
  • dry salt lake beds at Stuart Wells (on private land – a million hectare cattle property)
  • Chambers Pillar
  • Uluru (Ayers Rock) – the largest monolith in the world and the spiritual centre of Australia – a must see for everyone – well worth the easy 11km 3.5hr walk around it as long as weather is mild
  • Kata Tjuta (The Olgas) – even taller than Uluru, but very different being a many domed landscape of conglomerate rock making a striking scene at any time of day – has 2 main bush walks through the valleys

But first, let me introduce the region and try to convey its remoteness and climate – both of which are extremely important in your planning.

How do you get there?

It is in the centre of Australia in semi-arid to arid desert environs and over a 1,500 kilometres to the nearest state capital city – both Darwin and Adelaide are 1,500km from Alice Springs, while Melbourne is 2,260km, Perth 2,500km and Sydney 2,800km away.

To the novice, one may think that Uluru (formerly known as Ayers Rock) is just a day trip from Alice Springs – of course you would be wrong, it is over 460km but thankfully it is all bitumen now but Google estimates it should take you 6 hours by car (under 1hr by air), and that is not including another day or two diversion to the wonderful King’s Canyon.

One can thus drive from Darwin or Adelaide – preferably with a high clearance AWD or 4WD vehicle so you can better navigate the many side gravel roads to gorges, etc, or you can fly to either Alice Springs or direct to Ayers Rock airport – although direct flights to either airport from Melbourne only occur once a day – Sydney is more fortunate in this regard as there are more flight options.

Note that there are no commercial flights to Kings Canyon which is about 5hrs and over 470km from Alice by car or tour bus – the shorter distance “scenic” route on the 200km of corrugated unsealed dry weather only Mereneenie Loop Road requires a 4WD and also a permit fee and still takes over 5hrs and will test your car out!

Once in Alice or Uluru you can either use tour buses or hire a car (book early to avoid disappointment and avoid picking up the car at airports as these is more expensive) – note that there is an entry fee into Uluru-Kata Tjuta park – currently $25 per person which covers 3 days, and the park closes at 7.30pm in winter.

HOWEVER, be warned that in renting a car, even a 4WD, you will NOT be covered for any damage at night away from the township (risk of hitting wandering animals such as kangaroos, cows, or even camels, is too high for the insurance companies), and furthermore, most ban driving on unsealed roads (although you can usually drive to the tourist sites). A good option is renting from the only local company, Central Car Rentals which generally will pick you up from the airport in Alice for free and do permit more gravel road driving but still no night driving.

The ban on night rural driving means one needs to be creative in how they get to see sunrise or sunset away from their accommodation – consider camping as an option but this will not address sunsets at Kata Tjuta where you cannot camp overnight.

When should you go?

The peak season is the Australian winter as the days are not too hot for bushwalking (maximums range from 15 to 28deg depending on where the air flow is coming from the tropical north or the cold south) and the night sky shows off the wonderful southern Milky Way in all its glory (as long as the moon is not in the sky).

The climate is quite different from any of the Australian capital cities which are all coastal. The generally clear night skies mean nights can be cold, especially in winter when the overnight minimum can drop well below zero deg Celsius although usually is around 4degC (and up to 10deg on cloudy nights in winter) – but it will mean you MUST take some warm clothing if planning any night activities – gloves, beanie, scarf, warm jacket, boots and even thermals should be considered in winter.

The climate is much drier than humid Darwin, and this means very few mosquitoes, but bush flies can still be annoying when temperatures rise above 16-20degC and there is little wind.

Walking in winter generally just needs sturdy bush walk shoes, shorts or trousers, shirt, hat, sunglasses, sunscreen, water, lip balm, perhaps a fly mesh for face on hotter days, and warmer jacket and perhaps gloves for early morning walks.

Annual rainfall averages only 200mm or so (this is semi-arid so don’t expect expanses of endless sand dunes without vegetation – this can be found further east in the Simpson Desert) but can range from only 70mm to flood conditions every 12-15yrs or so at 900mm per year (most falling in the one month). The driest months are August and September while the wettest are Dec to Feb generally resulting from rains coming from the tropical storms to the north.

The many river beds are generally dry and only have running water after heavy rains – hence the famous Henley on the Todd canoe race in Alice springs in August each year is run on a dry river bed.

Although the days are much shorter in winter, the clearer skies in Winter means that average hours of sunshine is approximately the same each month.

From Oct-Mar, the average afternoon temperatures exceeds 30degC and thus any bushwalks should ideally be completed by 11am, especially in Dec-Feb when average 3pm temperatures are over 34degC. Many walks will be closed when temperatures exceed 36degC.

Winds are generally around 15kph in afternoons, but can be strong before storms and may occasionally create sand storms.

If you wish to photograph the Milky Way, make sure the moon will not be in the sky – ie. choose 3rd quarter to 1st quarter phases – if 1st quarter, you will need to wait for the moon to set around midnight.

If you wish to photograph the full moon rising near Uluru and photographed from Kata Tjuta sunset dune viewing platform, this will appear closest to Uluru at the equinoxes such as in March-April or Sept-Oct.

Where to stay?

There are a multitude of options in Alice Springs which is by far the most affordable location in central Australia – examples include:

  • Lasseter’s Resort – nice clean rooms, most with two queen beds and en suite, new gym, day spa, and a lovely heated pool and outdoor spa which is fantastic in the winter sun, a number of eating options, but rooms may get booked out if conferences are on; free shuttle buses to town (stops at Aurora Hotel) every 2hrs from 10am-4pm
  • Hilton’s Double Tree Hotel – perhaps the best restaurant in town and it’s a short walk from Lasseter’s – Hanuman’s Thai/Indian inspired menu
  • Chifley Hotel – nice seafood restaurant – Barra on Todd
  • in the shopping district – Aurora Hotel and many others including youth hostels, etc.

West Macdonnell Ranges:

  • Glen Helen Resort – note this is out of phone reception but they have a great restaurant meal, tavern-like feel, camping options and affordable WiFi
  • camping at various locations

Kings Canyon:

Yulara (the tourist township near Uluru and Kata Tjuta):

  • all are generally quite expensive and much more so if you choose the luxury accommodation at Longitude 131 ($2,400 per night for a luxury tent with views of Uluru)
  • Ayers Rock Resort offers a variety of accommodation including camping

What photography gear do you need to take?

Many of the walks are either long walks in the warm sun and/or strenuous uphill and downhill walks with often unstable, rocky paths and as you need to carry water and often extra clothing, one does not need to be further encumbered by heavy camera gear or tripods.

Furthermore airlines such as Jetstar tend to be more particular about both checked-in and carry on baggage weight and size – carry on baggage weight combined must not exceed 7kg.

Most photographs will probably be taken in the 24-80mm focal length range in 35mm full frame terms however, having a telephoto zoom allows one to get more options such as the smaller ghost gums growing off distant red cliffs, and abstract light/shadows on Uluru.

To reduce weight and size, my preference was the Olympus OM-D E-M5 and E-M1 Micro Four Thirds cameras with Olympus mZD 12-40mm f/2.8 lens and Olympus mZD 40-150mm f/2.8 lens (although I don’t have this lens and thus had to take the heavier and larger Olympus ZD 50-200mm f/2.8-3.5 SWD lens) – both with circular polarising filters to enhance the colour saturation and blue skies, and a spare battery and charger.

I mount both of these on a waist belt to take the weight off my neck and back – but despite my care and attention, the EVF of the E-M1 suffered damage from sunlight on the 4hr walk around Uluru – this is a well documented problem with the E-M1 and E-M10 (my E-M5 with an older style EVF did not suffer this damage and has not been documented as having this issue) – so be warned, one needs to take extra care to stop sunlight entering the EVF – or perhaps better still, buy 2 E-M5’s instead of the E-M1.

There are very few areas of flowing water and thus long exposure shots are generally not needed during the day so a ND400 10x filter is not likely to be needed unless there is rain forecast.

For those wanting sunset shots or Milky Way shots, a tripod will be needed, and perhaps ND gradient filters for sunset shots, and a tripod will be needed for shots where 36mp or more will be used.

Those with special needs may need extra lenses such as ultra-wide, fisheye or macro lenses.

Next posts will be details on each site

 More information on my wiki.


More exciting Micro Four Thirds gear from Panasonic – GX8 camera, 200-800mm eq. pro lens, post-focus technology and more

Written by Gary on July 18th, 2015

Micro Four Thirds is going from strength to strength as the two main companies, Olympus and Panasonic take it in turns to announce great new gear and technologies.

This week it was Panasonic’s turn.

The Panasonic Lumix GX-8 camera

camera

image courtesy of http://www.imaging-resource.com

This is a significant upgrade to the GX-7 model and includes many of the features of the new Panasonic G7 including its 4K video features, its Starlight AF mode, Clear Retouch, and its new button which enables the user to toggle functionality of the camera controls in a similar way to the Olympus 2×2 switch.

I am liking very much that Panasonic has finally started adding sensor based image stabilisation (IBIS) to some of their cameras such as is the case with this one and the GX-7 before it. Furthermore, Panasonic is taking it further by allowing it to be used in tandem with their optical IS mechanisms in many of their lenses for even better performance, hence “Dual IS” which is similar to Sony’s approach in their A7R II. Note that and the dual IS is not available in 4K video recording.

Another nice feature is that the GX-8 is now weathersealed and although it is somewhat larger than the GX-7 it does sport a better articulating EVF with higher resolution (2.36m dots) and magnification (1.54x magnification or 0.77x in full frame terms), while the rear screen is now an articulating OLED instead of a tiltable LCD which makes the Touch Pad AF (uise the rear screen to select AF point while viewing through the EVF) and there is an added dedicated exposure compensation dial to further improve ergonomic use.

It is also the 1st Micro Four Thirds camera to boast  a 20mp sensor (up from 16mp), which Panasonic says gives 1/3rd EV more dynamic range and a faster readout, plus it has a few new image processing tricks such as

Unlike the Panasonic GH-4, one cannot use the HDMI out video to simultaneously record uncompressed video as well as record internally,  but you do get a 2.5mm mic jack, and time lapse and intervalometer features, and it uses DFD technology for fast C-AF.

It should also be compatible, via a firmware upgrade, of Panasonic’s new post-focus technology which essentially shoots 4K images at 30fps at a range of different focus points so that the user can later select which focus point they wish. It is meant to be somewhat like the Lyttro camera but we will have to see how useful this function really is.

All in all, it is a camera that ticks most of my boxes – the important ones to me being compact size (but not too small), nice EVF, IBIS, weathersealing, great image quality and fast, accurate AF but at $US1199, I suspect it won’t be exactly cheap for us in Australia.

See my wiki page for more details and links.

The Panasonic Leica DG 100-400mm f/4.0-6.3 Power OIS ASPH zoom lens


lens

image courtesy of 43rumors.com

This lens will be to Leica’s optical standards and thus promises to be a very nice super-telephoto hand-holdable zoom lens giving 200-800mm telephoto reach in 35mm full frame terms.

It will be weathersealed, have Power OIS for effective optical image stabilisation, and fast AF thanks to the 240fps AF signal rate and compatibility with Panasonic’s DFD AF system.

A very exciting lens for the nature photographers which will compete with the forthcoming Olympus mZD 300mm f/4.0 lens for popularity – see my wiki page for more details.

The Panasonic Lumix 25mm f/1.7 lens

This is the third 25mm lens by Panasonic – the 1st was a large, heavy, extremely expensive but optically superb Leica-D 25mm f/1./4 lens for Four Thirds which I really love, and then this was replaced with the much more compact, lighter, more affordable Leica DG 25mm f/1.4 lens.

The new lens however, adds faster AF by offering the 240fps AF signal rate and compatibility with Panasonic’s DFD AF system.

Just a little gripe

One of the main powerful reasons to buy into Micro Four Thirds is that there are multiple companies contributing to the system, each bringing their own ideas and perspectives to design.

I wish they would share their technology more so that minor incompatibilities are eradicated such as Panasonic’s DFD fast C-AF technology only working with Panasonic lenses and the few Panasonic lenses with aperture rings which are only recognised by Panasonic cameras – I do like aperture rings but unfortunately Olympus has decided to ignore them.


A very brief history of camera design – film sizes, mirrors, manual focus aides, and mirrorless

Written by Gary on July 5th, 2015

There are a lot of people taking up photography who are really only aware of the digital age and thus I thought it was opportune to bring them rapidly up to speed on why we have cameras they way we do and thus what the future may hold.

So let’s go back to the 19th century when film based cameras were first being developed – the initial ones are like those seen in Western movies – mounted on a tripod, while the photographer buries himself under a black cloth behind the camera and uses some kind of primitive flash to light the portrait. What was he doing under the black cloth?

These cameras used photographic plates which could be moved out of the back of the camera and replaced with large ground glass screen which would enable him to focus the image – as long as he could make it dark enough to see the faint image. Once the subject was focused, he would remove the glass plate and insert the film plate, and then he could take the shot. Given that the film speed in those days was so “slow” – perhaps ISO 4 or so, and the lenses needed to be used at f/22 or so for the large format film plate, the exposures would be too long without additional light.

Obviously, the above system was not conducive to the take up by consumers – it was a very technical and slow photographic process.

The Kodak Brownie

George Eastman started manufacturing paper film in 1885 then celluloid in 1889 and created his 1st simple camera, The Kodak, in 1888 with a fixed aperture, focus and shutter speed and a single roll of film that the camera needed to be sent back to the factory for processing – not a great option for the masses.

In 1900, Eastman Kodak needed to sell more film so produced the affordable ($1) and quite simple even for children (“you press the button, we do the rest”) revolutionary Kodak Brownie – a simple box which used a roll film of type 117 producing 6cmx6cm square images (what we call “medium format”). It had no viewfinder or focus mechanism, just V sighting lines on the top or an optional add on viewfinder and thus was designed to create the “snapshot”. Only the film roll needed to be sent for processing.

The Brownie series of cameras were popular for children and families into the 1960’s.

6×6 “medium format” film cameras

The Brownie created a large market for 6×6 film and this spurred manufacture of a whole industry of more professional and enthusiast cameras based upon 6×6 film types (including the very popular 120 film).

These camera manufacturers had to solve a few issues though:

  • how can the photographer compose the image?
  • how can the photographer accurately set a focus for the subject?
  • how can the photographer adjust exposure for different light intensities?

Adjusting exposure was a relatively easy technical problem to solve – add an adjustable iris diaphragm in the lens, and an adjustable spring operated shutter within the lens.

Setting focus and composition though was a different matter with various compromise solutions:

  • adding a reflex mirror which directed the view to the top of the camera allowing it to be viewed from above as a waist level finder, and then prior to exposure being made, the large mirror is removed out of the way so the light will hit the film when the shutter opens – this created heavy, big, noisy “SLR” Single Lens Reflex cameras which ideally had the mirror locked up well before the exposure to minimise camera shake and then had to be manually returned to view next image.
  • adding a 2nd synchronised viewing lens which moved in sync with the main lens during focus and usually a fixed mirror for this lens – this created a heavy, big, quiet “TLR” Twin Lens Reflex camera but what you see is not really what you get – there is parallax error for closer subjects which affects composition and requires correction mechanisms, useless for macro work, and you don’t get to see  effects of filters such as polarising filters. Nevertheless, the fact you didn’t need to lock up the mirror made these cameras extremely popular in the 1930’s (thanks to the more compact Rolleiflex in 1928) through to the early 1960’s for tourists and portrait photographers.
  • adding a small fixed viewing lens with a special mechanism to overlay images to show the photographer when the subject is in focus – the quiet, but large and relatively heavy rangefinder camera. This had similar issues to the TLR and in addition only worked with certain focal length lenses to match the rangefinder mechanism.

There was a need for smaller cameras – enter the 35mm “full frame” cameras

The movie industry had been using 70mm wide film for years, and from 1905 onwards various manufacturers were making cameras for 35mm cine roll film which was 70mm cine film cut in half long ways. These cameras started to gain popularity with Leica’s 1st camera in 1925 followed by a Contax in 1932.

But again it was Kodak who leveraged this popularity by creating a much easier to use 135 cartridge film in 1934 and a Kodak Retina I camera to use it with. In the late 1930’s the Japanese manufacturers started to create 135-type cameras. In the 1950’s Asahi Pentax had developed the instant returning reflex mirror which further increased the usability and popularity of the SLR.

Street photography became easier thanks to 35mm rangefinder cameras such as those made by Leica, and later, a multitude of Japanese versions were sold to families in the 1960’s.

Meanwhile professional photojournalists started giving up their large medium format rangefinders for more versatile, compact 35mm SLRs of the 1960’s.

In the 1960’s, Olympus created an even smaller Olympus PEN rangefinder system using half a 35mm frame as the image size – hence called “half frame” cameras.

In 1963, Kodak introduced their 126 instamatic square film cartridges to make loading film even simpler and easy for children to do, spurning a new generation of children taking snapshots.

The 1970’s saw an explosion in the popularity of the 35mm film SLR helped along by Olympus who further re-defined the product by creating their beautiful, compact, quieter OM system with off-the-film TTL flash metering.

Professional wedding and fashion photographers needing to create large prints were generally not comfortable with the large print quality from 35mm film and still used medium format SLRs, while landscape photographers used even larger film cameras such as 6cmx17cm image panoramic cameras.

In the late 1980’s, Canon changed the SLR world, taking an enormous risk in abandoning its popular manual focus FD lens mount system of cameras and lenses, and thereby making them redundant and practically worthless – not great for your fan base, and created a new autofocus SLR system – their EOS system with electronic focus (EF) lenses which were  to dominate the photojournalist, nature and sports professional photographer world for the next two decades while Nikon played catch up and Olympus lost their way, never really creating an autofocus film SLR system.

How did the photographer accurately focus these cameras without autofocus?

Autofocus was not mainstream in cameras until the mid to late 1980’s, yet generations of photographers have always been able to get well focused images, even of fast moving sports – how did they do this?

Part of the reason is that they didn’t have to have accurate focus – the lenses of the day for 35mm cameras were generally sharpest at f/8 hence the adage “f/8 and be there”. If you are shooting at f/8 you do have a reasonable amount of depth of field to play with, so one option is to preset the focus for your subject’s estimated distance – indeed, this is the only way you could do it on most instamatic cameras – set for people or landscapes and depth of field will handle the rest. This technique is called zone focus and users looked at the depth of field scale on their lenses and worked out a good focus to achieve what they wanted.

But what if you wanted to use wider aperture lens with narrow depth of field, you really needed to get more accurate.

Enter the focusing screen.

The focusing screen is the ground glass used on all optical viewing devices including on dSLRs made today.

Before autofocus, most professional SLR cameras allowed one to remove the screen and replace it with another style depending upon your needs and lens being used.

Commonly, these screens used either a central split image (you align the images for focus) or a central microprism (stops shimmering when in focus) as well as the surrounding ground glass for the user to accurately ascertain focus. Unfortunately the split image, microprism and even the ground glass did not work with all lenses, so we had a screen for macro work, another for astro work, etc.

Most modern dSLRs with autofocus now have a fixed screen without split image or microprism aides, and which is optimised for f/2.8 apertures – if you are using a f/1.2 lens, the camera may automatically close the aperture to f/2.5 or so to optimise the view on the screen.

Modern dSLRs are NOT optimised for manual focus although they often do have “AF confirm” – pressing the AF button whilst turning the focus ring in manual focus, the AF confirm light comes on when it detects focus is achieved as determined by the AF mechanism – this requires a CPU chip in the camera lens or lens adapter.

The latest evolution – the mirrorless camera

Now that we are essentially in a digital camera world with cameras having digital sensors instead of film, and electronic viewfinders are now giving very acceptable views and with many possible functions not available to optical viewfinders, there was no longer a need to have a clunky, noisy reflex mirror which added to camera shake.

Enter the mirrorless camera.

The electronic viewfinders continually improve, and now give even larger apparent views than the best optical viewfinders, allow display of far dimmer subjects making it easy to compose on star fields or with extremely dark filters in place such as infrared filters or 10x Big Stopper ND400 filters.

Not only that, they give you real time live histograms, highlight/shadow warnings, compositional grids, real time pre-visualisation of creative picture tonalities or colours, keystoning adjustments or even exposures.

Furthermore, unlike with dSLRs you still can hold the camera to your face for steady camera holding when using Live View such as in video mode, and there is no need to microadjust the AF system for each lens as is the case with dSLRs.

But wait there’s more – you now gain some awesome manual focus aids such as:

  • image stabilised magnified view
  • focus peaking
  • live boost II so you can see really dim subjects such as faint stars

By removing the mirror, the sensor to lens distance can be shortened and thus allow radical new designs of lenses, especially wide angle lenses, and the ability to mount almost any other legacy lens and still attain infinity focus.

And, just as in the days where there was a market for highest quality large heavy cameras and a market for smaller, compact, quieter, versatile take anywhere cameras, these markets are still with us today and thus enthusiasts and professionals can choose from:

  • high resolution, potentially very shallow depth of field full frame image stabilised mirrorless camera such as the newly announced Sony A7R II which has been optimised to autofocus Canon EF lenses
  • compact, light, versatile, high image quality Micro Four Thirds cameras such as the Olympus OM-D family

Why Micro Four Thirds?

  • sensor size is small enough to allow relatively compact, light lenses with excellent edge-to-edge image quality – usually with much sharper edges than full frame lenses
  • sensor size is big enough to allow just the perfect amount of shallow depth of field for your portraiture when using the premium f/1.8 lenses
  • sensor size is big enough to give a good compromise of resolution vs high ISO noise performance – currently 16mp to ISO 3200, although this will further improve as technology improves
  • large range of lenses optimised for sensor size and silent, fast, more accurate autofocus – even AF on the closest eye
  • ability to use almost any lens ever made and have them image stabilised
  • ability to use full frame lenses with focal reducer adapters or tilt-shift adapters
  • optical image quality deteriorates exponentially the further from the centre and thus smaller sensor lens makers will always have the advantage in lens design
  • 99% of users do not print sizes greater than 20″x30″ and Micro Four Thirds can print to this size acceptably well
  • higher resolutions are possible by panoramic stitching or by sensor-shift technologies such as the Olympus 40mp mode which will be further improved to be usable hand held

And this is the dilemma faced by Canon and Nikon who are yet to really invest in mirrorless systems (not including the small 1″ sensor of the Nikon 1 system or the rather pathetic EOS-M system).

PS. Don’t get me wrong, the current Canon and Nikon systems are wonderful, albeit heavy and expensive, and I have well over $20,000 worth of Canon pro gear, and although they probably will still be around in 10-15 years,  I don’t believe that needs to be the way of the future for MOST people, and I far prefer to carry my compact Olympus gear which does not break my back, packs into cabin luggage on airplanes easily,  and is more affordable and fun to use, and it gives me just as good photos, if not better.


The Olympus ZD 50-200mm f/2.8-3.5 SWD lens is not dead yet – a nice hand held sunset

Written by Gary on June 12th, 2015

I am tossing up whether to buy the lovely Olympus mZD 40-150mm f/2.8 Micro Four Thirds lens and leave my old favorite, the Olympus ZD 50-200mm f/2.8-3.5 SWD Four Thirds lens for certain niche uses such as 800mm telephoto reach with the EC-20 teleconverter.

So my past 2 bushwalks have been with ONLY the Four Thirds lens mounted on my Olympus OM-D E-M1, to see if I can do without the faster focusing, more compact Micro Four Thirds lens.

The Four Thirds lens gives me more telephoto reach but in low light or poor contrast, the PDAF of the E-M1 still is a bit slow and for these sunset shots when contrast in the distant trees was low, I decided I was better off resorting to manual focus. Now I am not sure if the Micro Four Thirds lens optimised for CDAF will do better but I suspect it does.

The other lovely aspect of the Micro Four Thirds lens is that the lens does not extend on zooming – this aspect makes the Four Thirds lens look very long and intimidating indeed, particularly with the big lens hood attached. However, it does sit reasonably well on my waist belt – although I certainly wouldn’t want anything much heavier than this on my waist while bushwalking.

Here are a couple of hand held low light dusk sunset shots with the Four Thirds lens:

dusk

Olympus E-M1, Olympus ZD 50-200mm f/2.8-3.5 SWD Four Thirds lens at 112mm f/5, ISO 800, 1/160th sec. I chose f/5 instead of f/3.2 just to give me a bit more background depth of field.

birds

Flock of birds flying home to roost.

Olympus E-M1, Olympus ZD 50-200mm f/2.8-3.5 SWD Four Thirds lens at 182mm f/5, ISO 800, 1/80th sec – yes that’s right 360mm effective focal length hand held at 1/80th sec, not bad – that’s why I use Olympus gear. If I had the Micro Four Thirds lens, I would have had to add in the 1.4x teleconverter to get this telephoto reach.

So, I am still undecided both lenses have their pros and cons – if I didn’t already have the Four Thirds lens, the Micro Four Thirds lens with 1.4x teleconverter would be a no brainer for me – but can I really justify having both?

Olympus mZD 40-150mm f/2.8 Olympus ZD 50-200mm f/2.8-3.5 SWD
Price at Amazon.com $US1399 $US1199 but perhaps half price used on Ebay
focal length range in 35mm terms 80-300mm 100-400mm
1.4x teleconverter 112-420mm f/4 140-560mm f/4-4.9
2x teleconverter N/A 200-800mm f/5.6-7
length 160mm fixed length, collapsible lens hood 157mm but extends on zooming and bulky bayonet lens hood
diameter 79.4mm 81mm
weight 760g (880g w tripod mount) 995g (1070g w tripod mount)
CDAF optimized Yes, silent dual linear voice coil motors, face detection AF No, requires PDAF (eg. E-M1)
close focus 0.7m giving 0.42x macro 1.2m giving 0.42x macro
filter size 72mm 67mm
diaphragm blades 9 circular 9 circular
optical formula 16 elements in 10 groups (1 aspherical ED lens, 2 aspherical lenses, 1 SED lens, 3 ED lenses, 1 HD lens) 16 elements in 15 groups (3 ED lenses)
image sharpness in centre (my testing) At 200mm marginally sharper than the 40-150mm with MC14 at 150mm and comparable apertures. At 150mm marginally sharper than the 40-150mm at 150mm and comparable apertures.
 

The new Sony a7R II – finally a full frame mirrorless that almost does it all – a game changer indeed!

Written by Gary on June 11th, 2015

In my last post I compared the current Sony full frame mirrorless cameras with the Olympus OM-D cameras, and had to conclude that for most people, the Olympus OM-D’s were probably the way to go given that each Sony camera had significant issues, not least the lack of lens selection.

But today, Sony has really upped the ante with their newly announced Sony a7R II NEX E-mount full frame mirrorless camera which hopefully addresses many of my concerns and in addition adds faster AF for Canon lenses plus internal 4K video!

Now that is pretty cool and Canon and Nikon should be worried – very worried indeed!

The specs beat their new Canon 5DS hands down assuming one is not going to quibble over 50mp vs 42mp, and beats the Nikon D810E dSLRs.

Sony now make 40% of all digital sensors and Canon is falling so far behind in the mirrorless and video race, it will take something special from them to pull back the lead.

Nikon use Sony sensors so potentially this sensor will find its way into their dSLRs, but neither Canon or Nikon have added sensor-based image stabilisation and this is a real issue for them, nor can they offer accurate, fast AF on a person’s eye via Eye Detection AF, let alone 4K video functionality as is implemented on this camera.

This may be THE BEST camera for your Canon lenses (although you do need to buy a AF adapter such as a Metabones adapter) – as long as you don’t need super fast AF for sports, etc.

image courtesy of http://www.eoshd.com

Sony a7R II specs:

  • world 1st back illuminated full frame sensor for improved high ISO sensitivity and faster data processing (3.5x faster than the a7R)
  • 42.4 megapixels gapless design with anti-reflection coating
  • ISO range 100-25600 (extended: 50, up to 102,400)
  • Fast Hybrid AF system
  • AF response time improved by 40% over the a7R
  • Eye-AF now allows C-AF tracking of closest eye with specific face preferenc via registration
  • fast, accurate C-AF at 5fps even with fast moving subjects
  • 399 on-sensor phase detect AF sensor points covering 45% of the frame = 67% coverage in each direction (larger than dSLR AF coverage)
  • 25 on-sensor contrast detect AF points
  • 5fps burst rate for 22 frames
  • 500,000 shot rated shutter – by far the best specs in the industry
  • 50% less shutter vibration than in the a7R
  • electronic front curtain shutter to reduce shutter shake
  • shutter speeds 30sec – 1/8000th sec
  • flash sync 1/250th sec
  • metering to -3EV, exposure compensation -5 EV to +5 EV (in 1/3 or 1/2 EV steps)
  • no optical low pass filter for optimal sharpness and clarity (although this may cause some moire in videos – to be tested)
  • 3″ tilting 1,228.8k dot LCD screen (tilting up 107° and down 41°) and uses WhiteMagic technology which doubles the brightness of the display but still not touch sensitive
  • 4K video
    • internal UHD 4K 3840 x 2160p at 30/24 fps in XAVC S format at 100Mbps and 4:2:0 sampling at 8-bit
    • Super 35 without pixel binning or full frame read-out format
    • customisable picture profiles
    • S-Log2 Gamma – “squeezes up to 1300% more dynamic range into the video signal then traditional REC709, for increased post-production flexibility”
    • S-Gamut
    • time code – standard ‘Record Run” mode that only advances the timecode when recording, as well as “Free Run” timecode that advances the timecode even when not recording
    • clean 4:2:2 uncompressed video HDMI output
    • sensor based IS – hopefully now better optimised for video – but will it compete with the Olympus OM-D E-M5 II’s amazing IS in video?
    • 3.5mm microphone input jack
    • compatible with the Sony XLR-K2M XLR Adapter for recording professional balanced XLR audio signals with phantom power and adjustable mic/line inputs
    • 3.5mm headphone jack as well as real time audio levels for a visual reference
  • 1080p video 60fps XAVC S7 codec at 50Mbps
  • 720 120p slo-mo video
  • silent shooting mode
  • 0.78x EVF magnification with 100% view coverage plus 4-lens system with double-sided aspherical elements for comfortable viewing and diopter – 4 to +3 m
  • magnesium alloy body with weathersealing
  • improved ergonomics – larger grip, re-shaped shutter button and moved forward
  • and taking a leaf from Olympus:
    • the same 5-axis image stabilization system found in the Sony a7 II – my dreams are coming true indeed!
    • the ability to assign any of 56 functions to any of the 10 customizable buttons for a more personalized setup
    • the Olympus mode dial locking system
    • Picture Effect modes: Posterization (Color, B&W), Pop Color, Retro Photo, Partial Color (R/G/B/Y), High Contrast Monochrome, Toy Camera, Soft High-Key, Soft Focus, HDR Painting, Rich-Tone Monochrome, Miniature, Watercolor, and Illustration.
    • Creative Style settings: Standard, Vivid, Neutral, Clear, Deep, Light, Portrait, Landscape, Sunset, Night Scene, Autumn Leaves, Black & White, and Sepia (all with +/- 3 step contrast, saturation, and sharpness adjustment).
    • Face Detection is available to base exposure and focus on up to eight recognized faces. Furthermore, Eye AF can be used for even greater precision by maintaining critical focus on a subject’s eye – I do love this feature on my Olympus cameras
    • sensor dust reduction system as is now standard in most ILC’s
  • sweep panorama
  • WiFi and NFC connectivity
  • PlayMemories Camera Apps are supported via the built-in Wi-Fi connection, and allow you to personalize the camera’s features depending on specific shooting styles. Apps are available to suit creating portraits, detailed close-ups, sports, time lapse, motion shot, and other specific types of imagery.
  • battery: NP-FW50 Rechargeable Lithium-ion Battery Pack
  • optional AC-PW20 AC Adapter
  • 5.0 x 3.8 x 2.4″ / 126.9 x 95.7 x 60.3 mm
  • 22.05 oz / 625 g incl. battery, card
  • $US3200
  • availability said to be August 2015

What makes it a better camera for Canon and Nikon lenses than their dSLRs?

  • 4K video
  • sensor based image stabiliser which works on all lenses – much reduced need for a tripod for portraits with the 135mm f/2.0L lens in low light
  • at least as good, if not better image quality – Sony sensors generally have better dynamic range than Canon ones and this sensor should not be an exception
  • far better manual focus functionality thanks to full time Live View with magnification and focus peaking – awesome when using tilt shift lenses – and they become image stabilised
  • more accurate portrait AF with Eye detection AF – although we will have to see if this works on non FE lenses
  • more accurate AF as uses focal plane PDAF sensors
  • no mirror so less camera shake and no need for clunky mirror lock up modes
  • can use the EVF in either stills or video mode and the video hopefully will have excellent sensor based image stabilisation and thereby allow better run and gun video work without need for heavy, expensive stabilisation rigs
  • PDAF covers more of the image frame
  • C-AF tracking still not quite as good as Nikon’s 3D tracking but perhaps better than Canon’s iTR distance priority tracking
  • WiFi control

Compared to Canon 5Ds R

Similar resolution, burst rate, shutter speed range,

Sony a7R II Canon 5Ds R
Price at Amazon.com $US3200 $US3900
ISO range 100-25600 (expandable to 50-102,400) 100-6400 (expandable to 50-12800)
Weight 625g 930g
Size 126.9 x 95.7 x 60.3 mm 152 x 116 x 76 mm
EVF YES NO
LCD screen tilt screen fixed
HD video awesome image stabilisation 50Mbps 1080 50/60/24pp and 100Mbps 4K 30/24p, stereo mic, headphone port 1080HD 30p/24p average implementation and quality, no EVF and thus must use LCD screen; mono mic; no headphone port, no uncompressed HDMI out
sensor based image stabilisation 5-axis 4.5EV IS No
Manual focus support in viewfinder magnified view, focus peaking AF confirm
AF in view finder mode fast, accurate on sensor 399pt PDAF, 25pt CDAF, Eye detection AF fast 61pt PDAF (5 double cross, 41 cross) requires microadjustment for each lens but proven for sports
AF lamp Yes No, need speedlight attached
flash sync 1/250th sec but no PC port? 1/200thsec
Radio TTL flash No Yes
Sweep panorama Yes No
silent electronic shutter Yes No?
shutter rating 500,000 shots 150,000 shots?
battery life 290 shots 700 shots
CF and SD memory card slot No Yes
USB 3.0 No Yes
WiFi and NFC Yes No

What’s missing?

  • LCD screen is not touch sensitive – this is very useful on Micro Four Thirds cameras, and I would miss it
  • radio remote TTL flash
  • lossless RAW files – current 14bit lossy RAW files do show some posterization – firmware update may address this
  • whilst PDAF is more accurate, PDAF capabilities in low light is not as good as on dSLR
  • PDAF initial AF lock not as fast as a dSLR when using very out of focus telephoto lenses
  • timelapse recording? – via PlayMemories App?
  • USB 3.0 (still only 2.0)
  • colour rendition may not be as good as peers – Olympus jpeg engine is renown for its colours
  • none of the nice Olympus long exposure and low light options:
    • timed shutter to 60secs
    • Live BULB
    • Live TIME
    • Live Composite
    • Live Boost I and II for better EVF viewing
  • of course, the dedicated lens selection is currently very limited, but at least now, it promises to give faster AF for Canon lenses
  • not compatible with TTL flash from other systems such as Olympus, Nikon or Canon – perhaps one day they will be universal remote TTL flash capability, but this seems a way off yet

Conclusion:

I still believe that the Olympus OM-D cameras are a better fit for MOST people who just need a high quality, light, compact, versatile weathersealed system.

But for the pros and enthusiasts who don’t mind the extra size, weight and cost (~$US4000 for basic kit)  and are wanting high resolution, image stabilised full frame, or the serious videographers wanting high quality 4K video, then this camera is indeed a game changer given that it has all these capabilities without being absurdly expensive!

It also provides an option as a 2nd system to go along with your everyday Micro Four Thirds system, although an alternative to this role could be the newly announced Leica Q which is a 24mp full frame fixed lens camera with a superb 28mm f/1.7 lens and a very quiet leaf shutter which allows flash sync at 1/500th second – a great combo for street photography as well as shooting groups at weddings outdoors or indoors with flash fill in.

Finally, will it live up to the hype and the specs?

Formal testing and user experiences will be required to answer a few questions such as:

  • how good is the image quality from the sensor?
  • how fast is the AF with Sony FE lenses and with Canon EF lenses?
  • how good is the video quality?
  • how effective is the image stabiliser for video?
  • how good is the ergonomics and handling?
  • are there any gotchas yet to be revealed?

Time will tell if this camera is the gem it appears to be.


Which mirrorless in 2015 – Sony full frame or Olympus OM-D?

Written by Gary on June 8th, 2015

Mirrorless cameras are fast becoming THE camera type of the future thanks to the removal of the mirror which is holding back dSLR cameras from the many benefits of the new EVF world – in particular, the every increasing technological changes which in nearly all aspects have addressed the benefits of an optical viewfinder while adding in so many other benefits.

But which mirrorless camera system to buy?

I am going to discount the Nikon 1 system as the sensor is really too small for enthusiasts wanting a good compromise in size vs image quality vs shallow DOF.

For simplicity, I am also going to discount the APS-C cropped sensor systems (eg. Sony NEX, Fuji, Samsung) as they generally have larger lenses and very few are well designed for the cropped sensor cameras, and really, if you are going to have the larger lenses, you may as well go the whole hog and get a full frame camera. That said, many may find these cameras give them the compromise they need, particularly, the Fuji X system with their very nice lenses such as their 56mm f/1.2 portrait lens.

That leaves us with compact, light, less expensive, Micro Four Thirds 2x crop sensor cameras (Panasonic, Olympus, Kodak and Black Magic cameras) vs the relatively new Sony NEX FX cameras.

Micro Four Thirds vs Sony FX mirrorless:

The main reasons to consider paying all that extra money and carrying heavier, larger cameras and lenses for a full frame system include:

  • more capabilities of achieving even shallower depth of field – perhaps 1-2 stops more shallow
  • ability to use full frame lenses at their native field of view
  • some niche $2000-$3000 lens options only available in full frame as yet, such as 17mm tilt-shift, 14mm f/2.8 ultra-wide capable of taking filters, 24mm f/1.4, 35mm f/1.4, 50mm f/1.2, 85mm f/1.2
  • access to higher resolution sensors to allow even larger prints
  • access to sensors with even better high ISO performance

But these Sony full frame cameras come at a cost:

  • larger and heavier kits
  • more expensive cameras and lenses
  • images are generally less sharp away from the centre
  • very small range of dedicated AF lenses
  • current lenses generally have poor close focus limits and smaller apertures compared to Olympus options
  • shallow depth of field is often your enemy
  • high resolution images will generally require use of a tripod
  • high resolution sensor cameras create much larger RAW file sizes and use up more space on memory cards and your hard drives
  • range of camera options is much narrower
  • less hand holdable telephoto reach
  • equivalent telephoto reach lenses are MUCH bigger, heavier, more expensive and require tripods
  • only one Sony camera has 5 axis in-body image stabilisation and it is not as effective as the Olympus OM-D/PEN implementation
  • none of them can compete with the video image stabilisation of the Olympus OM-D E-M5 II
  • none of them will allow 1/3rd sec sharp hand held wide angle shots such as the Olympus cameras – eg. night time or when using ND400 10x filters in bright sun for blurred water effects
  • none will allow hand held night urban shots with adequate depth of field (compared to the Olympus OM-D’s and lenses such as 12mm f/2.0)
  • none of them have the handy functions of the Olympus cameras such as 60sec timed exposures, Live TIME, Live Composite exposures
  • each of the 3 current Sony FX cameras have gotchas which may prevent one from achieving what is hoped for:
    • ergonomics are not quite there
    • shutters are very noisy
    • the LCD screens are not touch sensitive
    • no timelapse recording
    • the Sony a7R 36mp camera has poor image quality at certain shutter speeds as one cannot use an electronic 1st shutter and thus is subject to shutter shake, no in-body IS, and only has 25 CDAF points and no PDAF, while flash sync is a miserable 1/160th sec while burst rate is a slow 4fps but would make a great landscape camera
    • the Sony a7S 12mp “low light”/”video” camera has RAW compression artefact issues, poor dynamic range, low resolution, no in-body IS, and only has 25 CDAF points and no PDAF, while burst rate is only 5fps but does make a great low light video camera
    • the Sony a7II 24mp camera finally has in-body IS, and PDAF with good dynamic range, but noise at high ISO, and only 5fps but does provide a way of image stabilising those Canon and Nikon prime lenses whilst retaining full frame characteristics although you do lose fast AF.

Let’s compare the Olympus OM-D E-M5 II vs Sony a7II:

These are relatively close in functionality, both offering IBIS, WiFi, weathersealing and similar resolution.

Olympus OM-D E-M5II Sony a7II
Price at Amazon.com $US999 $US1698
Weight 417g 600g
Size 124mm x 85mm x 44.5mm 127 x 96 x 60 mm
EVF eye sensor auto switching issues with eye sensor auto switching
LCD screen articulating touch screen not touch sensitive
HD video awesome image stabilisation 50Mbps 1080 50/60p better video quality but IS not as good
Burst rate 11fps 5fps
Top panel dual dial + 2×2 system Yes No
AF fast 81pt CDAF (need E-M1 for PDAF) 25pt CDAF, 117pt PDAF
Hi-Res mode Yes, 40mp No
Live BULB, Live TIME, Live Composite, 60sec timed, Live Boost EVF Yes No
Sweep panorama Individual shots stitched Yes
Auto hand held HDR Yes No
“14-28mm” pro lens 7-14mm (14-28mm) f/2.8, 534g, 106mm long, 0.2m close focus, no filter, MF clutch, $US1299 16-35mm f/4, 518g, 99mm long, 0.28m close focus, 72mm filter, OSS, no MF clutch, less sharp, distortion and CA worse, $US1348
“24-70mm” pro lens 12-40mm (24-80mm) f/2.8, 382g, 84mm long, 0.2m close focus, 62mm filter, MF clutch, $US740 24-70mm f/4, 426g, 95mm long, 0.4m close focus, 67mm filter, OSS, no MF clutch, very soft away from centre, complex distortion, $US925
“70-200mm” pro lens 40-150mm (80-200mm) f/2.8, 760g, 160mm long, 0.7m close focus, 72mm filter, MF clutch, $US1399, opt. 1.4x converter 70-200mm f/4, 840g, 175mm long, 1-1.5m close focus, 72mm filter, OSS, no MF clutch, no teleconverter, soft corners even stopped down, $US1498
“50mm” standard prime lens 25mm (50mm) f/1.8, 136g, 41mm long, 0.24m close focus, 46mm filter, $US349 (also other options such as Leica-D 25mm f/1.4) 55mm f/1.8, 281g, 64mm long, 0.5m close focus, 49mm filter, excellent optics, shallower DOF, but poor close focus and expensive $US998

Just look at those 3 main zoom lenses, the Olympus zooms offer better edge-to-edge sharpness, less distortions, substantially better close focus, and extra stop of light which partly addresses the shallow DOF and high ISO capabilities of the Sony full frame sensor, whilst being less expensive and offering the lovely manual focus clutch, and for the telephoto, the option of a 1.4x teleconverter.

The Sony zoom lenses being f/4 to allow a more compact, lighter and affordfable solution than the usual f/2.8 full frame lenses does not get you into the comfort zone shallow depth of field full frame f/2.8 zoom lenses and thus would miss the mark for portrait, fashion and wedding photographers who really do need the f/2.8 aperture.

Not only that, but Micro Four Thirds offer over 40 dedicated AF lenses in their system, while Sony only have 6 to date, and none of these are fisheye (let alone f/1.8 fisheye as with the Olympus), only 2 primes, and no macro lens. Micro Four Thirds has some lovely, compact lenses optimised for fast CDAF such as:

  • 8mm f/1.8 fisheye
  • 12mm f/2.0
  • 17mm f/1.8
  • 20mm f/1.7 pancake
  • 25mm f/1.4 or f/1.8
  • 42.5mm f/1.2
  • 45mm f/1.8
  • 60mm f/2.8 1:1 macro
  • 75mm f/1.8 (my favorite)

Olympus will also be bringing out their much anticipated 300mm f/4 super telephoto which will give hand holdable 600/840mm telephoto reach impossible to obtain on the Sony system as it would require a 600mm lens and they are big, heavy and expensive, and NONE are optimised for CDAF and face detection AF as the Olympus will be.

In addition, a 0.72x focal reducer on an Olympus OM-D combined with a Canon EF 135mm f/2.0L lens effectively gives you an image stabilised 200mm f/2.8 lens in full frame field of view and depth  of field characteristics, and it should not be too long before we see these with faster AF.

If you don’t like the video quality of the Olympus cameras, there are always the Panasonic GH-4 4K camera and Black Magic video cameras.

Furthermore, you can carry the Olympus E-M5 camera and a few prime lenses in your jacket pockets!

I think I have just convinced myself not to head down the Sony route even though there is the tantalising prospect of the very shallow depth of field options – I think I can manage this aspect with focal reducer adapters!

HOWEVER, the 36mp Sony a7R may be worth it for landscape photographers wanting to make larger prints and who are willing to carry a tripod for every shot, and avoid those shutter speeds where shutter shake is problematic – so it would be great for waterfalls, blurred water seascapes, etc and much more affordable than a Nikon D810 dSLR or Canon 5DS dSLR.


A different take on the Great Ocean Road

Written by Gary on May 26th, 2015

In my last post I mainly shot waterfalls and rainforests in the west Otways along the Great Ocean Road in Victoria, Australia.

This post takes this further and explores a few coastal seascapes using the weatherproof image stabilised Olympus OM-D  Micro Four Thirds cameras.

Please click on the photos to open a larger size view in my Tumblr account.


Long exposure hand held shot in bright sunlight as a storm approaches bringing a small rain shower behind the coastal rocks:

Details: Olympus OM-D E-M1 with Olympus mZD 12-40mm PRO lens at 12mm, f/5, Hoya ND400 10x neutral density filter, ISO 200, 1/4 sec:

sun showers

Same location, different view as more rain showers approach the coast:

Details: Olympus OM-D E-M1 with Olympus mZD 12-40mm PRO lens at 12mm, f/5, Hoya ND400 10x neutral density filter, ISO 200, 1/4 sec:

stormy coast

From high up on a hill, a lone lady walking the ocean beach at sunset, and hopefully I have captured the remote serenity ambience that she must be enjoying:

Details: Olympus OM-D E-M1 with Olympus ZD 50-200mm f.28-3.5 SWD lens at 200mm, f/4.5, ISO 800, 1/125th sec (not bad hand held for a 400mm equivalent focal length in 35mm full frame terms!):

beach walk

And driving further west along the Great Ocean Road to the Twelve Apostles region at sunset:

Details: Olympus OM-D E-M1 with Olympus ZD 50-200mm f.28-3.5 SWD lens at 50mm, f/8, ISO 200, 1/200th sec:

sunset rainbow at Twelve Apostles

Tourists having trouble working out which way to shoot – into the sun or away from the sun – so let’s cover both shots:

Details: Olympus OM-D E-M1 with Olympus ZD 50-200mm f.28-3.5 SWD lens at 54mm, f/8, ISO 200, 1/640th sec:

tourists


Light, compact, weatherproof camera kit – the Olympus OM-D’s are a blessing for bushwalkers – especially if you fall into a river rock hopping

Written by Gary on May 25th, 2015

OK, submerging your OM-D camera is NOT covered by Olympus for warranty repairs, nor do they recommend getting them really wet even if they have made them the more weatherproof than most dSLRs.

You probably have seen some reviewers “testing” this by sitting the camera in pool of water under a shower, or pouring a bottle of water on them, or running them under a tap without any obvious problems.

The Olympus advertisements themselves show off the OM-D’s with water droplets all over them to show you don’t have to fear the rain (as long as the lens is also weatherproof).

Despite the above, see looking after your Olympus camera in my wiki, and there is a link to an Olympus OM-D instruction manual regarding weathersealing of the E-M1.

Last week I had the pleasure of spending a week down in Victoria’s lovely Otway Ranges on the Great Ocean Road, and of course, bushwalking in the rain was on the menu given it is an extensive rainforest with around 2000mm rainfall per annum.

The Micro Four Third camera system has given me the ability to be more mobile, and access more places in less time thanks to its small size and light weight, plus, with its weatherproofing, I can make both my cameras even more accessible by mounting them onto a quick release plate on a waist belt which means no camera swinging dangerously from my neck hitting rocks I need to hands to negotiate, much reduced weight on my neck and back (I hardly need a back pack now for short walks), and best of all it only takes me seconds to access the camera and securely lock it back onto the belt, allowing me free to use my hiking poles when not taking pics.

Furthermore, the incredible image stabilisation system in the Olympus OM-D cameras means I no longer take tripods to waterfalls, or down the hundreds of steps to the beach, as I can get sharp hand held wide angle shots down to around 1/3rd second on my E-M5 and probably longer on the E-M1.

But even better, if I do need longer exposures, there is a lovely little Trail Pix device from kickstarter which converts my hiking poles (plus a 3rd collapse pole) into a tripod with a small ball mount tripod head – see my wiki page on ultralight bushwalking.

Back to my bushwalk and the dunking of my E-M5

I had both cameras on my belt and was attempting to walk upstream to this lovely little waterfall on Elliot River in the west Otways Ranges, when the slippery rock moved and I ended up half in the river – the E-M5 was submerged for a second or so, my E-M1 was on the other side and didn’t get wet, which was a good thing as I had the 75mm f/1.8 lens on it which is NOT weatherproof!

After drying off the water with a cloth, all was well and I continued my venture upstream, albeit, more cautiously and got a few long exposure hand held shots of the pretty little cascade (E-M5, mZD 12-40mm lens, polariser filter, ISO 100, f/7.1, 1/4 second):

Elliot Falls

Not far from here, someone had kicked over a curious purple and orange/brown mushroom which Google has not helped me identify thus far – so if anyone knows, please message me:

mushroom

A stormy dusk over a wild but serene remote beach (still have sore quads after doing a fast uphill hike to get back to the car before darkness – must remember to bring a torch!):

Details: Olympus E-M5, mZD 12-40mm PRO lens, polarising filter, ISO 100, f/8, hand held 1/5th sec to show motion in the pounding winter waves.

wild serenity

Moments earlier, a little of the sunset peaked through the dense clouds to allow this nice pastel effect:

Details: Olympus E-M5, mZD 12-40mm PRO lens, polarising filter, ISO 100, f/8, hand held 1/5th sec to show motion in the water.

sunset

Back up in the tops of the cool temperate rainforest of the Otways is the lovely Hopetoun Falls – quite accessible to tourists in a hurry as long as they don’t mind a hundred steps down and back up:

Details: Olympus E-M5, mZD 12-40mm PRO lens, polarising filter, ISO 200, f/5, hand held 1/10th sec to show motion in the water.


Hopetoun Falls

And, a visit to the Otways can’t not show the awesome ambience of being in the 300 year old Eucalypt Mountain Ash and Myrtle Beech rainforest with a touch of low cloud amongst the trees after rain:

Details: Olympus E-M5, mZD 12-40mm PRO lens at 40mm, polarising filter, ISO 200, f/5, hand held 1/13th sec.

forest

Finally, resting at a remote mouth of a river on a secluded beach is sheer bliss:

Details: Olympus E-M5, mZD 12-40mm PRO lens at 27mm, polarising filter, ISO 200, f/3.5, hand held 1/40th sec.

river mouth

ps… all the current Olympus OM-D’ cameras are weathersealed EXCEPT for the E-M10.


Which lens to buy for your Olympus OM-D camera?

Written by Gary on May 16th, 2015

This is an extremely hard question to answer given everyone has different photographic needs and styles as well as budgets.

First, the consumer lenses:

Most newbies will tend to end up with one or two of the very good  consumer level “kit” zoom lenses as they are very well priced and affordable, especially when purchased as a kit with a camera.

All camera manufacturers offer such kits to allow the entry level budget compromised photographer an option of getting into the system.

Fortunately for Micro Four Thirds camera users, these consumer kit lenses tend to offer very good performance for the money and historically, the lenses have often outperformed their Canon and Nikon counterparts.

HOWEVER, most enthusiasts will tend to end up purchasing the higher quality “premium” or “pro” lenses and generally will cease to use these consumer grade lenses once they have an improved option.

The main issues with the consumer kit zooms are that their aperture is quite narrow – often f/3.5-6.7 at their widest aperture and this means several compromises:

  • they do not let much light in and thus will have more trouble locking autofocus in dim light and will probably require a flash to be used indoor, and will have very limited use when outdoor light levels fall unless you use a tripod.
  • the aperture is not wide enough to allow really shallow depth of field images for when you want to blur out the background (unless you are shooting macro close up subjects)
  • adding a polariser filter further darkens the already relatively low light intake, again limiting hand held options and AF locking capability in low light
  • given the consumer grade optics, best image quality is often at around f/8 instead of around f/4 with the premium and pro lenses, which further limits your options if you want the best quality shots
  • they generally are not weatherproof (important exceptions are the Olympus mZD 12-50mm lens and the Olympus m.ZD 14-150mm f/4-5.6 II)

Nevertheless, if you are shooting mainly outdoors in bright light and not needing to blur the background, these lenses make great travel companions and there are a LOT of lenses to choose from depending upon your needs.

Some things to consider are:

  • focal length range
  • size
    • in general, the more zoom, the longer and bigger the lens will be, so one has to weigh up what they can fit in their bag with what focal length range they need
    • some lenses also have the option of reducing down to a more compact size when not in use, but these can be a bit clunky to unlock and you can miss shots because you forgot to have it unlocked
  • silent autofocus for movies
  • autofocus speed – the older lenses designed around 2007-2008 tend to have slower autofocus
  • weatherproofing – only a couple of the consumer lenses are weatherproof
  • macro capability – the Olympus mZD 12-50mm lens is not only weatherproof but has very good macro capabilities

The Olympus “premium” lenses:

Olympus has marketed a middle tier of the m Zuiko Digital (mZD) lenses to the enthusiasts who want extra wide apertures either for low light work or for shallower depth of field and better ability to blur the background to emphasise your subject.

Furthermore, these are mainly “prime” lenses in that they only have one focal length and no zoom functionality which makes them easier to design for better bokeh – the aesthetic quality of the blurred background.

These lenses are generally very good optically even wide open at their f/1.8 or f/2.0 maximum apertures and are great for indoors or outdoors and perfect for portraiture, and creative arty work.

My personal favourite of these is the brilliant Olympus mZD 75mm f/1.8 lens which is fantastic for single person portraits and for creative shallow depth of field work.

If I only take 2 lenses with me, it will be this one and the Olympus mZD 12-40mm f/2.8 PRO lens.

If you can’t afford the 75mm f/1.8 lens and you want a similar look and you can be happy shooting in manual focus only, then try the Rokinon/Samyang 85mm f/1.4 lens.

Other great options are:

  • Olympus mZD 25mm f/1.8 – great for street photography, parties, small group photos, etc (a more compact alternative to this lens is the Panasonic 20mm f/1.7 pancake lens – this lets you get your E-M10 or E-M5 camera into a jacket pocket at social events or for walking the streets at night and doing hand held night urban landscapes)
  • Olympus mZD 45mm f/1.8 – great for portraits of couples or one person, if you have plenty of cash to spare, also take a look at the Panasonic 42.5mm f/1.2 lens for even shallower depth of field
  • Olympus mZD 60mm f/2.8 macro – the only “premium” lens that is weatherproofed – a must have lens if you are into macrophotography

My next tier down are:

  • Olympus mZD 12mm f/2.0 lens – this is great for hand held night urban landscapes and infrared landscapes, but if you own the Olympus mZD 12-40mm f/2.8 PRO lens, you may not use this as much as you think and for my mind, it is over-priced.
  • Olympus mZD 17mm f/1.8 lens – great for street photography and groups at parties, but perhaps not as good as the 25mm f/1.8 lens, although many people absolutely love this lens – I don’t have one

The Olympus “PRO” lenses:

These are the current holy grail for many Olympus users, great lenses, relatively compact for their capabilities, well built, weatherproofed, relatively wide apertures (most are f/2.8).

The most useful of these for most people is the Olympus mZD 12-40mm f/2.8 PRO lens.

It could probably replace the need for the 12mm f/2.0 lens (unless you shoot hand held at night), and the 17mm and 25mm f/1.8 lenses (although I would still like my compact Panasonic 20mm f/1.7 pancake lens to provide a compact, low light option).

The choice of a second lens to match with this lens depends upon your needs and may include one or more of:

And for the nature, wildlife or sports photographer, the much anticipated Olympus mZD 300mm f/4 PRO lens is due perhaps late 2015.

In the meantime, if I am shooting the moon or need super telephoto capability, I use the Olympus ZD 50-200mm f/2.8-3.5 SWD lens +/- EC-20 2x teleconverter which gives me up to 800mm f/7 capability in full frame terms.

Olympus has also indicated it will be working on even wider aperture prime lenses, so we can expect some f/1.2 and perhaps even f/0.95 lenses with autofocus and ability to AF on the closest eye which is one of the brilliant capabilities of Olympus cameras and much needed when using such shallow DOF cameras, and combine these with the awesome image stabilisation and your creativity can go wild!

Many, many more options:

The beauty of the Micro Four Thirds system is not only its compact, light size, the amazing Olympus image stabilisation which works on ANY lens, but it is extremely adaptable allowing one to use well over 50 lenses designed in Micro Four Thirds mounts as well as those in Four Thirds mount, but also almost any lens ever made via third party adapters which offer the following options:

  • plain adapters for manual focus of nearly any other lens ever made albeit in 2x crop field of view
  • focal reducer adapters for manual focus of nearly any other lens ever made but with a 1.4x crop field of view and a 1 stop wider aperture
    • for example, a Canon EF 135mm f/2.0 lens becomes a 100mm f/1.4 lens giving similar field of view and depth of view as a 200mm f/2.8 lens on a full frame camera
  • autofocus adapters such as the Kipon AF adapter which allows relatively fast AF using Canon EF lenses while providing aperture control
  • tilt-shift adapters which convert nearly any full frame Nikon lens into a tilt-shift lens