Olympus officially announces their 2 new pro lenses – 8mm fisheye and 7-14mm f/2.8 super wide angle zoom – my take on these lenses

Written by Gary on May 12th, 2015

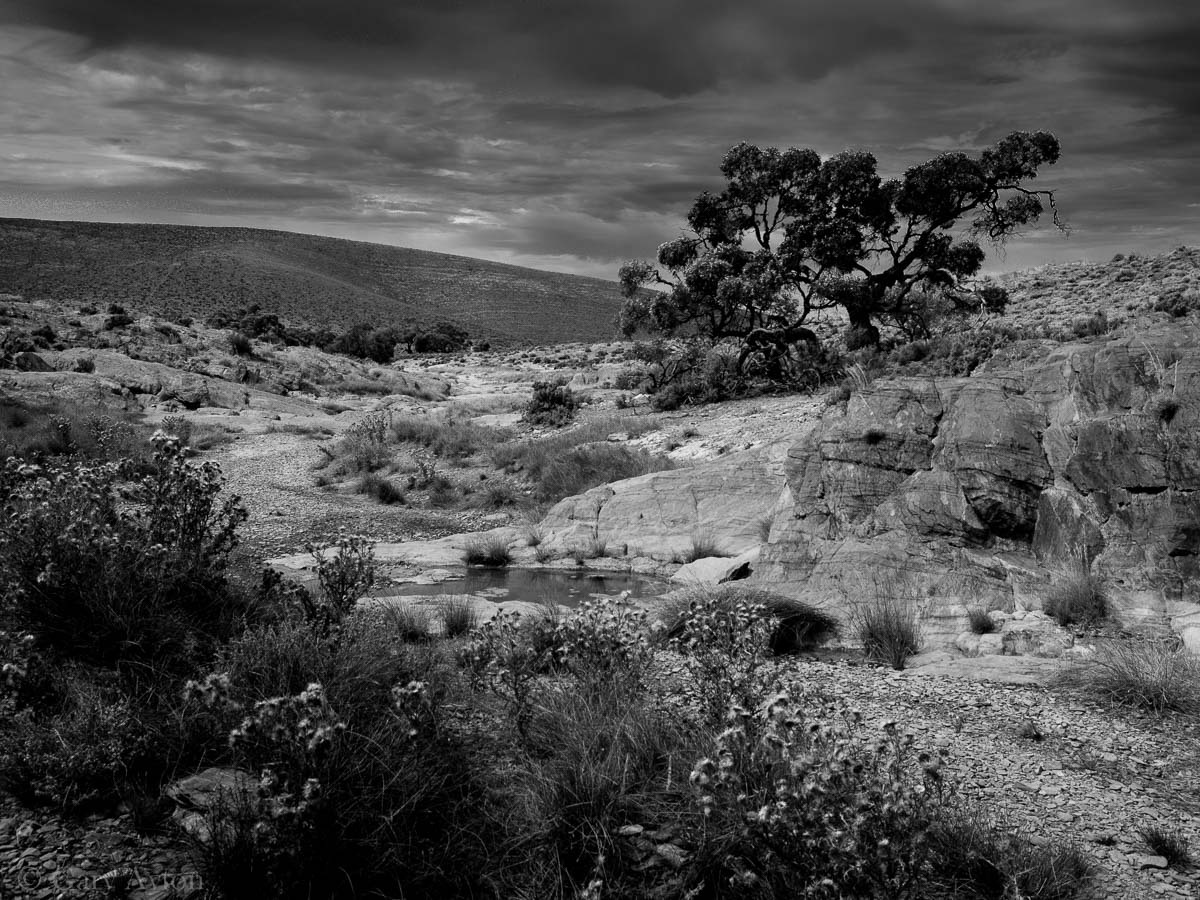
Back in the days of the Four Thirds dSLR, Olympus created a brilliant but very expensive and heavy super wide angle lens – the Olympus ZD 7-14mm f/4 Super High Grade Pro lens.

This lens was so good, I decided to buy it despite it being well over $2000. Compared to anything I could use on my Canon 1D Mark III, this lens just blew them away in terms of optical qualities – perhaps the only full frame lens to match the optical quality is the highly regarded Nikkor 14-24mm f/2.8G which is so good, many Canon users bought it for their cameras albeit sacrificing AF.

The Olympus had almost no barrel or pincushion distortion, it was weatherproofed and had excellent build quality.

But that was back in 2007 or so, and now Micro Four Thirds rules with good reason.

One of the big benefits of Micro Four Thirds over the Four Thirds system is that having a much shorter sensor to lens flange distance allows a far more efficient, less expensive, lighter, and smaller lens design for wide angle lenses.

Olympus has finally realised this benefit by now announcing a release date of around June 2015 for their new Olympus mZD 7-14mm f/2.8 PRO lens which also trumps the Panasonic offering which is a 7-14mm f/4 lens.

Olympus mZD 7-14mm f/2.8 PRO lens:

This lens is 1 stop faster than the Four Thirds lens – that is – it lets in TWICE as much light thereby allowing lower ISO to be used in low light, but even with this extra stop of aperture it is a welcome compact size, so let’s look at the specs to see what we get in benefits over the Four Thirds lens:

  • shorter: 105.8mm long instead of 120mm
  • smaller: 78.9mm diameter instead of 87mm
  • much lighter: 534g instead of 780g
  • close focus reduced to a working distance of 7.5cm (the close focus of the Four Thirds lens was 25cm from sensor)
  • new ZERO nanocoating to further reduce flare
  • new manual focus clutch to switch into “analog” manual focus mode with distance scale instead of the default focus by wire mechanism
  • new L-Fn button which can be assigned to any of 17 functions on the Olympus OM-D cameras
  • AF is now silent and optimised for CDAF live view and videos
  • new optical design hopefully maintains the excellent optical performance of its predecessor
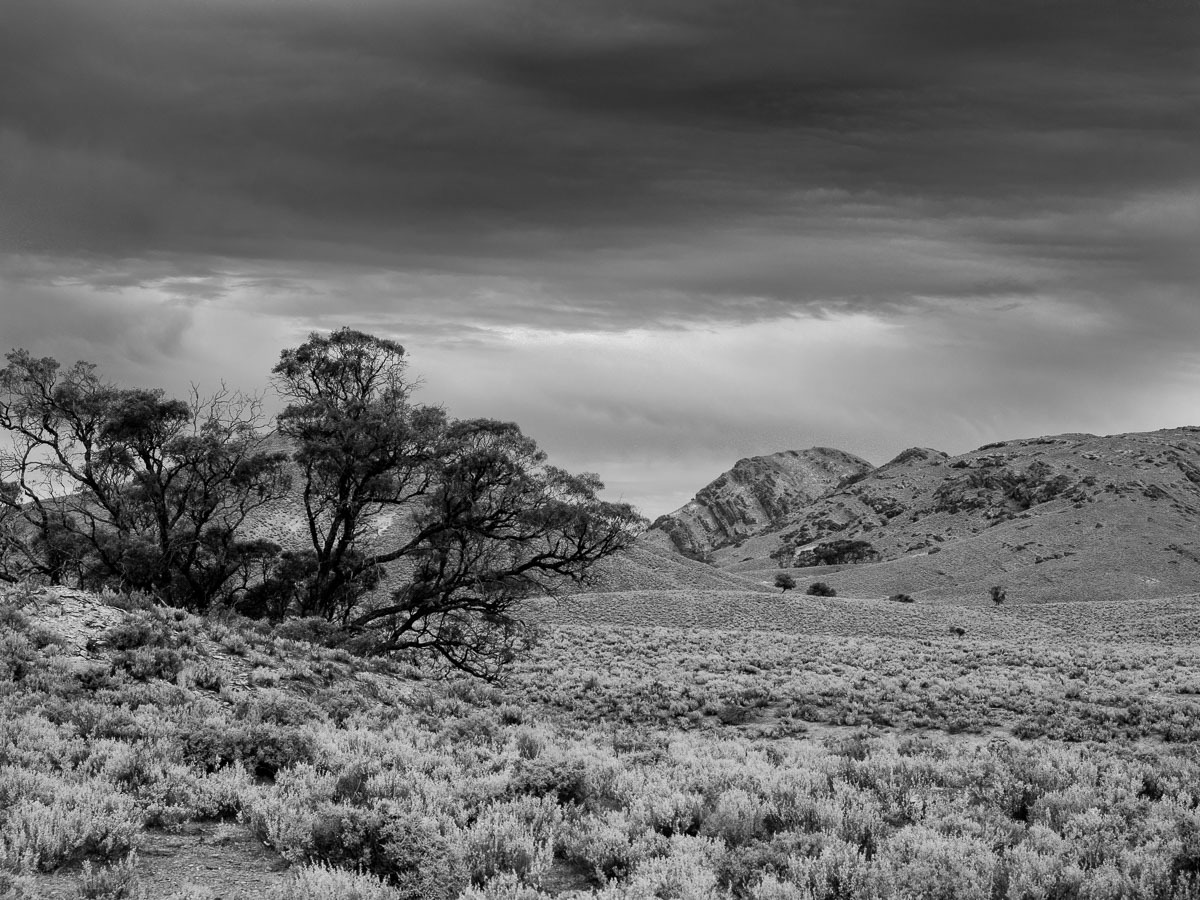
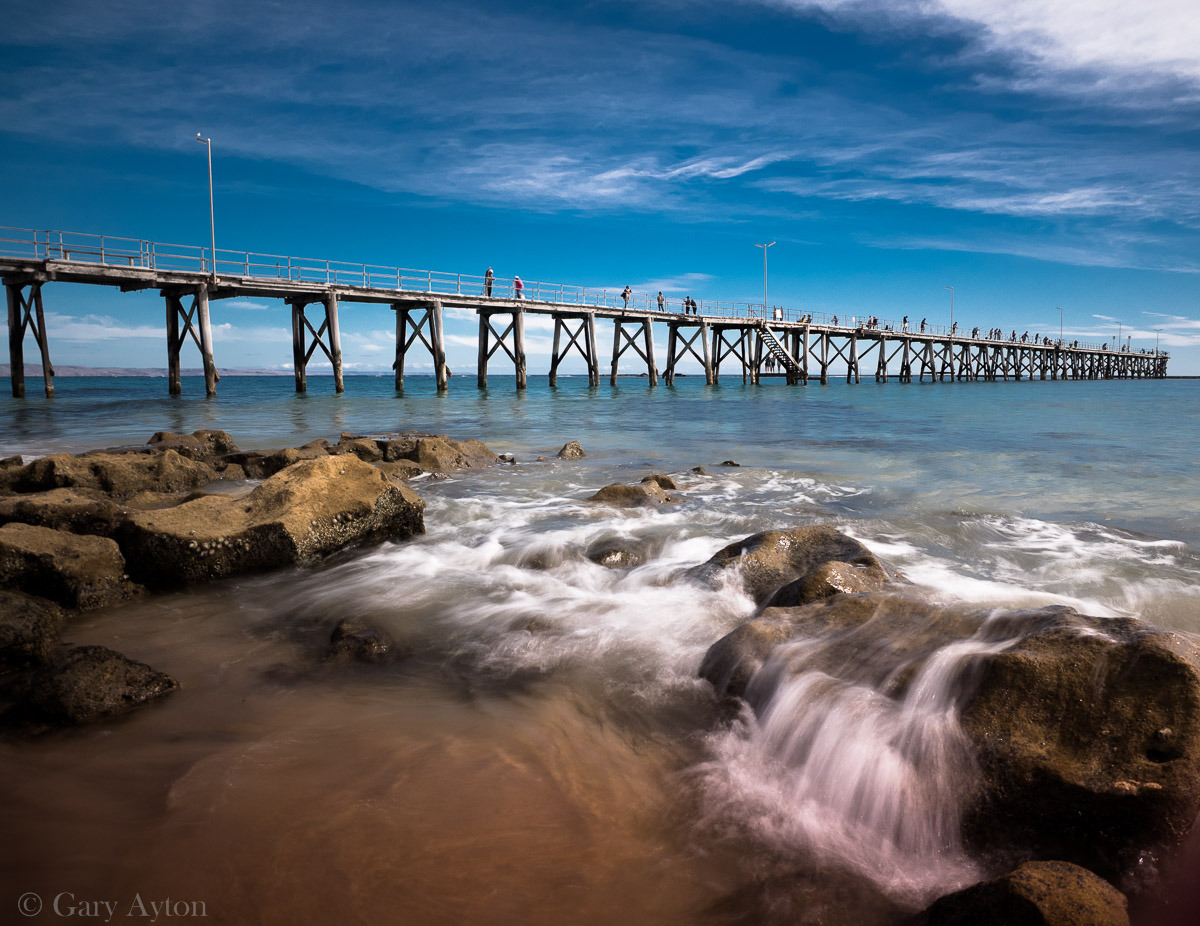
  • when matched to the Olympus OM-D cameras, the amazing image stabilisation system in these cameras allow such a lens to be hand held down to 1/3rd sec or even slower depending on technique! This opens up amazingly creative options in situations where tripods cannot be used and you want flowing water to be captured such as on beaches or with waterfalls.
  • but perhaps best of all is it is around HALF the price at $US1299

Where does that leave the Olympus ZD 7-14mm f/4 Four Thirds lens? Well, one would have to say assuming that its optics are not substantially better than the new f/2.8 lens, which appears to be a reasonable assumption given the preview testing, that it will be greatly devalued HOWEVER, it does have one potential trick up its sleeve that the new lens will not be able to do – add a ND100 or ND400 neutral density inside the Four Thirds adapter so that you can achieve long exposures to blur water in bright sunlight.

  • hopefully some enterprising company will make such an adapter with in-built ND400 filter
  • in the interim, it may be possible to cut a Cokin ND100 P155 filter to fit inside the odd-shaped interior of an Olympus or Panasonic adapter – the Cokin filters are plastic and thus can be cut to shape – see how to do this here
  • it would be great if future Olympus camera bodies could have a ND 400 filter activated within the camera body and then all lenses could use it seamlessly, but this is wishful thinking.

Olympus mZD 8mm f/1.8 fisheye lens:

Olympus have a Four Thirds fisheye lens – the Olympus ZD 8mm f/3.5 fisheye.

But now with Micro Four Thirds, Olympus has upped the ante on its rivals by producing the world’s widest aperture fisheye lens at f/1.8 aperture!

8mm fishe eye image
Why is the f/1.8 aperture important?

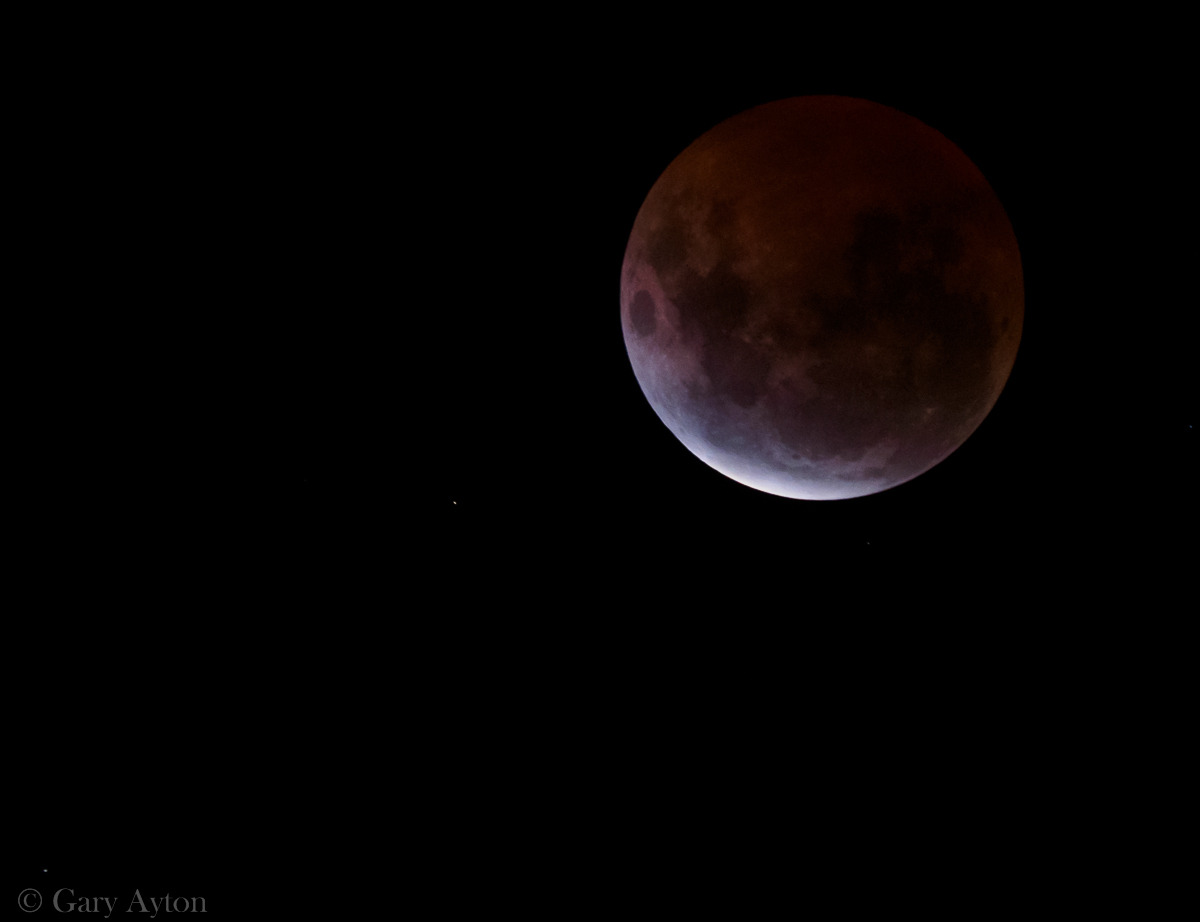
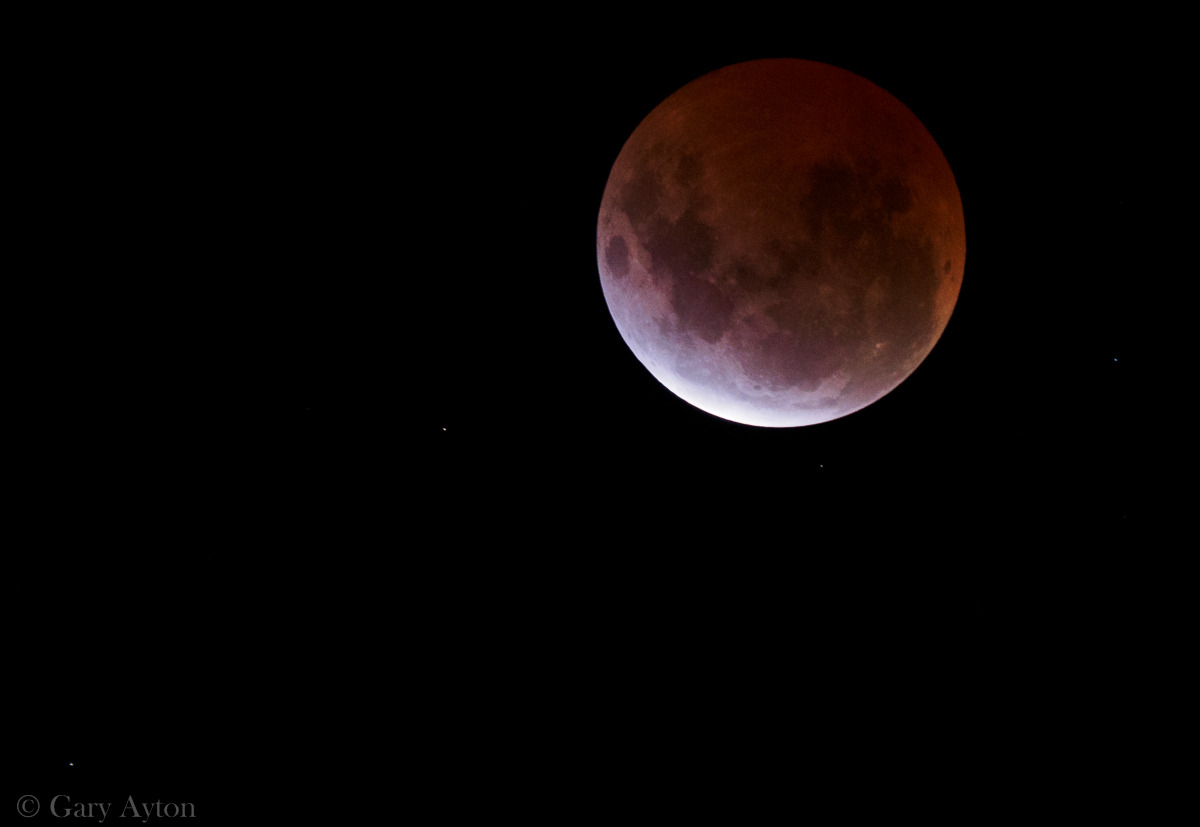
If you wish to take landscape photos at night and include the vast expanses of the Milky Way, you need a really wide angle lens – and the fisheye gives you a full 180deg coverage negating the need for panoramic stitching, but in addition, the f/1.8 aperture allows capture of more stars whilst retaining a low ISO of 800-1600. Another benefit of a fisheye lens for star photos is the shutter can be much longer than the usual 25-30secs (if using a non-fisheye wide angle lens) given the wide field of view, and thankfully, the Olympus cameras not only provide 60sec timed exposures, but the option of Timed exposures which negate the need of holding the shutter release down as in the usual BULB mode, or of LIVE TIMED or even LIVE COMPOSITE modes for further creativity at night!

A 14mm lens on a 35mm full frame camera offers around 114° angle of view and this means one can use a shutter speed up to 25-30secs without star trailing being objectionable. As the Olympus lens is a fisheye, one can’t use the usual shutter speed equation of 400/full frame equivalent focal length, but you can use the field of view to come up with 180 x 30secs / 114 = 50secs, so perhaps 60secs would be a reasonable shutter speed for the fisheye lens for Milky Way shots without tracking – this means you can halve the usual ISO to 800 while the f/1.8 aperture will capture FOUR TIMES as much light as a f/3.5 fisheye lens.

In addition, the f/1.8 aperture will be welcomed by underwater photographers.

This Olympus mZD 8mm f/1.8 fisheye lens is weatherproofed, has very close focus and is very reasonably priced at $US999 while remaining smaller and lighter than even the 7-14mm f/2.8 lens.

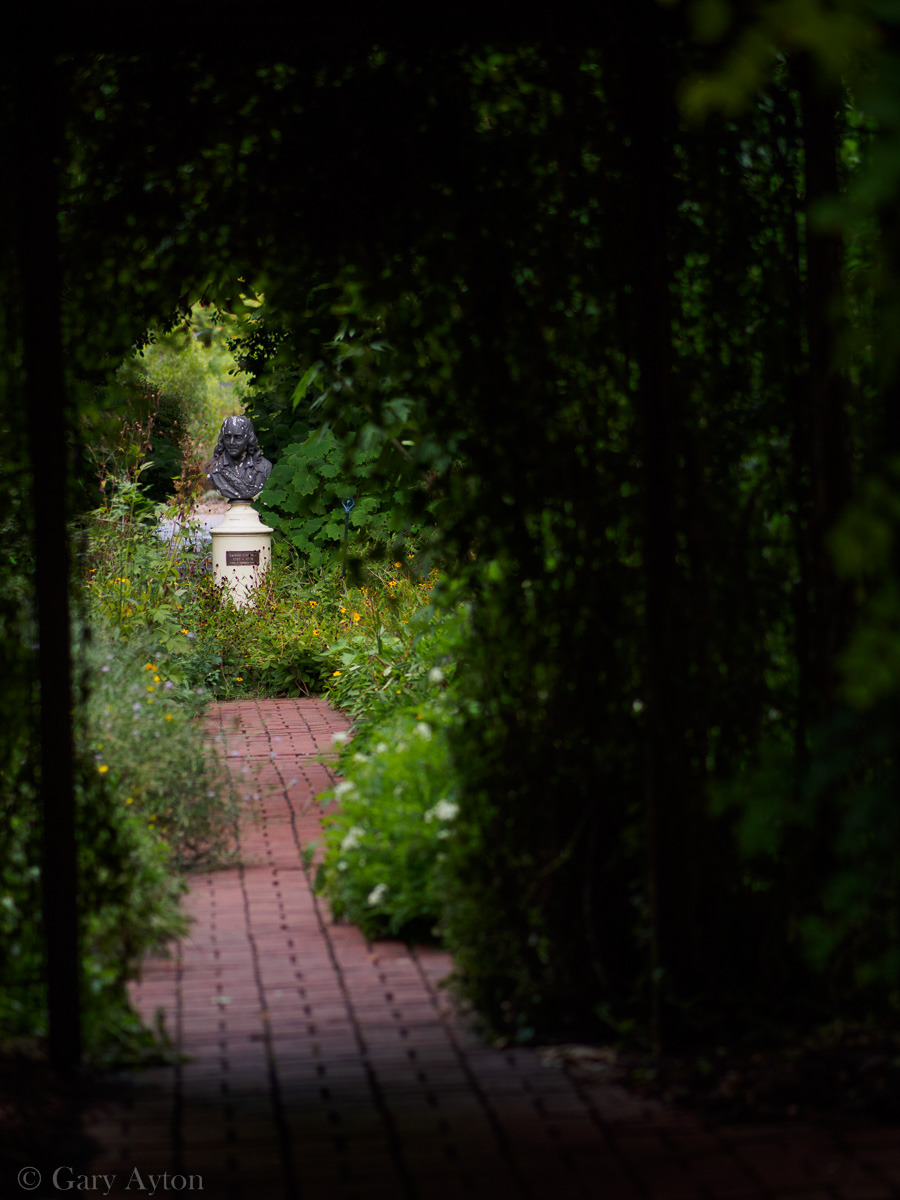
The very close focus allows for creative nature and landscape photography.

Obviously, it will also be image stabilised on Olympus cameras to hand holdable 1/2sec or longer – no fisheye lens on a Canon or Nikon dSLR can be image stabilised nor have such a wide aperture – another reason why the Olympus Micro Four Thirds system means more fun, more creative options, less back ache and less cost.

The optics of the fisheye seem extremely good given the example image of the aurora which shows star shapes are pretty good for such a lens, with only the top right corner stars developing significant aberrations – that to me is a sign this lens should be an awesome lens.
aurora taken with the f/1.8 fisheye

Olympus is well on its way to a full catalogue of weatherproofed PRO level lenses designed for Micro Four Thirds and its face recognition capable CDAF autofocus systems we now have:

  • 8mm f/1.8 fisheye
  • 7-14mm f/2.8 PRO
  • 12-40mm f/2.8 PRO
  • 40-150mm f/2.8 PRO with 1.4x teleconverter
  • and coming soon, the 300mm f/4 PRO (equates to an easily hand holdable 600mm field of view lens)

You might well ask, but where are the tilt-shift lenses which pro systems need?

One of the awesome features of Micro Four Thirds, is that the short lens flange distance allows one the option of using a tilt-shift lens adapter which in effect can turn any Nikon full frame lens into a tilt-shift lens!

Why pay a lot of money for a dedicated tilt-shift lens?

Or, if you already have expensive tilt-shift lenses, you can just use the full frame tilt-shift lenses in 2x crop factor (my Canon TS-E 17mm f/4 effectively becomes a 34mm tilt-shift lens with IS), or used with a 0.72x focal reducer (the 17mm lens becomes 24mm f/2.8 tilt-shift with IS).

Perhaps Olympus may develop a super wide angle tilt shift lens to fill the super wide angle gap such as a 7mm f/2.8 tilt-shift – or this may fall to a 3rd party given it does not need AF.

Just awesome, and unlike the Canon and Nikon lenses, these lenses will have their image stabilisation performances improved with each new version of Olympus camera, not to mention fast AF on the closest eye and other class leading functions.

And if you think the image quality of Micro Four Thirds can’t cut it with the full frame world, check out these side by side image samples comparing a Canon 6D full frame dSLR with a Canon EF 17-40mm f/4L lens compared to an entry level Olympus OM-D E-M10 with the Olympus mZD 12-40mm f/2.8 PRO lens – the Olympus just blows the Canon away in image clarity and detail edge-to-edge. Furthermore, buying a 50 megapixel dSLR is not going to get you better image detail or ability to make big prints if your lens can’t deliver the image detail you need or you have camera shake because the image stabiliser is not effective enough.


Olympus OM-D E-M1 rear dial issue not always responding – mine is now in for repair under warranty by Olympus Australia

Written by Gary on April 19th, 2015

Many and perhaps most cameras have either design or manufacturing build quality issues which do not get noticed until mass production has already occurred.

Such was the case with the professional sports dSLR – the Canon 1D Mark III which I bought in 2007 for over $5000 to compliment my Olympus E510 dSLR which was not capable of fast C-AF tracking of fast moving subjects.

Unfortunately with the Canon 1D III, there was a major design fault with the C-AF system and despite returning it for attempted repair, the problem was not resolved fully, and Canon partly resolved it by releasing a new camera, the Canon 1D Mark IV although this did not compensate the many thousands like me who bought the faulty model.

Nikon had similar serious issues with their Nikon D600 full frame dSLR in which the shutter mechanism was allegedly causing dust and oil to contaminate the sensor causing granular spots on images. After much debate and testing, Nikon finally announced it accepted that it was a design issue and in Feb 2014 announced it would offer free replacement of the shutter mechanism, and allocated $17.7 million to address the issue. It then released an updated model, the D610 to resolve the problem for future buyers.

It seems that Canon may also have a major problem with their sensors on the Canon their latest cropped-sensor dSLRs – see here.

Apart from the Canon 1D Mark III, I have been extremely fortunate with my long run of cameras I have bought since the 1970’s, none of which have needed a warranty repair – these include, the Olympus OM-1n, OM-2n, Olympus C8080, Olympus E510, Olympus E330, Olympus OM-D E-M5.

But just over 2 months after I purchased a new Olympus OM-D E-M1, and well before my trip to South Australia, it started developing the well-documented issues with its rear dial requiring several clicks to change a setting instead of just the click. The camera is still usable but it is an extremely annoying fault, and if it did fail totally, one could always use the touch screen and also re-allocate important control to another dial such is the versatility and customisation capability of this wonderful little camera.

It seems the issue is not isolated to the E-M1 but has affected similar models such as the E-P5. I have also seen the top part of the rear dial just fall off on someone’s new E-M1 so there does seem to be build quality and perhaps design issues with this new dial which differed from the design on the E-M5.

Fortunately, this issue should be an easy fix and presumably just requires replacement of the rear dial, although there is a risk that the problem may return with a new dial if it is a more significant design issue – time will tell on that

Nevertheless, it was time to do the inevitable and take it back to the camera store to have it sent off for repairs to Olympus Australia who do the repairs in Sydney (or Perth), but unfortunately not in Melbourne.

I am thus posting this blog to give Australians a feel for the service provided by Olympus Australia, particularly given that Olympus no longer has world wide warranties, but regional – my understanding is that Olympus Australia only do warranty repairs themselves for cameras purchased in the Australia region which they have distributed to retailers.

Both of the above, on the surface could appear to be show stoppers for professional photographers who need fast turn-around times for servicing, however, this would be partly negated by the fact one could probably buy a spare body and lens and still have a substantial amount of money left over when compared to buying a full frame pro system. In this way a pro could risk manage the issue, although most pros would always have a spare camera body at least anyway.

I will update this post further once I have news on the outcome of my warranty repair, in the meantime it is back to using the E-M5 with the Canon 1D Mark III coming out of retirement.

When sending the camera in for repair via the retailer, all they need is the receipt and the camera body with body cap in place – no battery, no accessory grip, no SD card, no box.

Do NOT send in other accessories which are not needed for the repair, as with any service centre, there is a chance they could be lost amongst all the other repairs!

A quote from a fellow Australian who had the same issue “I sent it to the Olympus offices in Australia (they still do all the repairs in house, and are fantastic to deal with)” – so I am very optimistic the service will be excellent.

UPDATE – ALL FIXED!

The camera store contacted me on 6th May to come and pick up and all looks good – Olympus Australia replaced the rear dial under warranty as expected, gave it a clean and it is working beautifully now.

Turn around time was about 3 weeks which included the postage to and from Sydney via the camera store.


Sth Australia – a last hurrah – road trip into the desert beyond World’s End Highway

Written by Gary on April 13th, 2015

My rental car road trip exploring South Australia having left the lovely beaches of Port Noarlunga, the photogenic old copper mining town of Burra, and the Mount Remarkable National Park region, I now head back towards Burra and the extremely isolated desert areas north east of Burra that look towards Broken Hill some 400km away.

This area is off grid – no mobile telephone services, no internet and in my 4+ hours round trip on the gravel roads I did not get to see another car or another person, nor any evidence of current habitation. So not a place to have your car break down – it’s a long walk in the dry, heat without water back to civilisation!

The following photographs were all taken with the Olympus OM-D E-M5 Micro Four Thirds camera with the Olympus mZD 12-40mm f/2.8 lens or the Olympus OM-D E-M1 with Olympus ZD 50-200mm f/2.9-3.5 SWD lens, which I had ready at my side in the car for the very frequent stops for photo opportunities.

Jamestown:

Jamestown Hotel and church just south-east of Stone Hut:

Jamestown Hotel

Jamestown church

Back of beyond – the desert – remote yet only 2hrs from Adelaide

I stopped at the petrol station to see if they knew much of the mysterious lands across the highway – but alas they had never dared go, nor did they have any maps – their advice, just open the gates and close them behind you:

the desert

and beyond the gates, a 90km + remote circuit on gravel road across dry flood ways (although a storm was coming):

the desert

a dry sheep trough:

the desert

the only water I saw on the whole trip and it was far from drinkable:

the desert

ominous clouds suggest a brewing storm which would make the road impassable in my 2WD car:

the desert

stunted trees:

the desert

a kangaroo hiding amongst the ballerinas (shot with a 400mm eq focal length at a distant hill side):

the desert

desert hill lookout track:

the desert

abandoned sheep station on private property with signs prohibiting entry onto the property:

the desert

and another abandoned homestead:

the desert

a very old stone cottage further down the track:

the desert

remnants of a wall with the timber plinth used to support the ceiling:

the desert

this is why I took a radio beacon EPIRB device – not really a place to be stranded without supplies or communication, as it was I drank all of my 5 bottles of water on the trip – maybe it just made me feel thirsty!:

the desert

the desert

the desert

the desert

Nearby is the re-created birth homestead of the famous explorer of the Arctic, Sir Hubert Wilkins.


Sth Australia – Mount Remarkable NP – the Southern Flinders Ranges

Written by Gary on April 12th, 2015

My rental car road trip exploring South Australia having left the lovely beaches of Port Noarlunga and heading north, through the Clare Valley vineyard region and the photogenic old copper mining town of Burra, I now head back towards the coast and the rather isolated Mt Remarkable National Park which forms part of the Southern Flinders Ranges – a range of sedimentary rock formed 600 million years ago and uplifted some 540 million years ago to form the line of mountains extending south through the Adelaide Hills (composed of folded and faulted sediments of the Adelaide Geosyncline) and even to Antarctica when it was joined to Australia.

There are three main entrance points into the Mt Remarkable NP and be aware you need to pay ONLINE an entry fee BEFORE going:

  • summit walk from the adjacent town of Melrose
  • walks in the Alligator Gorge via bitumen access road from Wilmington in the north
  • walks in Mambray Creek region via bitumen access from the Stuart Highway near Port Germein.

The following photographs were nearly all taken with the Olympus OM-D E-M1 Micro Four Thirds camera with the Olympus mZD 12-40mm f/2.8 lens:

Stone Hut region:

I chose to stay in a cottage in Stone Hut as it was 1hr drive to Alligator Gorge and also to Mambray Creek and thus it would mean I could do walks in both as a single day trip in a round circuit.

Georgetown Hotel just south of Stone Hut:

Georgetown Hotel

This is not the cottage I stayed in but shows what the Olympus OM-D E-M1 can do hand held at 1/6th sec in street light well after dusk:

Stone Hut

A derelict farm truck just north of Stone Hut in Wirrabara Forest Reserve:

Stone Hut

Stone Hut

Alligator Gorge:

This was shot with the Samyang 7.5mm fisheye lens:

Alligator Gorge

600 million year old sandstone patterns in the gorge walls:

Alligator Gorge

Alligator Gorge

Fossilised water ripples in the sand on the ceiling of a rock ledge:

Alligator Gorge

Mambray Creek bushwalks:

I did not get time to do the 7hr 18km Hidden Gorge walk which takes you through the narrow steep gorge, but did get to do the first 4km just before sunset.

Mambray Creek

Mambray Creek

Baroota Cottage ruins at entrance to Mambray Creek camp ground:

Mambray Creek

Mambray Creek

After leaving Mambray Creek, I headed to the small seaside village of Port Germein which boasts the longest jetty in the Southern Hemisphere at 1.6km, but I needed to get a hamburger and get back to Stone Hut before dark as my rental car contract banned night driving and the drive through the narrow but pretty Port Germein Gorge Road had plenty of wildlife to miss.

After getting through the gorge I came across this lovely stone farmhouse ruins with the last of the sunset colours as a backdrop:

Mambray Creek

Just before getting to Stone Hut, and as the last light was fading, a small area of ground fog developed just at an abandoned cottage which I managed to capture hand held with the Olympus E-M1 with the brilliant Olympus mZD 75mm f/1.8 lens at 1/80th sec ISO 800:

As an aside, to capture this with a full frame Canon or Nikon dSLR, I would need to use 150mm f/3.6, ISO 3200 at 1/80th sec, and at this shutter speed even with OIS, I would not be confident of adequately eliminating camera shake, especially if using a 36mp sensor, and thus I would need to stop the car and get my tripod out, set the shot up, make sure it was level, and by this time the fog would have disappeared – as it was, I was very lucky to capture it with the dusk light backlighting it before it disappeared within a minute. This is the beauty of the Olympus OM-D system – light, fast, and hand holdable to much lower light levels without need to resort to a tripod.

Mambray Creek

Next stop will be my last of the South Australian road tour posts – off the beaten track into the desert near Burra.


Sth Australia road trip – Clare Valley and then the historic copper mining town of Burra – a must see if you like photography and history

Written by Gary on April 9th, 2015

My rental car road trip exploring South Australia now leaves the lovely beaches of Port Noarlunga and heads north, through the Clare Valley vineyard region, stopping for a lovely gourmet lunch at the Skillogallee Winery.

Cafe in Auburn, Clare Valley:

Auburn cafe


The following photographs were nearly all taken with the Olympus OM-D E-M1 Micro Four Thirds camera with the Olympus mZD 12-40mm f/2.8 lens:

Ruins of stone cottage in a vineyard, Clare Valley:

clare valley winery


I then headed east to explore the very interesting and photogenic historic copper mining town of Burra which at one stage apparently helped save the Sth Aust. government from bankrupcy in the late 19th century when the copper was discovered and created a mini boom.

From Burra, I then headed back west through some lovely rolling hill sides dotted with abandoned stone cottages as I made my way to cottages in tiny town of Stone Hut where I planned to stay as a base for a couple of nights to allow me to spend a whole day exploring both ends of the Mt Remarkable NP in the Southern Flinders Ranges.

Burra:

When you arrive in Burra, head to the tourist information centre – not only can they book accommodation for you which does not show up on wotif.com or stayz.com (if you wish to book accommodation online, do so at the local booking service) but they have a wonderful self-guided tour of the heritage sites  and a museum which will cost you $20 plus a refundable $20 for a key which will allow to let yourself into a number of heritage sites and you will probably end up exploring them without anyone else around to annoy you or get in your photos – just awesome – but the tourist information centre does close around 4pm so if you arrive after that you are out of luck, and the museum closes around 3pm.


Wooden cart wheel at Bon Accord Mining Museum (open noon-3pm):

Burra

Burra railway station:

Burra

Old Burra police cells and stables:

Burra

Burra

Burra antique store:

Burra

Recreation of vintage dining room at Paxton Square Cottages via the self-guided key passport:

Burra

Old copper miners’ underground dug-out sleeping quarters via the self-guided key passport:

Burra

Part of the old Burra copper mine via the self-guided key passport:

Burra

Redruth Gaol via the self-guided key passport:

Redruth Gaol was built in 1856 and was the first gaol built outside of Adelaide metropolitan area at a time when Burra was the largest country town in South Australia. It housed up to 30 prisoners until it closed in 1894, and, after renovations, from 1897-1922, it served as the Redruth Girls Reformatory. Girls were sent there for a variety of reasons including breaches of the law, unfit guardianship, pregnancy, or for being “beyond parental control”. The girls had to dig large holes each morning to bury contents of the lavatories. The rest of the day was spent doing chores including raising chooks, shelling almonds, sewing, cooking, gardening, knitting for the Red Cross, cleaning and laundry. The girls had a habit of escaping but were generally caught and returned.

In 1979, it was used in the Australian film, Breaker Morant.


Burra

Burra

Burra

Burra

Burra

North-West of Burra:

Burra

Burra

Burra

I hope this has given you a taste of what you can see – from my point of view, photographically, the north of Adelaide does not get interesting until you hit the rolling hills around Burra and north of the Clare Valley although I did not get time to see the historic town of Mintaro east of Clare Valley. Between Adelaide and Auburn it is generally just open plains of wheat fields, then from Auburn on are the vineyards of Clare Valley. I really like the countryside north of Clare Valley up through to the Southern Flinders Ranges and across to Burra.

My next blog post will be on Mt Remarkable National Park and the gorge walks.


South Australia road trip – Talisker Tin Mine and Fleurieu Peninsula

Written by Gary on April 7th, 2015

Whilst staying a couple of nights in Port Noarlunga on my rental car road trip from Adelaide, I decided to do a day trip south down to Cape Jervis and back through the inland of Fleurieu Peninsula.

It took me through the nice old town of Normansville which was a great spot for lunch before heading down to one of the most photographed beaches in South Australia – Second Valley Beach.

Then I drove south to Cape Jervis at the southern tip where you can get a car ferry to Kangaroo Island (although this may not be permitted in your rental car contract).

I found the gravel road not far from Cape Jervis which took me into the Talisker Conservation Park where there is a 19th century Cornish tin mine.

This was am interesting, albeit quite isolated walk through forests and one could spend 1-2 hrs exploring the area and the many ruins.

Here are a couple of photographs taken with the Olympus OM-D E-M1 Micro Four Thirds camera with the Olympus mZD 12-40mm f/2.8 lens:

tin mine

And the view across Cape Jervis to Kangaroo Island on the horizon from the lookout in Talisker Conservation Park:

tin mine

tin mine

From there, I headed back to the main highway and re-traced my route north back to the petrol station / general store at Delamere to get an ice cream to last me for the inland trip back to Port Noarlunga. I took the Range Rd (B37) eastwards from here and turned left on the Hay Flat Rd (gravel road) to check out Ingalalla Falls which are a 300m easy walk from the car park, but alas there was very little water flowing over the waterfall – not surprising given it was early Autumn. I then took the gravel road back to the B37 highway travelled a little further east before turning left on the Parawa Rd (bitumen) which takes one through some lovely valley and the stone hut ruins in the ghost town area of Torrens Vale, although given it was getting late, I did not actually get to drive to Torrens Vale which is presumably on Blacker Rd and accessible from Hay Flat Rd.

On the way back to Port Noarlunga, I stopped into Port Willunga for the sunset photos:

Port Willunga’s cliff caves dug out many years ago to store boats:

Port Willunga

The remnants of the old jetty at Port Willunga at sunset, hand held with Olympus OM-D E-M1, 12-40mm f/2.8 lens and a Cokin gradient filter:

Port Willunga

Port Willunga


South Australia road trip – Second Valley Beach

Written by Gary on April 7th, 2015

Whilst staying a couple of nights in Port Noarlunga on my rental car road trip from Adelaide, I decided to do a day trip south down to Cape Jervis and back through the inland of Fleurieu Peninsula.

It took me through the nice old town of Normansville which was a great spot for lunch before heading down to one of the most photographed beaches in South Australia – Second Valley Beach.

Second Valley Beach has only a small area of sandy beach and a small fishing jetty but it is surrounded by some very rugged looking rock formations – here are some of my efforts in the early afternoon on a cloudy day – not the best time to create aesthetic imagery so I decided to convert these to monochrome to emphasise the textures.

These were all taken with the Olympus OM-D E-M1 Micro Four Thirds camera with the Olympus mZD 12-40mm f/2.8 lens.


Looking back at the fishing jetty and the concrete path that allows one to walk around the cliff to the rocky cove:

Second Valley

Second Valley

To give a sense of scale, note how small the people are in this photo:

Second Valley

Second Valley

Second Valley

Just past Second Valley is another inlet, Rapid Bay, this has a much longer, more modern jetty, and sweeping views along the coast to the north but is not as picturesque.

Next I head further south to Cape Jervis where there is a car ferry to Kangaroo Island, but as this is really an option for a several days expoloration of the fascinating island, I opted instead to explore nearby Talisker Conservation Park with its protected remnants of an 19th century Cornish tin mine.


Sth Australia – Port Noarlunga and Port Willunga

Written by Gary on April 6th, 2015

Continuing on from my quick rental car trip to South Australia, starting in Adelaide, I then decided to stay a couple of nights on the lovely beaches of Port Noarlunga and to use this as a base to explore the Fleurieu Peninisula further south as a day trip – although one could spend a lot of time exploring this region and the nearby Adelaide Hills which I didn’t get time to explore.

When I arrived at Port Noarlunga on the Saturday afternoon I was surprised by the car parks all being taken, and it was only when I went down to the beach I discovered South Australias annual surf life saving club championships were being held there all weekend. This proved to be an opportune time to test my new Olympus OM-D E-M1 with the Olympus ZD 50-200mm f/2.8-3.5 SWD lens for continuous autofocus in burst mode, and it did better than I expected, although I am sure not as good as could be achieved with the new Micro Four Thirds lens – the Olympus mZD 40-150mm f/2.8. To get the most out of shooting sports with this camera you need to have the camera’s settings optimised for continuous AF (C-AF) – see here.


Port Noarlunga:

Port Noarlunga

Surfer guy getting ready for the surf canoe race, seems fashion for the year is pink crop tops:

Port Noarlunga

Port Noarlunga jetty – 1/4sec long exposure in bright sunlight using the ND400 10x neutral density filter hand held with the Olympus OM-D E-M1 and the Olympus mZD 12-40mm f/2.8 lens:

Port Noarlunga

Port Willunga:

Port Willunga’s cliff caves dug out many years ago to store boats:

Port Willunga

The remnants of the old jetty at Port Willunga at sunset, hand held with Olympus OM-D E-M1, 12-40mm f/2.8 lens and a Cokin gradient filter:

Port Willunga

Port Willunga

There are many places near Port Noarlunga which I did not get time to explore including:

  • Maslin Beach – Australia’s 1st official nude beach
  • Mclaren Vale wine region
  • Onkaparinga National Park with its many walks which follow the Onkaparinga River

My brief exploration of the Fleurieu Peninisula is in my next post.


a lunar interlude – shortest lunar eclipse in 500yrs – and our last blood moon for 3 years

Written by Gary on April 5th, 2015

Last night (4th April 2015) we witnessed our last total lunar eclipse for the next 3 years and apparently the shortest in the past 500 years.

Shooting a total lunar eclipse at totality is challenging however there are are nice features on the Olympus OM-D cameras which do help such as:

  • continuous live view – no need to always be resorting to mirror lock up as on a dSLR
  • magnified live view to allow accurate focus which is actually quite difficult near totality
  • relatively cheap and high quality telephoto reach with the Olympus ZD 50-200mm f/2.8-3.5 SWD lens with Olympus EC-20 2x teleconverter
  • reasonable ISO performance at ISO 1600

So here are a couple of mine from last night taken with the Olympus OM-D E-M1 with Olympus ZD 50-200mm f/2.8-3.5 SWD lens with Olympus EC-20 2x teleconverter to give 800mm focal length (in 35mm full frame terms), on a tripod with IS turned off, but with 12 sec self timer ON to reduce camera shake. Both taken at f/7, 1/2 sec, ISO 1600 and have had some cropping done but minimal processing in Lightroom.

Some cloud over the 1st one:

eclipse

eclipse


South Australia – first up – Adelaide

Written by Gary on April 3rd, 2015

Adelaide is the capital city of the State of South Australia and is just over 1 hour’s flight from Melbourne although you also need to take into account the 30min time zone difference.

The airport is close to the CBD and it does have a reasonable bus and train public transport system (no train at airport though) although I have never used this, and of course you can pick up your rental car from the airport or from the CBD.

To me, Adelaide CBD has never been inspirational itself from a cultural, retail, culinary or photographic viewpoint, but then I am spoilt by what Melbourne has to offer.

It, along with other local areas such as Port Adelaide, does have some nice 19th century heritage sandstone buildings to check out, but more importantly, there are are great number of areas to explore by car all within a 2 hour drive such as the Adelaide Hills, Fleurieu Peninsula, Barossa Valley and Clare Valley wine regions, York Peninsula, and a multitude of beaches.

You can even enter the “outback” type remote desert regions past historic copper mining heritage town of Burra in just over 2 hrs if the weather has been dry and the gravel roads there are manageable  (see a later post on this).

There are a couple of oases where I like to chill out and take photos in the CBD – the Adelaide Botanic Gardens is lovely with a wide range of plants and lots of secret nooks and crannies to explore, and nearby, the State Art Gallery has free entry, and although is no where near the size of the NGV in Melbourne, it does have a few nice art works and often very alternative avant garde works.

First the wonderful botanic gardens

The Olympus OM-D and the lovely Olympus mZD 75mm f/1.8 Micro Four Thirds lens:

One of the many nooks and crannies:

secret nooks and crannies

water lily:

water lily

a great variety of interesting trees:

tree

and more water plants:

water plants

Now the Art Gallery, again with the Olympus 75mm lens:

A nailed installation by Swiss-born, Thomas Hirschhorn titled “Twin subjecter”:

twin subjecter

And my view through a sculpture of an Arthur Boyd portrait painting:

twin subjecter

Port Adelaide:

If you are returning the car at the airport and coming from the north, it is worth stopping off for refreshments and an explore around Port Adelaide, you never know what you find in this mix of industrial and heritage architecture – this was taken using the Olympus ZD 50-200mm f/2.8-3.5 lens:

street art