Decisive moment – a brief period of backlit low sunlight breaking through and a candid shot of a cute girl awed by the snow

Written by Gary on August 13th, 2014

Cradle Mountain Peppers Resort – lovely restaurant and bar, with a very picturesque lake and short walks.

This young lady kitted out in her awesome yellow gloves and red gumboots “invaded” my landscape shot just as the sun started to break through the clouds – am very happy she did!

Olympus OM-D E-M5 Micro Four Thirds camera with the lovely compact and sharp Panasonic 20mm f/1.7 lens:

girl in awe of the snow


a long weekend trip to beautiful Cradle Mountain, Tasmania

Written by Gary on August 13th, 2014

Cradle Mountain is a very popular bushwalking destination in Tasmania, Australia.

It caters for most needs including some very lovely short walks less than 1 hour through luscious old rainforests near the main resorts, 2-4 hour short walks around Dove Lake and for the fitter walkers, up to Marion’s Lookout and to Crater Lake.

However, the ultimate walk for many is the essentially one way, 7-9 night Overland Trail, assisted with strategically placed huts and an optional boat ferry at the end.

The region has lovely old rainforests with old King Billy pines, deciduous beech trees (fagus) with abundant wildlife including wombats, and the Tasmanian pademelon, while out in the more open alpine areas, pandanus palms are conspicuous in the landscapes.

Cradle Mountain in winter with snow is best accessed with a 4WD – these can be hired from Launceston (the nearest main airport which is ~ 2.5hrs drive to the resort through some winding hilly roads), but can also be hired from Devonport which is a little closer but flights are less frequent.

As the resort, being at ~1000m altitude, may well be above the snow line in Winter, be prepared to pay an extra $20/day cover for the vehicle to be insured at that level, on top of the additional $40/day levy to bring the insurance excess down to $1000 – check different hire care companies to avoid such unexpected expenses.

Cradle Mountain peak itself is 1545m and can be climbed although this is not advisable in poor weather conditions, and walking on snow there is dangerous.

Although there was no snow when we arrived, the following night, heavy snow fell covering the resort and continued to fall though the following days, making 2WD vehicle access difficult or dangerous on the icy roads without snow chains, and indeed, until the weather cleared, 2WD cars were banned from the entrance of the park to Dove Lake which is the start of many of the longer walks.

It is also worth being aware that Cradle Mountain is a National Park and you will need to pay a fee to access it – at present this is around $16 pp per day, or $60 car pass which covers 2 months access.

The weather in Winter can be expected to range from minus 5 degC to +10degC, while rain and snow may occur along with strong winds which may result in a wind chill factor of around minus 12deg C.

Walkers, even for short 1-2hr walks must come well prepared – for those doing short-medium walks who want to travel light, avoiding becoming fatigued, wet or lost is a prime aim, so consider taking the following:

  • backpack with waterproof cover
  • drinking water, food (for longer walks), map, compass, smartphone (although you may not get service – Optus coverage is non-existent, Telstra coverage there is good, although may fail in a snow storm)
  • sunglasses and lip balm and consider UV protection, particularly on the snow
  • waterproof walking shoes (eg. Gortex lined), or waterproofed boots (these are particularly advised if snow is likely)
  • thick socks (some prefer wearing 2 pairs)
  • light waterproof and windproof jacket with hood
  • light waterproof and windproof overpants (for those on longing walks, heavier, more durable Gortex pants may be preferred)
  • layers of clothing – you will tend to get cold when standing around and tend to get hot and sweaty when walking, particularly up hills – this can be mitigated by adjusting clothing layers and opening front zips
    • one or two thin inner shirts – one of which at least should be long sleeved
    • long-sleeved woollen jumper or synthetic fleece zipped top
    • duck down-filled vest – but this must be kept dry – so put your waterproof jacket on if it starts to rain
    • thermal leggings
    • either shorts or tracksuit pants – avoid denim jeans – they are a disaster if they get wet! Photographers in particular, will want to be wearing the waterproof overpants if the ground is wet to avoid getting themselves wet when kneeling down for shots or climbing out of creeks, etc.
  • light gloves so you can still operate the camera buttons
  • heavier waterproof, warm gloves if it will be colder such as in snow
  • beanie and scarf for when the wind picks up
  • consider gaiters for longer walks, as these will help avoid your socks getting wet from rain or snow, reduce risk of sand and gravel entering shoes, reduce injuries to lower legs from sharp sticks, etc.
  • camera – preferably small, light, compact, water-resistant, cold-resistant such as the Olympus OM-D E-M1 Micro Four Thirds camera with Olympus 12-40mm f/2.8 lens – this will allow much longer hand-held shots (than any other current camera) down to even 2 secs for those lovely flowing water shots and may mean you can avoid taking a tripod – but do take a ND filter and a polarising filter to help you get longer exposures, and take a spare battery in a warm pocket as the cold shortens their capacity. If you are taking a dSLR such as a Nikon or Canon, then you should take a good tripod with you which is sturdy and has insulated legs. This Olympus kit could be supplemented with the Olympus 60mm macro lens which is also weather-resistant, light and compact but adds 1:1 macro capability as well as some telephoto if needed. If you cannot afford the Olympus 12-40mm f/2.8 pro lens, then consider the light, compact, Olympus 12-50mm macro kit lens – it will give you more telephoto plus some macro capability, and given that most of your shots will be around f/8 for the best compromise in depth of field and image sharpness, this lens should suit you well, although it will not be as useful in low light.

Before setting out on ANY walk, you should check the weather forecast and register in the huts provided so people can better decide if, when and where they should start searching for you if you do not return.


Dove Lake – Olympus OM-D E-M5 camera with Olympus 12mm lens:

Dove Lake after the snow

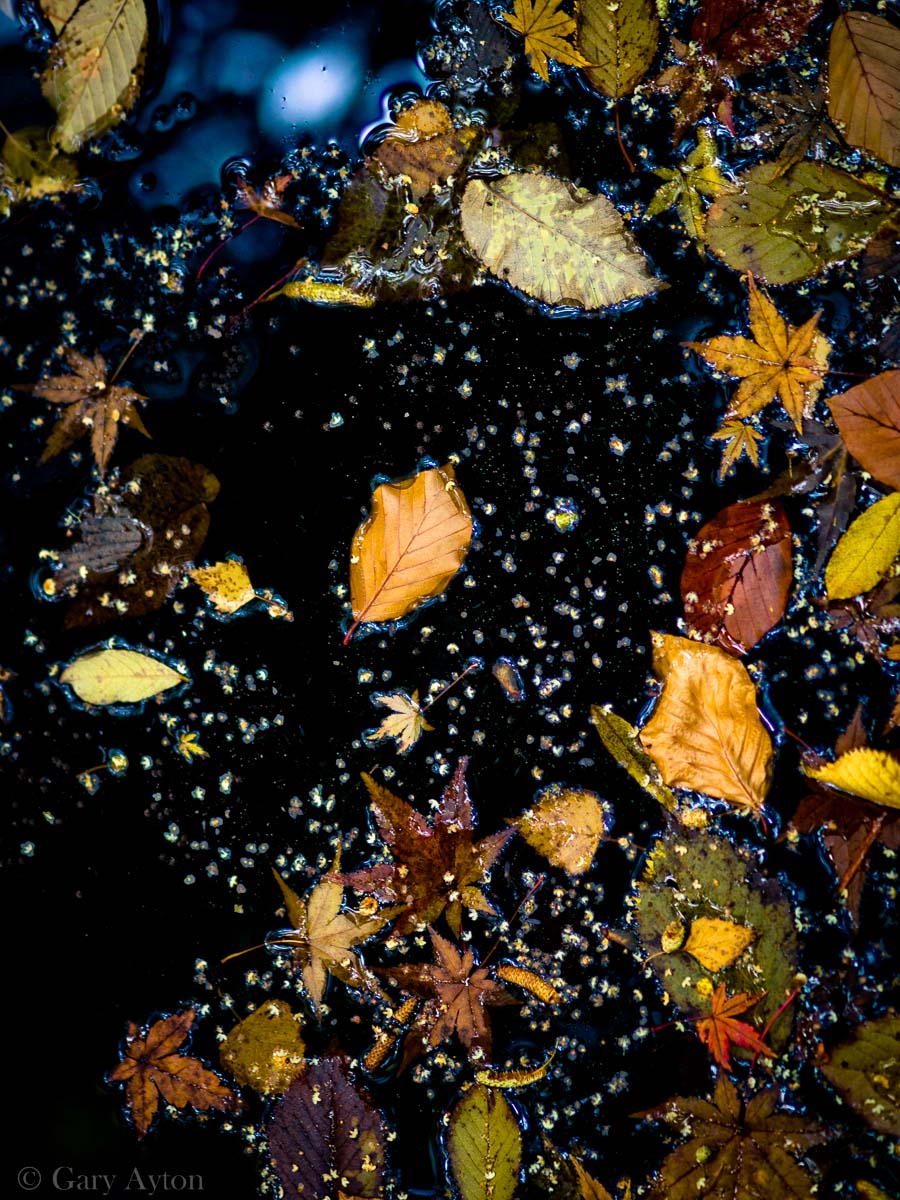
Dove Lake – Olympus OM-D E-M5 camera with Olympus 60mm macro lens:

Dove Lake after the snow

I can’t believe I was silly enough to do a 2 hour walk around this lake the previous night – half in the dark without torches on very uneven and slippery tracks and in the driving rain and wind, just before the snow started falling and didn’t break an ankle! We had planned to do a short walk but when we reached 1/3rd of the way around, we recklessly decided to complete the loop rather than go back. Memo… when walking near sunset, always take a torch!!!

Olympus OM-D E-M5 camera with Olympus 60mm macro lens:

near Dove Lake after the snow


The tree of knowledge – the Olympus 75mm f/1.8 is great even into the sun

Written by Gary on June 1st, 2014

Following on from my earlier post demonstrating images taken on Daylesford, Victoria with the Olympus 75mm f/1.8lens, here is another from that region.

This was again shot using the lovely, light and very sharp Olympus mZD 75mm f/1.8 lens& on the Micro Four Thirds camera, the lovely little Olympus OM-D E-M5:

the tree of knowledge

tree of knowledge

This image was exposed to create a silhouette and then processed in Lightroom principally to darken and warm the clouds.

ps.. if shooting into the sun, remove any filters which may introduce internal lens flare – unless of course, you want this.


Yet another day out with the Olympus 75mm f/1.8 lens

Written by Gary on May 29th, 2014

Following on from my earlier post demonstrating images taken on Daylesford, Victoria with the Olympus 75mm f/1.8lens, here are some more from nearby Mt Macedon.

These were shot using the lovely, light and very sharp Olympus mZD 75mm f/1.8 lens& on the Micro Four Thirds camera, the lovely little Olympus OM-D E-M5 (NB. no PS other than toning adjustments):

autumn light

autumn light

An alien deciduous tree in an Aussie eucalypt forest

an alien tree

Fall leaves:

fall leaves

Winter is coming:

Winter is coming


Occultation of saturn by the full moon tomorrow night (14th May 2014)

Written by Gary on May 13th, 2014

UPDATE: Here is a shot from tonight using the Olympus E-M5 with Olympus 45mm f/1.8 lens and eyepiece projection via a 10″ Newtonian telescope. Seeing was not great but at least the clouds were less than earlier.

saturn occultation May 2014

Those lucky people in Australia with access to a camera and a telescope (or at least a telephoto lens with around 1000mm or more focal length in 35mm terms) will be able to attempt to photograph saturn with its rings going behind the full moon (this is called an occultation) tomorrow night.

Times in the various cities can be found on Ian Musgrave’s web blog post here.

For those of use in Melbourne where the forecast is for nice clear skies (hopefully), saturn will disappear behind the moon at ~ 8.50pm local time and then reappear around 10pm.

You will not need to go to a dark rural site as light pollution will not be as much of a problem other than preventing accurate polar alignment – but this is not really needed either given the short exposures of well less than 1 second. More of an issue is atmospheric disturbances so, a site above grassed land or over water and away from houses is preferred – but then you will have to deal with standing on wet, dew affected grass. For best seeing, elevated sites away from urban areas may be best – but these are colder.

You will need to have everything set up by about 8pm to ensure it is all working for you, and the telescope has had a chance to cool down so your seeing conditions are better.

You will need to manually focus on the moon or saturn well before the crucial events occur as you will be too busy taking shots in the couple of minutes or so each event itself will last.

Ideally you will control your camera remotely so you don’t shake the telescope, and ideally you won’t be using a SLR but a mirrorless camera so the mirror doesn’t shake the telescope.

An ideal camera for this is the new Micro Four Thirds cameras such as the Olympus E-M10 or Olympus E-M1 as these are not only mirrorless cameras which can shoot at rather fast burst speeds of around 10fps for brief bursts (you need rapid shots as atmospheric seeing changes rapidly within each second so sharp images may only be seen on a few frames out of 10 shots), but you get a great compromise in having the most telephoto effect for a large sensor camera while still having good image quality at ISO 1600-3200 (and you will probably be needing ISO 3200).

Better still, these 2 cameras allow you to wirelessly tether to a smartphone so you can see what you are imaging on your smartphone BEFORE you take it and remotely release the camera shutter without shaking the camera. Very nice indeed – my Olympus E-M5 does not have this feature so I will be using a TriggerTrap accessory and iPhone app to trigger the camera by cable.

Manual focus is made more accurate by being able to magnify the image in the electronic viewfinder.

Here is a previous blog post of mine demonstrating what can be achived using the Olympus E-M5 with the TriggerTrap accessory to photograph the occultation of Jupiter by the moon.

Tomorrow night’s event will be a little tougher as saturn is much less bright than jupiter, but it will be higher in the sky so hopefully there will be less atmospheric disturbance and less atmospheric extinction.

Here is one of my images from the Jupiter occultation:

Jupiter

Good luck and have fun.

For those without the above, a pair of binoculars will be useful.

More on astrophotography here, and more on lunar occultations here.


Another day with the Olympus 75mm lens – Daylesford

Written by Gary on May 10th, 2014

Following on from my earlier post demonstrating images taken on Mt Macedon, Victoria with the Olympus 75mm f/1.8lens, here are some more from nearby Daylesford – a lovely township in central Victoria famous for its mineral springs such as those at Hepburn Springs.

These were shot on a sunny day  using the lovely, light and very sharp Olympus mZD 75mm f/1.8 lens& on the Micro Four Thirds camera, the lovely little Olympus OM-D E-M5 (NB. no PS other than toning adjustments):

the olde cart

the olde cart

Aussie farm tools from a bygone era

farm tools

Remains of vintage train wheels at Trentham:

train wheels


Have I told you how much I love the Olympus 75mm f/1.8 lens?

Written by Gary on May 4th, 2014

I really enjoy going for walks in the forests and gardens in the nearby hills, and taking the light and compact Micro Four Thirds camera kit avoids making these walks a burden as often happens carrying the larger, heavier dSLRs.

Following on from my earlier post demonstrating images taken on Mt Macedon, Victoria with the Olympus 75mm f/1.8lens, here are some more from Tieve Tara, one of the private gardens up there open to the public from Sept – May.

Even though these were shot on a very overcast day in low light, I still prefer to use a polarising filter for when I am shooting leaves so I was thankful I had the Olympus OM-D E-M5 with its 5-axis image stabiliser to help out with these hand held shots without flash in low light using the lovely, light and very sharp Olympus mZD 75mm f/1.8 lens (NB. no PS other than toning adjustments):

Aussie garden diptych I

diptych I

Aussie garden diptych II with flowers as focal point

diptych II

The hidden garden:

hidden garden


Lunar eclipse over Melbourne

Written by Gary on May 2nd, 2014

Last month’s eclipse of the moon at moonrise in Melbourne was quite challenging to photograph.

It would have been nice to find a location with the city’s buildings in the foreground, but given the position of the moon rise this was not easy and thus a spot along the shores at Williamstown was chosen which looked across the bay towards St Kilda’s Palais Theatre.

The very dim eclipsed moon was difficult to see rising over the Dandenong Ranges in the distance and it was not until it was some 5 degrees above the horizon that it could be seen through the autumnal haze. Manual focus was made much easier with the electronic viewfinder and image stabilisation during magnified view using the Olympus E-M5 camera.

My initial attempts were with the Olympus E-M5 with Olympus ZD 50-200mm f/2.8-3.5 lens with 2x converter (the EC-20) at full 200mm focal length giving an equivalent field of view of 800mm on a 35mm camera.

This is a favorite set up of mine for the moon but being so low and with the atmospheric disturbances it was not possible to get sharp imagery of the craters.

Timing of the shot of a lunar eclipse is quite critical as the most aesthetic image is when the sunlight just starts to hit the edge of the moon (as shown below).

I then resorted to doing wider angle shots to show the yachts anchored nearby, so here is my version of the lunar eclipse:

lunar eclipse

EXIF: 100mm focal length (50mm + 2x telecoverter = 100mm in Micro Four Thirds crop = 200mm in 35mm full frame equivalent), ISO 1600, f/7.1 (f/3.5 x 2), 1/4sec, tripod mounted.

See my wiki for how to photograph the moon.


Gardens and forests with the Olympus 75mm f/1.8 lens

Written by Gary on May 2nd, 2014

I really enjoy going for walks in the forests and gardens in the nearby hills, and taking the light and compact Micro Four Thirds camera kit avoids making these walks a burden as often happens carrying the larger, heavier dSLRs.

Even though these were shot on a very overcast day in low light, I still prefer to use a polarising filter for when I am shooting leaves so I was thankful I had the Olympus OM-D E-M5 with its 5-axis image stabiliser to help out with these hand held shots without flash in low light using the lovely, light and very sharp Olympus mZD 75mm f/1.8 lens (NB. no PS other than toning adjustments – a lot with the psychedelic garden!):

Girl leap frogging her brother in front of a pond:

girl leap frogging her brother

Dreaming of what life could be:

girl dreaming

Too much mountain fresh air – a psychedelic garden:

psychedelic garden


Abstract forest:

And by putting the E-M5’s image stabilisation into panning mode, we can shoot the forests in an abstract manner by sweeping the camera at 1/30th sec.

abstract forest


Killing time in the botanic gardens with the Olympus mZD 60mm f/2.8 macro lens

Written by Gary on March 30th, 2014

What do you do when you have an hour or so to kill and you are in the CBD of a city such as Sydney?

Head for the botanic gardens for a relaxing walk and see what you can find.

As long as it is not windy, you can use the time to search for subjects for your macro lens – be warned, even the slightest movement of a plant will make your subject blurred unless you use a flash.

It was a very overcast day in low light so I was thankful I had the Olympus OM-D E-M5 with its 5-axis image stabiliser to help out with this hand held shot without flash in very low light using the lovely, light and very sharp Olympus mZD 60mm f/2.8 macro lens:

Australian native long legged fly

This dainty little metallic blue and green Australian fly is the long legged fly (Austrosciapus connexus) – which is mainly found along the east coast of Australia, Adelaide and Perth but not in southern Victoria or Tasmania.

And here are a few cacti that caught my attention:

cactus flower

cacti

cacti

And a water lily using the awesome Olympus 75mm f/1.8 lens at f/1.8:

water lily

This macro lens is fantastic, not only because it is incredibly sharp, and it has focus range limiters for faster AF which, by the way is very fast, and it is image stabilised in 5 axes by the E-M5, but it is so light and small you don’t even notice you are carrying it in your bag, and your hands don’t start shaking from its weight as you try to hold it steady for the shots.