Nikon introduces new full frame pro sports dSLR – the Nikon D5

Written by Gary on January 21st, 2016

Nikon recently announced a new pro dSLR for their sports and wildlife photographers who have $US6500 to upgrade from their aging Nikon 4DS, and it adds some nice new features to get them excited.

Specs of the new Nikon D5 dSLR:

  • 20.8 mp full frame sensor
  • native ISO 100-102,400
  • 12fps burst rate
  • all-new autofocus module with 153 points, 99 of which are cross-type
  • EXPEED 5 processor
  • 4K video but this is very limited
  • touchscreen LCD
  • support for Nikon’s new radio remote TTL flash functionality (requires a radio TTL compatible flash)
  • $US6500

On paper, seems like a great camera for Nikon’s sports and wildlife photographers who will get much improved high ISO performance, better AF, some 4K video capability as well as remote radio TTL flash.

 Why carry all this weight and pay $US25,000 for a telephoto kit?

In my last post, I blogged about the wonderful new super telephoto lenses for Micro Four Thirds – the Olympus 300mm f/4 and the Panasonic 100-400mm.

You could use a Panasonic GH-4 mirrorless camera with the 100-400mm zoom and gain not only wonderful hand held telephoto reach up to 800mm in full frame terms but better 4K video quality, and this for well under $US4000 and perhaps a quarter of the weight and size as a Nikon 600mm full frame telephoto with less reach.

Alternatively, you could use an Olympus OM-D E-M1 with the 300mm f/4 lens and gain unprecedented image stabilisation capability with superb optics in a much more compact size and weight than the Nikon kit and again coming in at under $US4000.

So why then buy the Nikon outfit?

The answer is primarily, the improved capability of shooting moving subjects in very low light – a scenario where image stabilisation is of very limited utility as you need sufficiently fast shutter speed to adequately stop the moving subject – and here is where image quality at high ISO becomes a prime consideration.

The Micro Four Thirds cameras will get you to ISO 3200 with good image quality but it can be expected that the Nikon will give you at least 1, maybe 2 more stops of higher ISO for similar image quality, although we will have to await tests to see how good the Nikon really is.

The Micro Four Thirds options will be just as good and perhaps even better for many situations such as studio work, macro work, static wildlife/sports subjects and for moving subjects in good light (although the Nikon’s AF may be better, and the optical viewfinder will have advantages in this situation) and allow for far more versatility and maneuverability thanks to not being stuck with a large heavy tripod and having to carry large lenses.


2 new premium quality super-telephoto lenses for Micro Four Thirds – Panasonic 100-400mm and Olympus 300mm f/4

Written by Gary on January 8th, 2016

Micro Four Thirds camera users are spoilt by the rich array of wonderful lenses at their disposal – but until now there has not been any premium quality super-telephoto lens optimised for CDAF (there are Four Thirds lenses such as the superb 300mm f/2.8 which do work well with phase detect cameras such as the Olympus OM-D E-M1), and now, at last, we have been endowed with 2 great lenses coming to a camera store near you over the next 2-3 months.

Each lens has its advantages and disadvantages which will make us all spend weeks trying to decide which will be best for our needs.

These lenses although very niche in the dSLR world given they would need tripods, have a much more versatile utility in the Micro Four Thirds world ranging from wildlife, nature macrophotography, sports action, and perhaps even for concerts when silent shooting is needed from a distance.

At only around 1kg, even long distance overnight hikers would consider carrying one of these to get those shots that full frame dSLR users would need Sherpas to carry their gear.

In addition, the amount of background perspective compression can make them useful for fashion photography and other creative uses.

The class leading image stabilisation of these camera-lens combinations with lower weight and bulk make them superior to dSLR alternatives for use where tripods are not useful such as on ships to the Antarctic, while the weathersealing and freezeproof design of the Olympus lens also comes in handy!

Common features:

  • compatible with any Micro Four Thirds camera whether Olympus or Panasonic – although having the same brand as your camera can give better functionality
  • weathersealing
  • high optical quality
  • tripod mount
  • focus limiter switch
  • close focus is around 1.3-1.4m giving very useful macro performance of around 0.48x macro in full frame terms
  • optical image stabiliser which can be combined with the camera’s sensor based image stabiliser to allow even better dual system image stabilisation (but will this work on different branded cameras?)
  • relatively large and expensive for Micro Four Thirds but smaller, lighter and less expensive than a full frame lens of similar quality and field of view
  • nano coating for reduced flare and improved contrast
  • fast, silent AF capable of face detection AF and even nearest eye detection AF, and optimised for video
  • 9 rounded aperture blades

The benefits of the Panasonic lens over the Olympus lens are:

  • its a zoom lens which means it is more versatile, particularly when subjects are coming towards you as you have 200-800mm field of view in 35mm full frame terms in an easily handholdable lens and it has a zoom position lock
  • it is considerably less expensive at $US1799 vs $US2499
  • considerably lighter at 985g vs 1270g
  • considerably shorter at 172mm vs 227mm
  • 10mm thinner at 83mm vs 93mm
  • smaller, cheaper filters at 72mm vs 77mm
  • AF will be faster on Panasonic Lumix cameras than the Olympus lens thanks to compatibility with Panasonic’s DFD (Depth From Defocus) technology (presumably no difference on Olympus cameras though)

The benefits of the Olympus lens over the Panasonic lens are:

  • wider aperture at 300mm allowing 1EV lower ISO to be used as presumably lets in around twice as much light or 1 stop more light (600mm field of view in full frame terms)
  • ability to use the Olympus mZD MC-14 teleconverter which converts it to 420mm f/5.6 (840mm field of view in full frame terms)
  • the “highest resolution lens ever made by Olympus” which promises superb optical quality
  • focus limiter switch has 3 settings not just 2 and thus improved utility for nature macrophotography
  • perhaps better weathersealing with its 11 separate hermetic seals, and Olympus is renown for its wonderful weathersealing
  • Manual Focus Clutch mechanism for improved manual focus feel and rapid access
  • configurable lens function button can be used to suspend C-AF, etc
  • image stabilisation may be somewhat better, particularly as few Panasonic cameras have built-in sensor based image stabilisation and Olympus are class leaders in this technology

The Panasonic Leica DG 100-400mm f/4-6.3 Power OIS lens:


Panasonic lens

  • model H-RS100400
  • 200-800mm telephoto reach
  • 20 elements in 13 groups (1 aspherical ED lens, 1 UED lens, 2 ED lenses)
  • Power OIS image stabiliser with Dual IS compatibility
  • high speed digital signal exchange at 240 fps to comply with the high-speed, high-precision AF (Auto Focus) with DFD (Depth From Defocus) technology on LUMIX G cameras
  • focus limiter 5m to infinity
  • built in sliding lens hood
  • 171.5mm / 6.75in long but extends upon zooming
  • 83mm / 3.3in diameter
  • 985g / 34.74oz excl. lens hood, tripod mount
  • $US1799
  • see my wiki for more links and information

The Olympus mZD 300mm f/4 OIS lens:

Olympus lens

dual IS

  • 600mm field of view (840mm with MC-14 teleconverter)
  • weathersealed with 11 separate hermetic seals
  • freezeproof
  • 5-6EV optical image stabiliser and dual IS / sync IS with certain cameras
  • “highest resolution” Olympus lens ever made
  • fast, silent AF (completely silent shooting when used in electronic shutter mode)
  • Zero and Z nano coating
  • Manual Focus Clutch mechanism
  • 17 elements in 10 groups
  • close focus 1.4m giving 0.48x macro in 35mm terms
  • 3 position focus limiter: 1.4-4m, 4m to infinity and full range
  • configurable lens function button
  • 77mm filter
  • 93mm x 227mm
  • 1270g (27lbs) excl. tripod mount presumably
  • compatible with Olympus mZD MC-14 1.4x teleconverter to give 420mm f/5.6 (840mm telephoto reach in full frame terms)
  • $US2499
  • see my wiki for more links and information

Handheld video shot entirely at 840mm field of view using the Olympus 300mm plus MC14 teleconverter – amazing IS indeed!

Summary

Users will have an agonising decision to make as these are two wonderful lenses but given the price, it is likely only one will make it into your kit, so you need to decide whether you go for smaller size and zoom versatility vs larger aperture, perhaps better optics and better low light capability of the Olympus.

For those who cannot afford these, all is not lost, there are a number of enthusiast quality telephoto zooms for Micro Four Thirds which are lighter, smaller and much less expensive, but you do get what you pay for here. Examples are Olympus mZD 75-300mm f/4.8-6.7 and the Panasonic Lumix G Vario 100-300mm f/4-5.6 Mega OIS.

Compared to the new Canon EF 100-400mm pro lens:

For perspective, Canon has recently introduced a superb telephoto zoom lens, the Canon EF 100-400mm f/4.5-5.6L IS II USM lens which could be used on a APS-C cropped sensor dSLR such as a Canon 7D to give 160-640mm OIS which places it between these lenses in capability and price with these notable features:

  • only 640mm telephoto reach (on testing it only gets to 383mm = 613mm) and this is at f/5.6 (half the light of the Olympus and much less reach than the Panasonic lens)
  • heavier at 1.64kg incl. tripod mount
  • image stabiliser is not as effective (“4EV” vs “5-6EV” for the Olympus) and not able to be used in Dual IS mode as Canon do not make sensor based IS cameras
  • weathersealing is not as good as the Olympus as only “dust and moisture sealed”
  • cumbersome bayonet style lens hood not like the sleek slide on hoods on these lenses
  • AF is not optimised for CDAF camera systems and thus not optimised for Live View, silent AF, nor video C-AF nor for face detection or eye detection AF
  • vignetting is severe while sharpness is a bit soft wide open at 400mm when tested on full frame cameras
  • similar close focus macro magnification although working distance shorter at 1m
  • less accurate AF as needs micro adjustment calibration for each camera
  • AF sensors cover less of the image frame than with mirrorless cameras
  • $US2199

Other options for Canon and Nikon dSLR users:

Canon APS-C users also have the less expensive option of the excellent 1993 designed Canon EF 400mm f/5.6L lens which comes in at 1.25kg although much longer, and only $US1249 but it is not fully weathersealed, and does not offer image stabilisation and thus really needs to be used at high ISO and on a tripod, and the close focus capability is substantially poorer with close focus only down to 3.5m. Furthermore it only has 8 straight diaphragm blades not 9 rounded blades. Nevertheless, this lens has been popular with birders. Most Canon users though would be better off with the Canon EF 100-400mm II lens outlined above.

Nikon DX users have the option of the new Nikon AF-S VR 80-400mm f/4.5-5.6 G ED lens giving 120-600mm in full frame terms but it is a touch heavier at 1.47kg w/o tripod collar, priced at $US2299 (RRP is $US2699), does not focus as close (1.75m vs 1.4m), image stabiliser not as effective at 4EV, not optimised for CDAF (see above), cheap, plasticky bayonet lens hood, and is not weathersealed.

Both Canon and Nikon cropped sensor dSLR users also have the option of the 300mm f/4 image stabilised lenses combined with a 1.4x teleconverter to give around 600mm f/5.6 telephoto reach but these lens combos weigh in at about 1.4-1.5kg and would not match the image quality nor the image stabilisation of the Olympus lens, let alone the CDAF functionality. Nikon does however have a new fresnel technology ultralight 300mm f/4 lens which is half the weight of a usual lens and comes in at 755g and $US1999, but you then need to factor in the teleconverter and potential for fresnel artefacts.

Full frame dSLR users will have to use heavy, very expensive lenses to get to this 600-800mm telephoto reach or resort to 2x teleconverters with the above 300mm f/4 lenses and try to AF with an f/8 widest aperture.


Solo overnight hike to summit of Mt Stirling

Written by Gary on December 27th, 2015

Following on from my overnight camping hike up Mt Feathertop, I decided it was time to do one solo.

I thus decided upon Mt Stirling as it was relatively close to Melbourne (some 3hrs drive via Mansfield) and the hike up the mountain is only half as long as the Mt Feathertop hike (4.5km at 500m altitude gain vs 10.5km at 1100m altitude gain), and with the extra weight of cooking gear and food, I felt this would be a good hike to start as a solo endeavour, given I did struggle with the ascent of Mt Feathertop given my lack of fitness.

I had considered extending the hike across The Monument saddle to camp near Craig’s Hut of The Man from Snowy River movie fame but wisely considered this might be a touch too much and perhaps best done another time as the walk from there back up Mt Stirling is on a very steep, severely eroded 4WD track and not much fun with a heavy backpack.

Mt Stirling is in the Victorian Alps and rises to 1749m which is similar to nearby alpine resort of Mt Buller.

Unlike commercialised Mt Buller, Mt Stirling offers camping and is a relatively “remote” camp site – I was the only person camping up there the night I went.

That said, as I soon discovered 2/3rds of my way up the mountain, you are not really isolated from people – I met 3 teams of commercial horse trail riders each with about a dozen horses, and leaving plenty of fresh presents for me to step in while attracting a multitude of flies, and then around 9.30am on a Monday morning, a 4WD enthusiast decided to pit his car and his skills against the treacherous 4WD ascent track to Mt Stirling, presumably not for the views nor to experience the ambience of Mt Stirling but just as a challenge to himself and his colleague, and to further erode the already severely eroded track.

Having left my car at the Telephone Box Junction (TBJ) and placed a note of intention of my trip in the ranger’s post slot, I again mounted my new Aarn Peak Aspiration Body Pack which weighed around 16-17kg with 1.5kg of water.

To reduce weight given that this trip I needed to carry cooking gear and food for dinner, I decided to leave my lovely Olympus mZD 40-140mm f/2.8 lens at home as this would save nearly 1kg, but given the forecast was for the clouds to clear by midnight, and there was hope of Geminid meteor shower being visible (I was 24hrs early for the peak of the shower), I decided to bring a small tripod and the Olympus mZD 8mm f/1.8 fisheye lens as well as my only other lens for the trip – the small, light, Olympus mZD 12mm f/2.0 lens. Of course, I also brought along my Olympus OM-D E-M1 Micro Four Thirds mirrorless camera. I feel sorry for those hikers who have to cart big heavy dSLRs such as Canon or Nikon with their big, heavy lenses and big, heavy tripods to match.

Despite the weight of my backpack which again performed beautifully for me, the walk up Mt Stirling was pleasant amongst the tall eucalypts and the overcast skies kept the summer temperatures to a comfortable level for strenuous uphill hiking, made all the more enjoyable by knowing that it is only a 2.5hr walk and then I would be able to relax and take in the awesome ambience of being the only person on top of the mountain overnight.

The enjoyment was somewhat reduced with the horse manure and flies, and then, once at the top, by the small but aggressive Australian native alpine ants, Iridomyrmex alpinus, which insisted on swarming over my feet and giving me a few friendly nips whenever I had inadvertently encroached near their ground nests hidden amongst the low foliage on top of the mountain. I thus took some time to plan where I would pitch the tent, even though it was insect proof.

There are a number of emergency huts along the way to the top of Mt Stirling should the weather become extreme, and near the camp area at the base of the summit, there is the Geelong Grammar School hut with a rain tank which unlike at Mt Feathertop, this one had water, although not potable and required treating. To save weight I did not bring the Camelbak All Clear UV water sterilisation kit, but instead brought along a 10 micro water filter kit, which although slower to process the water is considerably lighter.

After pitching my Big Sky Revolution 2P tent and boiling water for tea and for my dehydrated beef pasta dinner, I became excited by a very unexpected sunset as the sun managed to find its way under the big blanket of cloud to light up Mt Speculation and the Cross Saw ridge:


Mt Speculation

I tried to get some sleep and wake up after midnight when the forecast for the cloud to disappear came to fruition and allow me access to the summer Milky Way and the Geminid meteors, but alas, sleep did not come easy, but I was rewarded with beautiful dark skies full of stars, but very few meteors (I was after all 24hrs too early for the peak meteor shower).

Looking south to the Southern Cross, Centaurus and the Magellanic Clouds whilst I boiled water at 2am for a hot chocolate and marshmallow – a meteor came shooting down from the Small Magellanic Cloud aiming straight for my tent (Olympus mZD 8mm f/1.8 fisheye lens at f/1.8, 30secs):

Meteor

and at last a Geminid meteor sweeping from Castor and Pollux, the Gemini twin stars at lower right and across to the left upper between Orion and Taurus with the lights of the alpine tourist town of Bright in the distant north-east horizon:

Geminid

Next day, after earlier moving my tent into the shade of a tree, I was awoken at the unearthly hour of 11.30am by female voices warning me that there were women around and perhaps extracting myself from the tent naked would not be a good idea – I suspect they were secretly hoping for a Hugh Jackman pouring a bucket of water over himself, but instead, they got a bleary eyed George Clooney asking where the Nespresso machine was and discovering instead, a dozen women on horseback!

The heat of the midday sun meant it was well and truly time to eat the remains of my cheeses and “twiggy stick” salami before it went off, and then to go exploring the summit of Mt Stirling and the ridge across towards Stanley Bowl.

The summit (at left) from the east ridge looking towards the prominent Mt Cobbler:

summit

and another view along the more gentle parts of the 4WD track – the camp ground is the small clearing to the right of the base of the road:

Mt Cobbler

View of Mt Buller from the eastern ridge:

Mt Buller

The hike back down to the car was hot and sunny (it was 34degC at the base of the mountain, although I suspect it was only around 20-24deg air temperature for most of the hike but the direct summer sun made up for the difference!). I decided to go a different route down which was longer but supposedly more picturesque. I took the first of several possible short cuts, this one was to Wombat Drop but after some 400m the path which had been notable for the grass becoming longer and more difficult to see snakes in, suddenly was terminated by a sign indicated it was under revegetation and thus I returned back up the path to the gravel track and continued on my merry way.

Somehow, perhaps because of this experience, I missed the last of the shortcuts and ended up walking far further than I needed to, down to King Saddle Hut, and a very boring 4km or so walk along the Summit Circuit Road (had I bothered to put my reading glasses on and consult a map, I could have walked instead to Razorback Hut instead of along the circuit road) back to the TBJ where fortunately, my car still had all four wheels and the windows were even intact!

The drive back to Melbourne was broken by a hamburger in the township of Yea, but I did miss not being able to allow myself extra time to photograph the beautiful late afternoon light coming through onto the hillsides in this lovely region. I was concerned that the boring drive down the Hume Freeway would put me to sleep and to further delay my trip home would only create a greater risk. I thus regrettably gave up on enjoying the beauty of an uncommon light that was truly inspirational.


A review of the Big Sky Revolution 2P ultra-light 2 man hiking tent

Written by Gary on December 27th, 2015

Despite me getting on in the years, I am a new comer to overnight hikes and bushwalks, so after much research and advice from the more experienced campers, I purchased the Big Sky Revolution 2P hiking tent as a 3 season tent for one person.

Given my advancing age, my main requirements were a light weight and compact tent which is fast and easy to pitch, capable of withstanding reasonable wind and rain while still being comfortable, weather-proof, come with a waterproof tub floor, and perhaps most important of all in Australia, insect proof with good ventilation.

In most parts of Australia, insects are a real annoyance, so a bug mesh is almost mandatory if one is to have any chance of a good night’s sleep – mosquitoes, flies, ants and midges are all very annoying in the warmer months in particular.

Be aware that no ultralight hiking tent will stop a persistent native rat or mouse gnawing through the tent to get to your food – so be careful how you manage your food to reduce attracting them into your tent.

But what about ultra-light shelters?

I had looked at the ultra-ultra-light shelter options, and whilst attractive in weight terms (300-850g), none seemed adequate to address all of the above requirements adequately for me:

  • most are single wall shelters which either lack space, lack 360deg protection, lack insect protection, and/or are not  likely to cope with prolonged rain and wind well.
  • the tarp style ones also tend to be more difficult to set up and keep the tarp pitched taut
  • to me, they would be great as emergency shelters when you are planning on a day hike but are forced to take shelter, or for some situations such as fair weather desert camping, but do risk leaving one without adequate shelter if the weather really turns sour for prolonged periods.
  • if you are using single wall shelters, check out this pdf on how to minimise condensation
  • excellent examples of these include:
    • poncho/cape – tarp – shelters such as Gatewood Cape Shelter which can be combined with the Six Moon Serenity Net Tent ($A229) but only sleeps 1 person and but combined weight is only 540g
    • trekking pole single wall tent shelters such as:
      • Big Sky Wisp 1 person tent
        • available in 300g-600g designs although the 300g version is $US300 more expensive as it uses lighter, stronger, more UV resistant, Let-It-Por Cuben fibre fabric
        • ventilation and condensation can be problematic
    • tarp with bug net such as:
      • Sea to Summit Escapist 15D large tarp with Ultra-mesh bug Tent
      • you do save perhaps 0.5kg at around 800-900g compared with the Rev 2P tent, but it costs much the same and you don’t get 360deg protection plus it is harder to pitch, less private and requires your trekking poles
      • some 300g heavier than the similarly priced Gatewood Cape solution but does provide room for 2 people and more versatile tarp but no 360deg protection or poncho
      • the tarp though does make for a very versatile accessory, and of course the bug tent could be used alone to better enjoy the outdoors in good weather, providing better visibility and connection with your surroundings
      • needs additional 12 stakes, 2 trek poles +/- groundsheet (if heavy rain) and lots of practice and space to pitch and preferably, 2 people to pitch – “with the various guyout points and the fact that the inner tent has to be setup separately, it can be quite a challenge”
      • best for the experienced tarpist or for expected mild weather conditions for those with patience to get the pitch reasonably weatherproof
    • 4 season tarp with bivvy

The search continued for a ultra-light 2 man tent:

I then went to camping stores and tried to pitch one or two double shell two-man tents, and found some where actually quite complex to pitch.

I did like the concept of the highly rated ZPacks Hexamid Twin Tent which is made from expensive, ultra-light cuben fibre and weighs only 540g, but it is quite expensive and is only made to order from the US, and thus even if I was prepared to pay that much, I would not have had it delivered on time.

The Big Sky Soul tents are also very nice as an easy to set up, free-standing tent with full bug mesh, tub and a fly, and these tents are great as you can see the sky with the vestibule unzipped, and in the day time or on warm nights, the whole fly can be removed to use it as a bug tent. They are light (1.1kg and $US365 for 2P Ultrasil), come in 1P or 2P versions and even ultra-light (724g but expensive at $US780) cuben fibre versions and are reasonably roomy and the fly does have a top vent, but there is only one vestibule, and no porch so rain could be an issue when unzipping it. The 2P floor measures 215cm long x 119/135cm wide x 107cm in centre height making it comparable to the S2S Bug Tent but easier to set up and 360deg weather protection.

In the end, I settled upon the Big Sky Revolution 2P hiking tent with porch and bug screen inner as I was impressed with:

  • ease and speed of pitching thanks partly to its external frame
  • can be set up in the rain without getting the interior wet
  • excellent ventilation (inner mesh walls with two high top vents in outer wall which can be opened to allow warmer, humid air to exit while air can also enter under the outer nylon or cross-ventilation through unzipped vestibules combined with extra internal air volume of a 2 man tent for 1 person) to reduce condensation forming
  • condensation is on the inside of the fly, so the interior mesh shields you from the moisture
  • taut walls to reduce pooling of condensation and rain as well as reducing wind noise
  • excellent bug screen protection
  • vestibules and entrance on either side
  • plenty of space to store your backpack, etc inside the tent when used as a 1-man tent
  • silnylon waterproofing of the outer wall and tub floor
  • do not need to be seam sealed like other silnylon tents
  • relatively light and compact – said to be 1.3kg but measured was closer to 1.5kg
  • ability to easily move the fully pitched tent to a better site without taking it down

Why not buy the Big Sky Revolution 1P one man tent?

  • whilst this is also an excellent tent, weighing some 200g lighter and around $100 cheaper, I decided that the benefits of the extra space outweighed either of these concerns for me.

Road testing

I have now used it on two overnight camping trips, the 1st to Mt Feathertop in strong winds averaging 30-35 knots with some protection from small alpine gums, and minimal rain, and the 2nd on Mt Stirling in good weather conditions but with winds 10-20 knots.

Pitching in the dark was easy and fast, just remember to peg the outer shell down if it is windy while you are assembling the poles!

When pitched the outer walls are taut.

Like most small hiking tents it can be awkward extracting yourself through the door but that would be nit-picking.

It coped extremely well with the strong winds even though I had only used one storm guy rope.

Both nights were at altitude around 1700m and the minimal temperatures only fell to around 7degC (early December which is summer in Australia) with lowish humidity, so there was no moisture build up internally or externally, although, the excellent ventilation of this tent should work well to prevent internal condensation.

The very thin silnylon floor is very slippery, so if you are not on flat ground, your mattress is likely to slide down – this apparently can be reduced by applying dobs of silicone in strategic places on the floor – “paint stripes of silicone across the floor. Use McNett SilNet or DuPont Silicone II and dilute it with paint thinner to the consistency of pancake syrup, then paint it on”.

The Silnylon is also a dirt magnet!

Although I purchased a footprint to go under the floor to provide extra protection, I did not use it.

On the 2nd trip which was a solo trip, I had spent the early hours of the morning photographing the night sky so I decided to sleep in. The hot mid-morning sun soon made the tent uncomfortably warm, but it was a very simple matter to just remove the pegs and move the whole tent fully pitched to a shady position then re-peg it. (Remove heavy items from within the tent so it can be lifted without having to drag it along the ground as this may result in tears!).

I noted reviews online which indicate it is hard to roll up and return to its bag as it is so slippery, I decided to do what the retailer advised, keep the inner all attached with its buckle clips ready for pitching next time, and just push it into the bag as you would a down sleeping bag.

I slept in a Sea To Summit Micro II sleeping bag which is rated down to 2degC for comfort and found that this was perfect for these conditions without need for thermal leggings, just a thermal top.

Mt Stirling at 2am – meteor aiming straight for my tent from the Small Magellanic Cloud galaxy while I was boiling water for a hot chocolate and marshmallow (Olympus OM-D E-M1 Micro Four Thirds camera with Olympus mZD 8mm f/1.8 fisheye lens):

Mt Stirling at 2am

Conclusion:

Everyone will have their own preferences and requirements when it comes to tents, and like cameras and lenses, there is no perfect tent to suit every person or needs.

So far this tent has delivered for me and hopefully will be durable.

More information on my Wiki.

Disclaimer:

I have not been paid or subsidised by any of these companies, nor provided with any of these to test.


Overnight camp 1400m hiking ascent to Mount Feathertop – how a sedentary middle aged photographer survived to get some great pics

Written by Gary on December 4th, 2015

I decided it was time to re-invent my life and instead of restricting myself to 2-3hr return bush walks, I needed to push the envelope and get a new outlook and actually be there for the golden hours at the start and end of the day instead of having to be heading home well before it.

For those reading my earlier blogs on central Australia, you will note that my largely sedentary lifestyle combined with man flu resulted in a lumbar disc prolapse back in August this year but I pushed through this and only a few weeks later with some help from my friends, I climbed up the 360m steep ascent to Mt Gillen near Alice Springs, then walked around Uluru and then followed this with a rocky hike through the Olgas – all of which markedly improved my disc prolapse pain to such an extent, I vowed I would regularly hike up some hills.

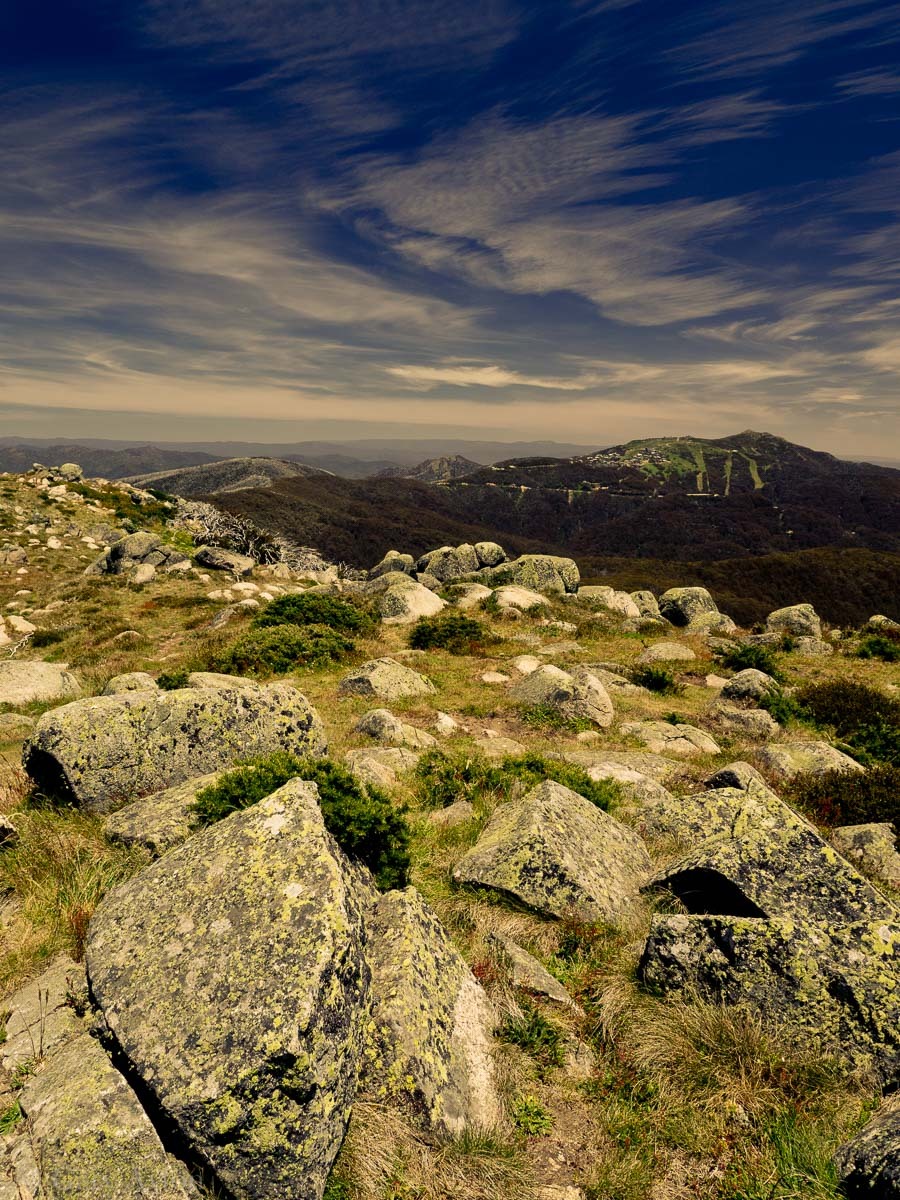
My friend then encouraged me to embark on my life changing aspirations and suggested we tackle the “gentle” climb up Mt Feathertop (altitude 1922m making it Victoria’s second highest mountain peak) and camp overnight.

Climbing Mt Feathertop is one of those bucket list items for many Australians as it is relatively accessible and the walk at the top is very enjoyable.

I was very dubious that a guy such as me, who, much to my wife’s disgust, hates the boring gym so much that he can only stand being there for 15 minutes twice a week,  would actually make this – yep, 2 minute sprints on a bike at the gym probably is not enough endurance training for this kind of hike – but he did say it is a “gentle” hike.

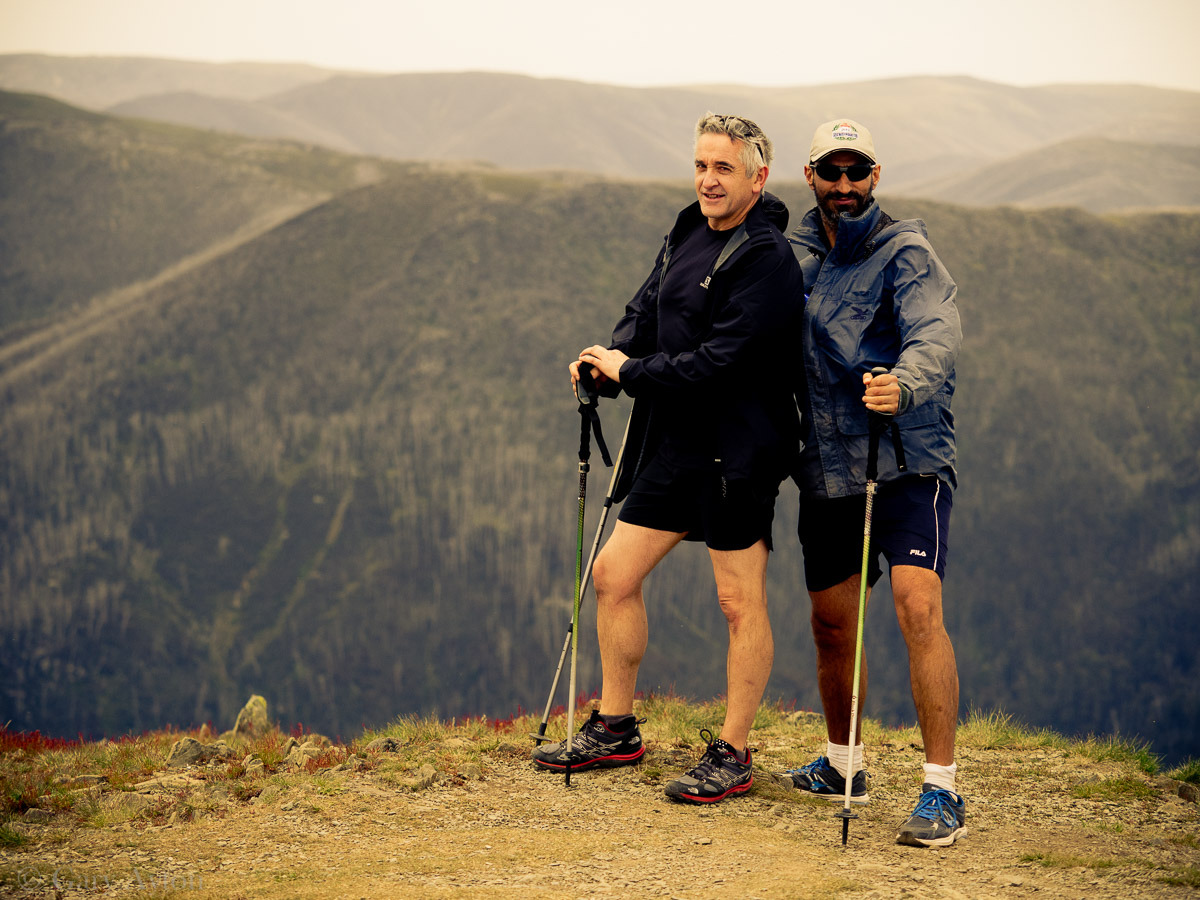
If I was going to do this, I was going to have to get as much as possible in my favour and this means buying some reliable, light gear and doing some planning as well as taking along 2 fit guys in case I needed them.

I did make it

Spoiler alert – Yes, I did make it to the peak!

Phase 1 – planning

I needed an ergonomic back pack that would not put too much strain on my neck or back – so after a bit of research I purchased the rather unique New Zealand Aarn Peak Aspiration “body pack” which encourages you to walk upright instead of stooped over as the load is not only mostly transferred to a nicely designed hip belt, but is counter-balanced by 2 packs on your chest in which you carry your camera gear, munchies, and water. These packs are cleverly designed to also place the load on the hip belt and at the same time lever away from your chest to allow air flow and visibility of your feet. I bought the “Long” version which allows some 47L in the rear pack and 6L in each of the front packs. The front packs are purchased separately as there are various designs for different purposes – I bought the regular photo version which is large enough top hold my Micro Four Thirds camera – the  Olympus OM-D E-M1 attached to a Olympus mZD 40-150mm lens in one pocket. If you are a dSLR user, you will probably need the Pro Photo version which is larger and better padded but makes the pack very bulky indeed. The back pack does need an experienced user to  customise the many fittings to your body shape, and I found that I could slope the hip belt downwards so it it optimised placement over my ASIS point of my pelvis while the buckle sits comfortably BELOW my little paunch which hides the 6 pack which should be there somewhere.
the backpack

The Aarn Peak Aspiration back pack with Photo pack on the front (Panasonic 15mm f/1.7 lens).

My aim was to be almost self-sufficient (apart from cooking which my friend was providing) and carry around 12kg which for me should make the ascent bearable.

Next I needed a 3 season light, compact, versatile sleeping bag which could be used for any temperature down to 2degC comfortably, and for this I chose the highly regarded Sea to Summit Micro II sleeping bag with 850 goose down and ability to keep foot end open, or open the whole bag into a quilt for thye warmer nights. This weighs about 600g.

For a light but stable, reliable 3 season spacious tent I chose the Big Sky Revolution 2 tent – a silnylon (and thus very slippery but waterproof and light) 2-man tent with 2 porches and although advertised at 1.3kg, actually weighed in closer to 1.5kg.

I picked up a Nemo Astro insulated air mattress on Ebay as reviews rated it well for comfortable sleep although it was a touch heavy at just over 500g, but much more affordable and less noise than the Thermarest Neoair XLite.

Being paranoid I decided to spend big and purchase a Camelbak All Clear UV light water sterilisation kit which weighed an extra 250g and which my colleagues thought was overkill as there would be plenty of water at the camp site, nevertheless, it came along as well as my EPIRB radio beacon, first aid kit, repair kit, extra guy ropes (gale force winds were forecast as 2 cold fronts were passing over that night).

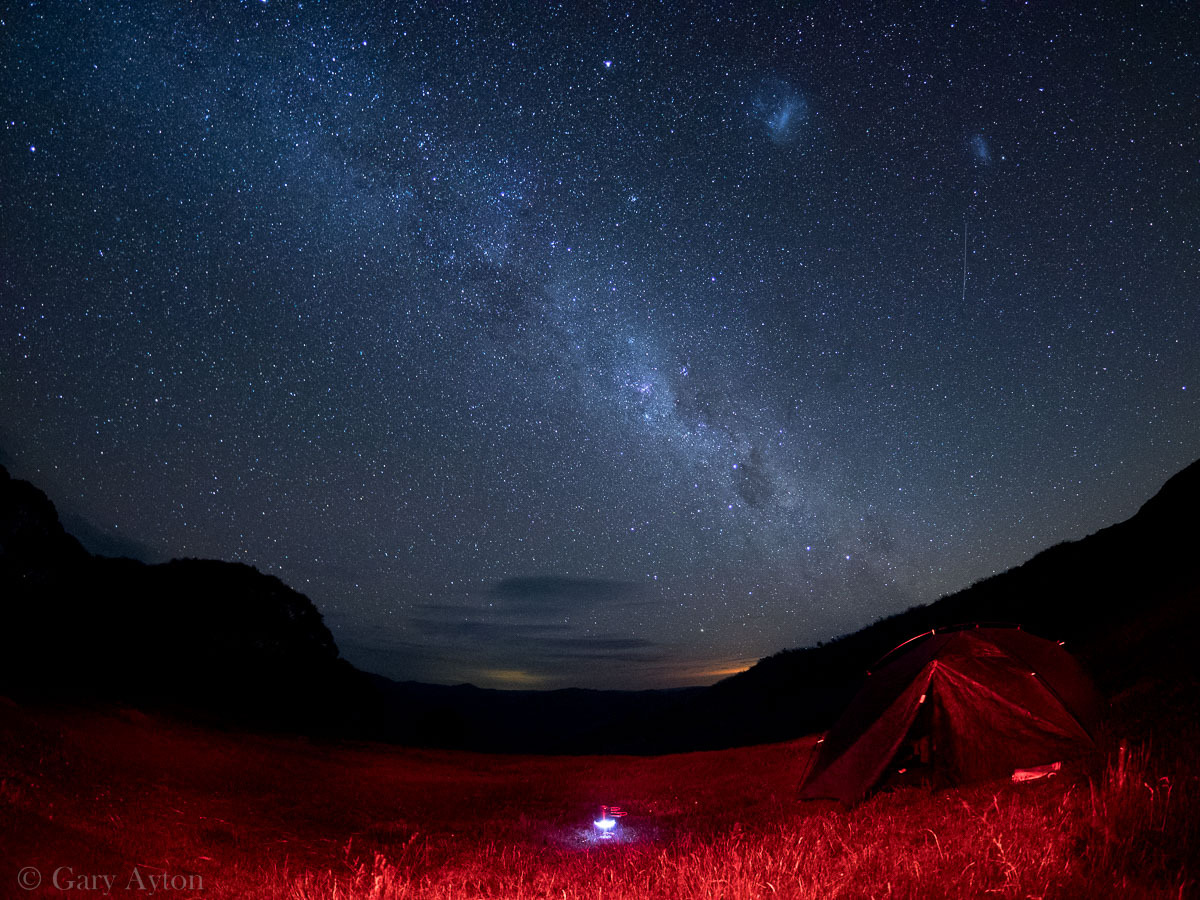
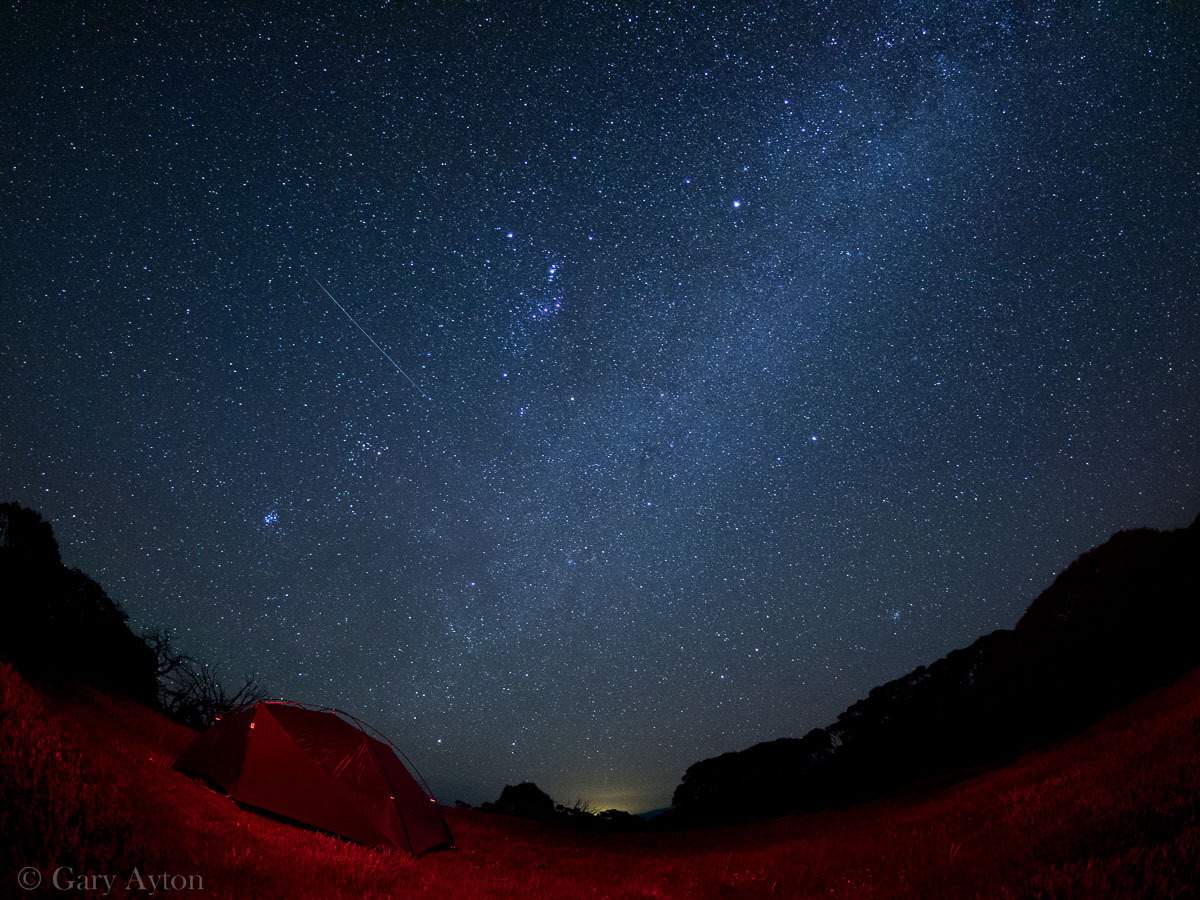
Finally, camera gear. I had hoped to test out the Olympus mZD 8mm f/1.8 fisheye lens on the last of the Milky Way for the season, so I brought it and a small tripod, plus spare batteries, gradient filters and my Olympus mZD 12mm f/2.0 and Olympus mZD 40-150mm f/2.8 lens, the combination of all of these would hit around 3kg – thank goodness I no longer use my heavy Canon dSLR gear.

Unfortunately, when all this plus some warm change of clothes, water and some food is weighed up it came to a potentially back breaking 17+ kg, but I hoped the ergonomic design of my pack would get me over the line – my family just laughed and said I was crazy – maybe they were right!

So an important part of my planning was to have 2 fit colleagues!

Other contingencies to consider:

  • re-check the ever changing weather forecast
  • ensure you sign the check-in book at the start of the walk and notify your family of where you are going and when you will be back
  • wet weather gear
  • warm thermals, gloves, beanie to combat the wind chill overnight
  • usual bushwalk gear – first aid kit (including blister repair kit), radio beacon, map, compass, water sterilisation, torch, multi-tool, emergency thermal blanket, trowel (probably not needed on this hike), compostable wipes, rubbish bag
  • cooking and food gear – stove, pots, cutlery, bowl, hand sterilisation liquid, tea towel, knife to chop veges, and of course food +/- wine
  • 3L water container to transport water from source to camp
  • Leave No Trace principles
  • snakebite bandage
  • usual medications if any, and include EpiPen if anaphylaxis is a possibility (eg. bullant bites), plus analgesics, aspirin, NSAIDs
  • turn off mobile phones to save battery, consider small USB power pack
  • be aware of the constant dangers in summer of bushfires, lightning, etc.

Phase 2 – getting there

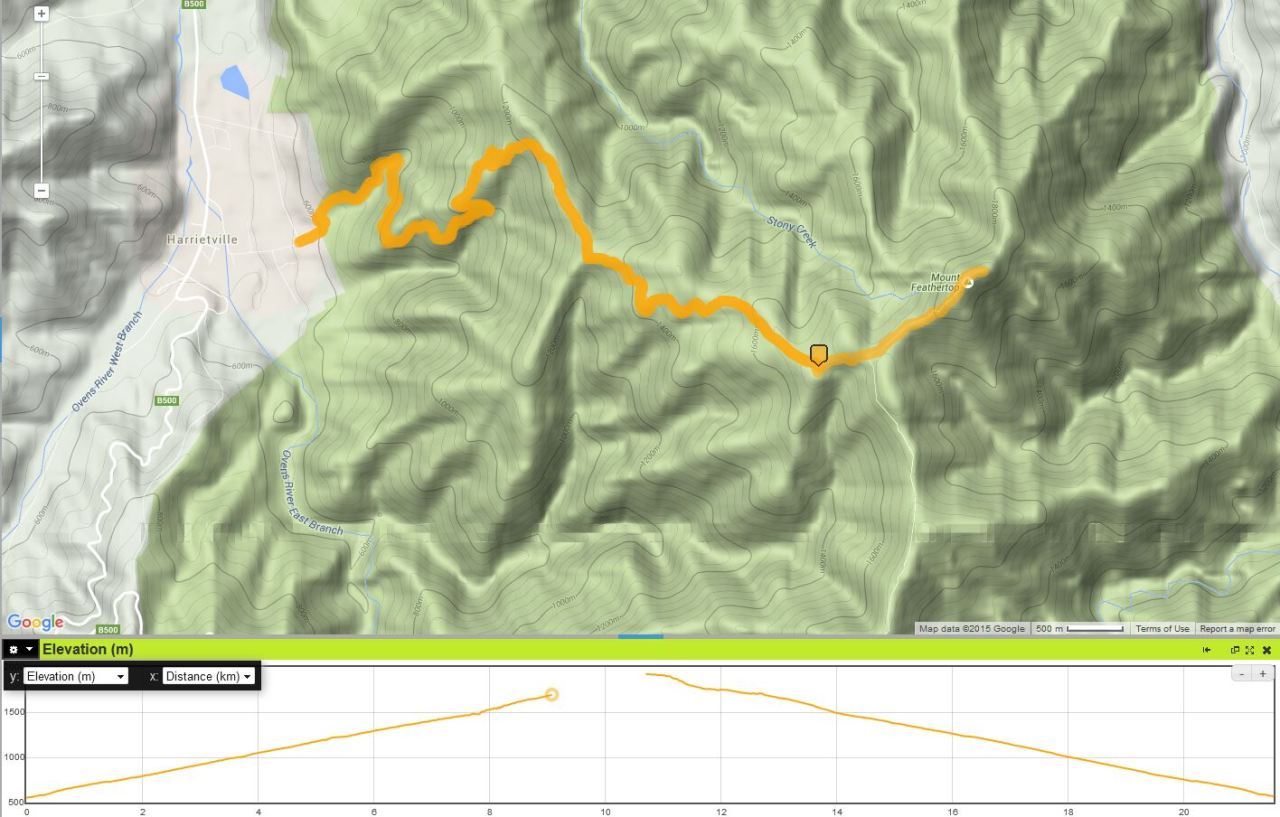
Mount Feathertop can be approached via several different walk routes – we chose the “gentle” walk from Harrietville called the Bungalow Spur Walk.

Harrietville is some 340km from outer NW suburbs of Melbourne and takes around 4 hours drive plus time for lunch at the Milawa Cheese Factory, so after departing Melbourne around 9.30-10am after peak hour traffic had subsided, we reached Milawa around 12.30, had lunch then reached Harrietville around 3pm for the start of our alpine walk.

Phase 3 – the ascent


GPS map of actual walk

The actual walk from our GPS tracker – yep there are NO flat segments to catch your breath!

Despite it being 3pm, the early Summer sun was quite warm and temperatures were around 28degC – a lovely day as long as you were not carrying a heavy load up a tall mountain!

Hiking gear included broad rim hat, sunglasses, trekking poles (although often these were a nuisance in the many sections of very narrow overgrown trail), waterproof Gortex hiking runners, moisture wicking shirt and shorts active wear, sunscreen. I took gaiters but it was too warm for them and benefits were not sufficient to justify them on this walk and the snakes here were mainly copperheads which are unlikely to bite you unless you tried to capture them or you stood on it.

The walk is a leisurely 10.5km walk and the sign at the start advised one should take time to stop and smell the roses (metaphorically of course – we don’t have roses in our forests), and the walk would ascend 1100m to the camp site where there is a hut for emergency shelter and a rainwater tank. This camp is some 300m below the peak which we planned to do on the next morning.

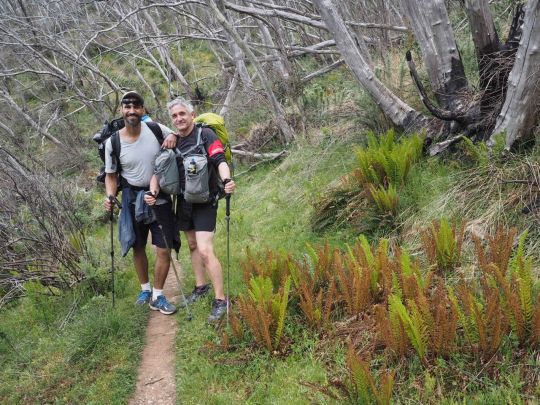
The three of us set off in high spirits and even I felt pretty good in my new backpack despite the 17kg – but it didn’t take too long for me to realise this was going to be torture for my poor heart – the “gentle” walk was an unrelenting climb which took us almost 5hrs (thanks to my lack of endurance fitness – it would take fit hikers 3-4hrs) – and each time I found a little shade in which to get my heart rate below 150 per minute for a few seconds and catch my breath, my personal fitness trainer encouraged me that the next rest is just around the corner – although it never was just the next corner.

I managed to get 90% of the way (to the Bungalow Hut ruins) before the sun was getting low in the sky and every muscle in my legs started to cramp, so my colleagues took pity on me and jointly carried my backpack up the last steep ascent to the hut only to find the rainwater tank was as empty as our water bottles!

By this stage the temperature had dropped and the wind chill had dramatically increased so it was time to get into some warm gear with some rain protection although we probably only received 1mm overnight.

My colleagues then volunteered to go back the 200m down the mountain side in the dark with head torches to find the little spring past the well marked sign “DO NOT DRINK” – thankfully I had brought along the UV sterilisation unit and it tasted better than any water I have had – dead giardia and all – now to wait the 7 days or so incubation period to see if it worked!

It was too windy and cloudy to test the fisheye out on the Milky Way 🙁

The forecast 35knot winds soon unleashed on our tents and blew all night – I managed to get to sleep by inserting my noise isolating earphones and listening to some Beethoven and although a few times I felt the tent lift in the wind, I awoke in the morning to find I was still in the campsite. My colleagues in their tent did not get much sleep at all – perhaps it was the red wine with the late pasta and chicken, or the balmy warm (10degC) windy night.

The tent, sleeping bag and mattress all performed flawlessly, although some may find the Nemo mattress a touch “bouncy”.

For cooking, we used a MSR Whisperlite Internationale shellite stove which is highly regarded for being reliable in all conditions and worked extremely well.

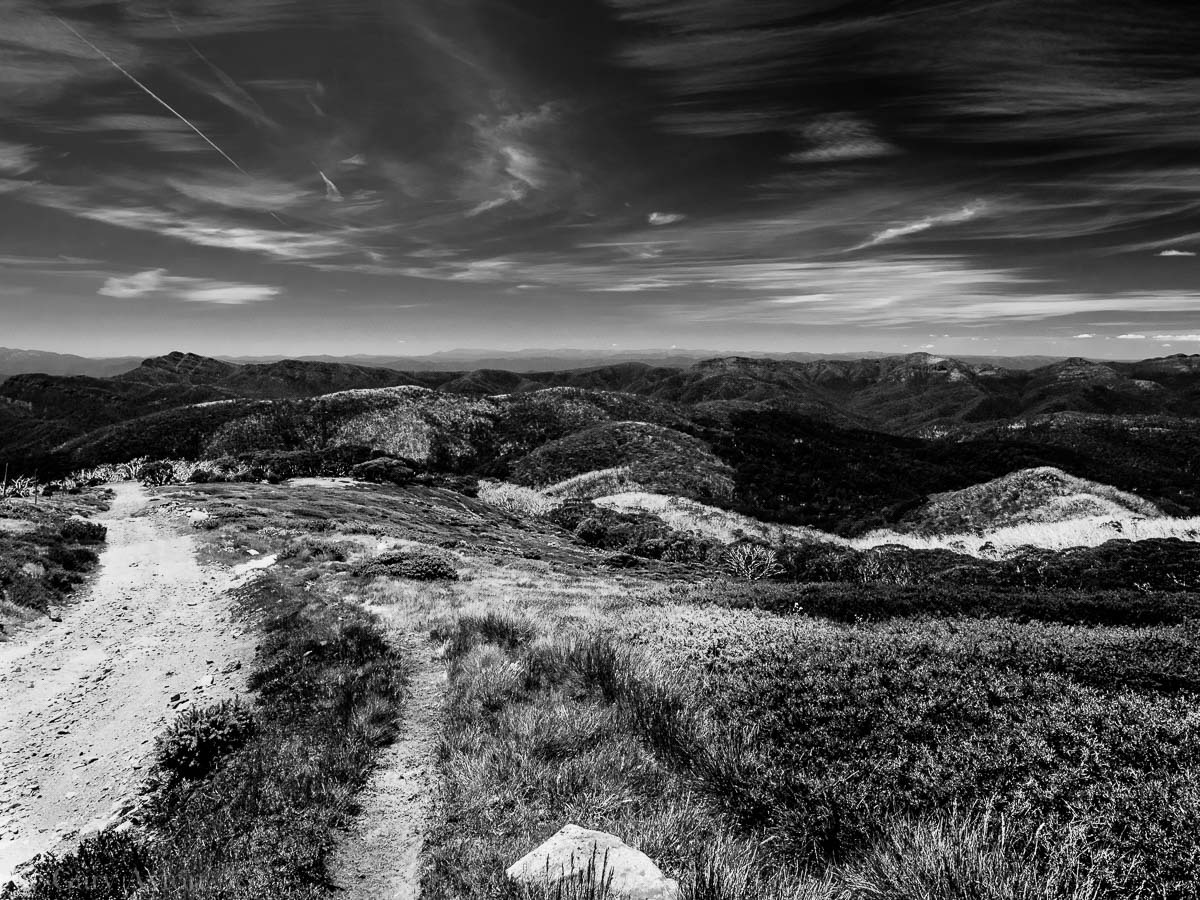
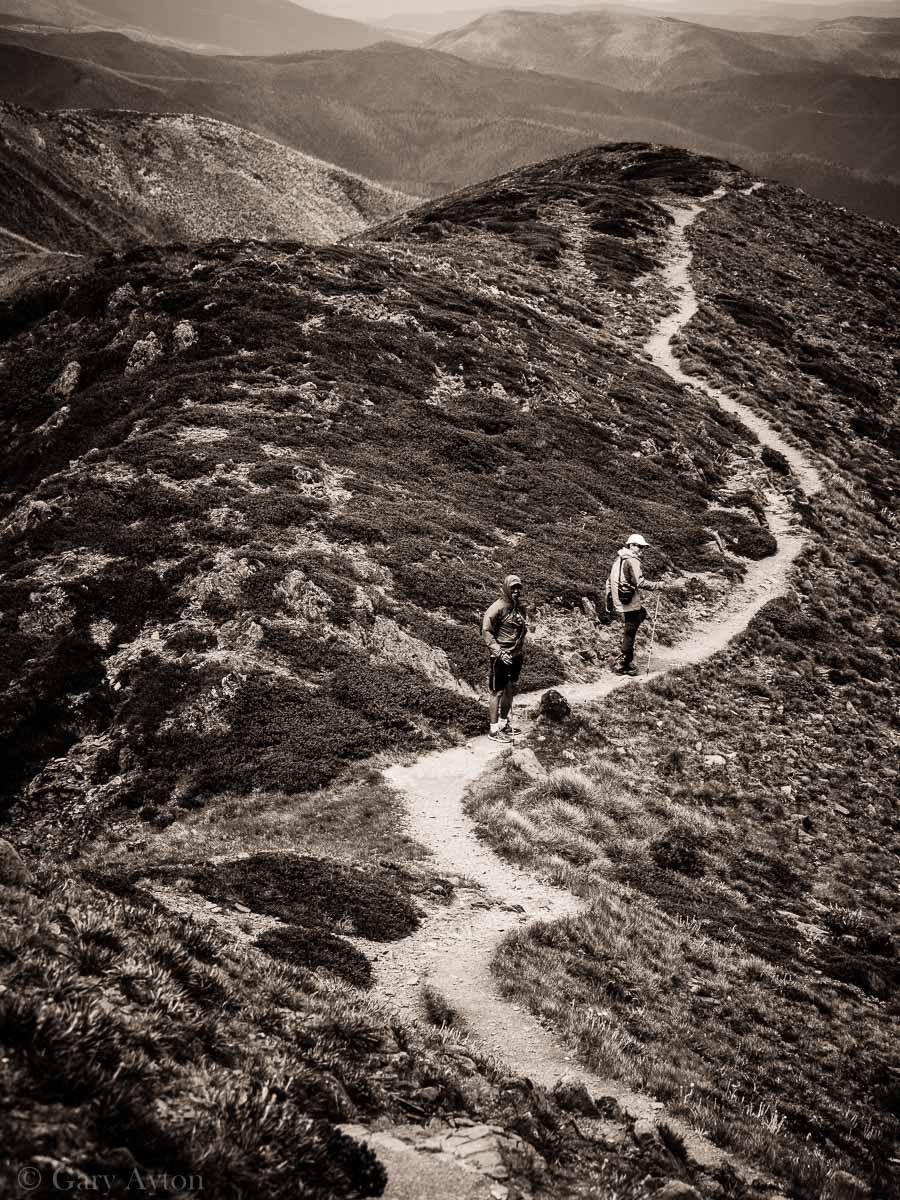
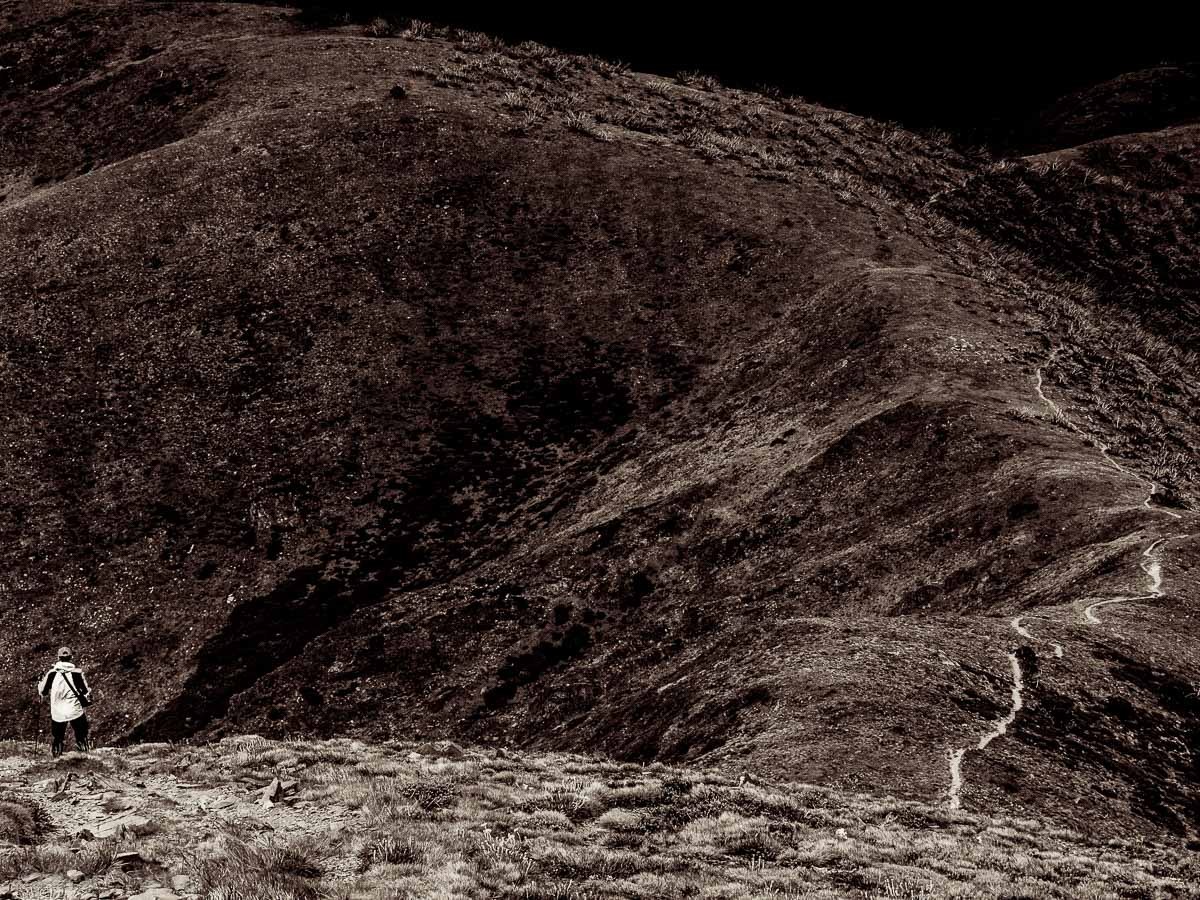
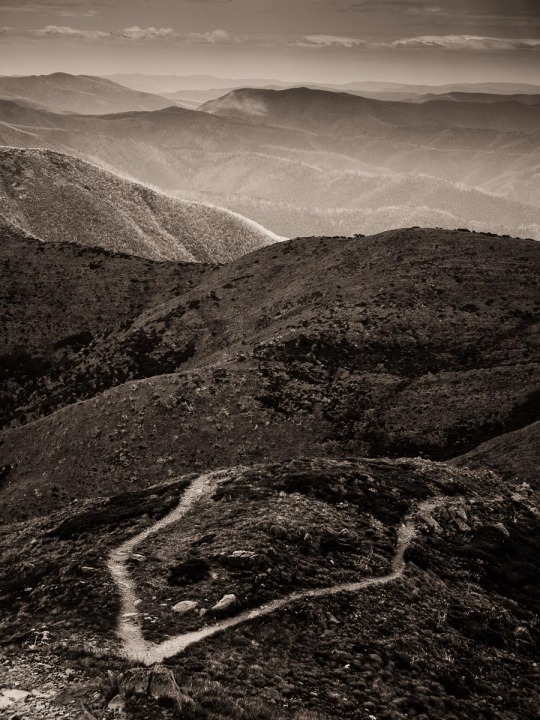
Phase 4 – the walk up to the peak of Mt Feathertop

After breakfast, despite the occasional light rain shower, we decided to walk up to the peak with just a rain jacket, single trek pole each and our Olympus OM-D weatherproof cameras.

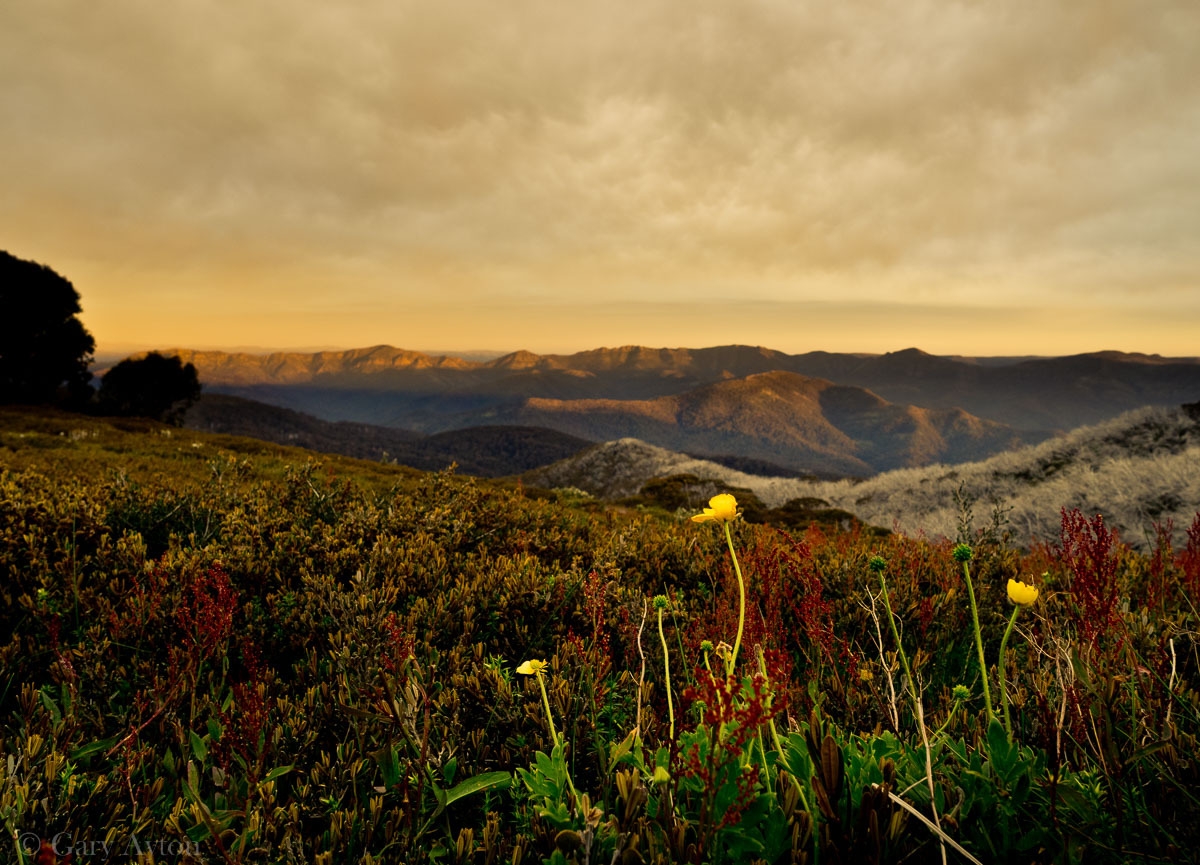
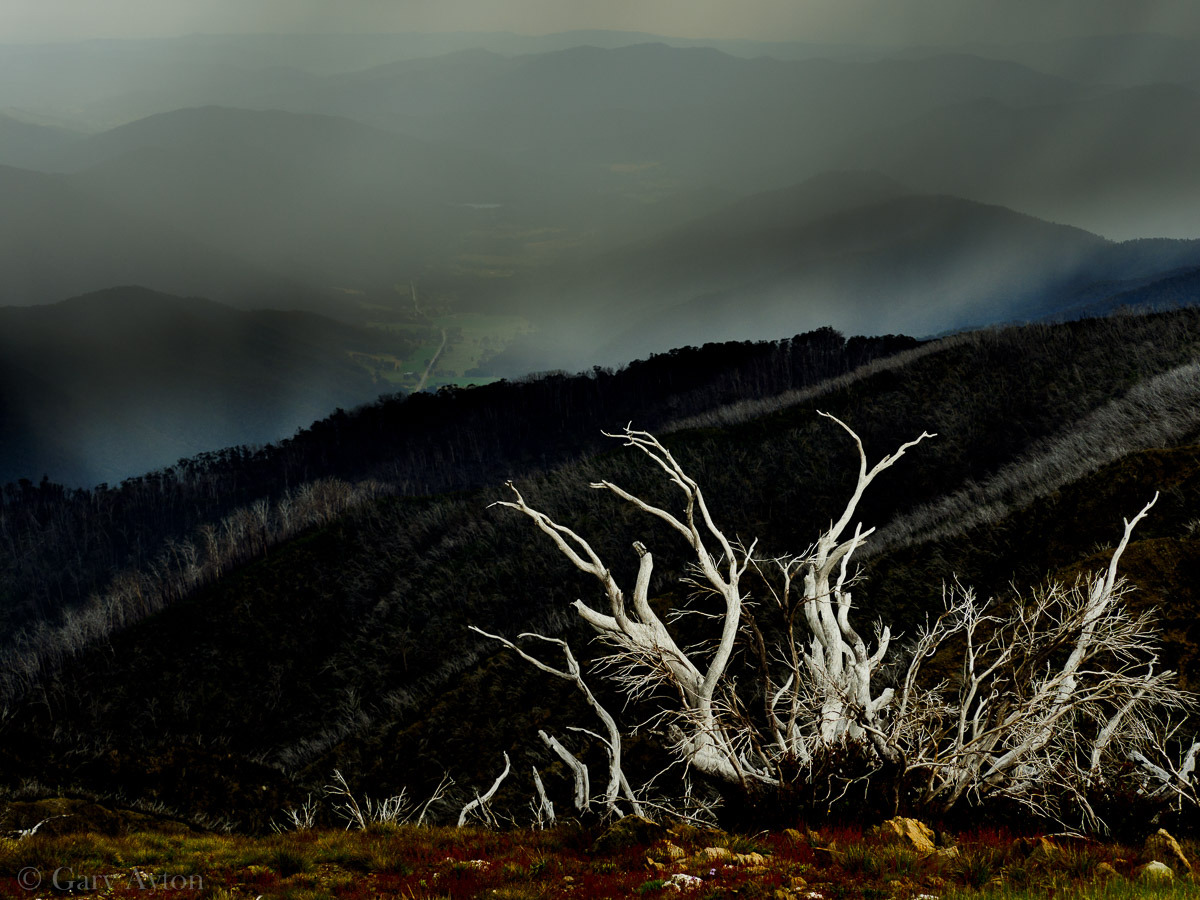
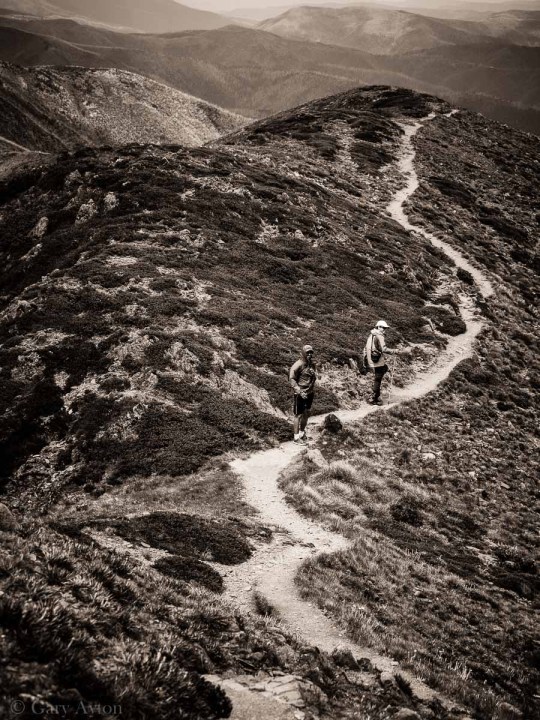
Photographically, phase 3 was not inspiring for me at all, perhaps mainly because of my fatigue, but phase 4 was a different story – walking up that ridge was inspiring and I was making my 40-150mm lens work hard although in the strong wind I had to be extra careful to avoid camera shake.

walking along the highest ridge

which way?

into the abyss

Not long after we had reached the peak, we saw another band of rain coming and to our surprise, a lightning storm – not a great thing to enjoy when you are the tallest objects on a very exposed highest ridge on the tallest mountain in the storm. We took a few more pics and headed back as quickly as possible to the safety of the hut where he had a quick lunch and packed up.

See here on how to reduce your risks in a lightning storm.

the incoming storm

Phase 5 – descent back to the car

cleaning up the hut

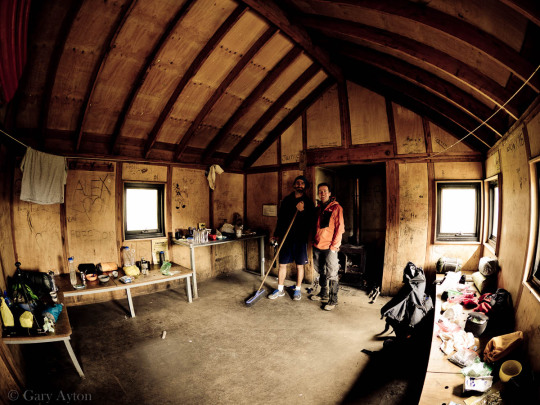
Cleaning up the hut – Olympus mZD 8mm f/1.8 fisheye lens

Hiking back down the trail was vastly different to the previous day’s ascent, I was not troubled by the back pack and could even run some of it – the trekking poles of course were very helpful in taking weight of the knees and for avoiding spraining the ankle when one loses concentration on the loose rocks.

We collected some more water from the trickle of trackside “spring” and sterilised it with the UV kit.

Ironically, just as we were getting into the car, 2 very close lightning strikes made sure we didn’t waste any further time.

The next day, the second cold front produced unseasonal dusting of snow.

I am going to work on trying to get the weight down further – prhaps the Panasonic 35-100mm f/2.8 lens instead of the Olympus 40-150mm lens as a start.

More of my info on ultralight bushwalking on my wiki

More info on hiking to Mt Feathertop on my wiki

WARNING – if you are sedentary and over 35 years of age, DO NOT DO a strenuous hike like this without getting the OK from your doctor first – if you have coronary artery disease, such an activity is the perfect way to have a sudden death and your family won’t be happy! I know my heart can cope, nevertheless, on the way down, I took a NSAID to help with muscle soreness, and to offset its potential to increase the risk of heart attacks, I also took 300mg aspirin.

Disclaimer: I am NOT sponsored by any of these manufacturers or retailers and I purchased all items.


The new Sony RX 1R II 42mp full frame compact fixed lens camera – a lovely but pricey serious photography tool

Written by Gary on November 1st, 2015

Sony has just announced their upgrade to the 2012 world’s 1st full frame compact fixed lens digital camera – the Sony RX I and the new camera is the Sony RX 1R II and packs some very important improvements, albeit with the same excellent Carl Zeiss 35mm f/2 lens, but the RRP of $US3300 may be just a touch too high for most people!

Firstly, these cameras are fairly unique in packing such a high quality lens and full frame sensor into a small package much the same size as a Micro Four Thirds Olympus OM-D of equivalent field of view.

Leaf shutter:

Not only that but the shutter is a leaf shutter in the lens which gives 2 very important advantages over shutters at the sensor:

  • it is more quiet
  • it allows flash sync at full flash output at shutter speeds up to 1/2000th sec  (ie. no need for power sapping high speed sync modes such as HSS or Super FP)

Fast flash sync:

A fast flash sync is extremely useful in 2 particular circumstances:

  • allowing wide apertures to be used in bright outdoor situations at a distance – eg. wedding groups
  • allowing one to over-power the sun if the strobe is powerful enough and it’s full output flash has a very brief duration such as 1/800th sec or shorter – unfortunately many flashes require 1/300th- 1/500th sec duration for maximum flash output which does limit the benefit of fast flash sync somewhat.

Improvements over the Sony RX 1:

  • 42mp sensor and image processor as for the Sony a7RII E-mount mirrorless interchangeable lens camera
  • a much needed improved AF system now with 399-point hybrid AF system and C-AF capability
  • built-in flash replaced with a superb popup built-in EVF – 2,359,296 dot OLED TRU-finder EVF with 0.74x magnification, a 19mm eyepoint and a -4.0 to +3.0 diopter adjustment
  • rear LCD now tilts but still no touch control
  • new variable optical low-pass filter to allow user to decide upon maximum detail or minimal moire artefacts
  • 5fps burst with AF between each frame
  • shutter now to 1/4000th sec
  • can now define a minimum shutter speed for the Auto ISO sensitivity option
  • 50Mbps XAVC S movie mode at 1080 full HD at 24, 25, 30, 50 or 60fps
  • WiFi, NFC, smartphone remote control

What does it miss out on?

There are a few features missing which really should be available on a camera at this price point such as:

  • weathersealing – this is a pity as I could imagine bushwalkers would love this camera if it was weathersealed
  • image stabiliser – this is a real pity as hand held, the camera shake is likely to waste all those 42mp of data and mean that low light street shooters would not get the maximum out of it
  • shutter speed to 1/8000th sec – another problem means one may need a ND filter to use f/2 in bright sunlight, although an option is to drop ISO to 50 and give up some dynamic range
  • 4K video which is now becoming the video to have
  • touch control of rear LCD screen – given this is such a small camera, touch control would be handy indeed

Why not just use an Olympus OM-D E-M5 II with 20mm Panasonic pancake lens?

The Olympus OM-D E-M5 II kit gives the following advantages at 1/3rd of the price and is only a touch larger and heavier:

  • camera is weathersealed (although this pancake lens is not)
  • can use almost any lens ever made
  • the world’s best image stabiliser which is just magic in video mode as well
  • touch control of rear screen which not only tilts but swivels
  • mechanical shutter speed to 1/8000th sec
  • 40mp HiRes mode without moire for static subjects with camera on tripod
  • 77mbps HD video with incredible image stabiliser
  • PC sync port
  • don’t need to pop up the EVF
  • some great in-built features such as Live Composite mode, etc

BUT the Sony does give a few benefits which may make it worth it for some people:

  • the shallower depth of field and lower high ISO noise of the full frame sensor
  • 42mp detail – although one really needs a tripod, fast shutter speed or flash to realize this detail
  • fast flash sync – but you need a short duration flash unit to make the most of it
  • 399 AF points instead of 81 points may provide some benefits

Or for a similar price, the Sony a7R II camera:

The Sony a7R II is only a little more expensive and substantially bigger and heavier, and lacks the leaf shutter, but gives you the following benefits:

  • camera is weathersealed
  • can use almost any lens ever made
  • a very good image stabiliser
  • mechanical shutter speed to 1/8000th sec
  • 4K video

Note that at present there is no dedicated AF lens for the E-mount which equates with this lens, the nearest are the Sony Zeiss 35mm f/2.8 ($US799) and the new Zeiss Batis 25mm f/2 (~$US2000). There is a manual focus Zeiss Loxia 35mm f/2 lens at $US1250.

Thus the Sony RX 1R II gives you similar image quality in a much smaller package and the benefits of fast flash sync and 35mm f/2 and if these are more important than the other features then it maybe a camera to buy but for most, the Olympus OM-D or Sony a7R II would be better options.


A surreal view of Australian surrealism with the Olympus mZD 8mm f/1.8 fisheye lens

Written by Gary on October 31st, 2015

Fisheye lenses are rather unique creative niche lenses and until I went to Palm Cove I didn’t really think I had a need for one – but up there, a fisheye was the only way to capture the tall palms on the beach with the ambience and field of view I wanted. For those images I used the cheap Samyang/Rokinon fisheye but it is manual focus and the front of the lens isquite close to the camera body meaning I often imaged my left hand in the shot inadvertently, nevertheless, this is a great lens if you are on a budget.

Now that Olympus has created a superb weatherproofed pro quality Olympus f/1.8 fisheye lens, I just had to test it out, and what better test is an indoor art exhibition of Australian surrealism at Melbourne’s Ian Potter in Federation Square titled Lurid Beauty – Australian Surrealism and its Echoes. I highly recommend anyone interested in art to see this very affordable exhibition, I really enjoyed it.

These were shot hand held without flash using the Olympus OM-D E-M1 Micro Four Thirds camera.

A fisheye view of Lurid Beauty:

doorway

Anne Wallace Sight Unseen:

doorway

Tom Moore Self-preservation 2014:

still life

Dusan Marek Equator 1948:

painting

Herbert McClintock Three Faces 1940:

painting

painting

Tim Schultz :

painting

Hein Heckroth Australia painted whilst a “German enemy alien” during World War II at the camp in Hay, NSW 1941:

painting

There are many more wonderful works including more from James Gleeson – do yourself a favour and check it out.

Architectural uses:

Melbourne’s Regent Theatre in Collins St which is so contrasty it is very hard to photograph:

theatre

theatre

Melbourne’s Federation Square:

building

and to show how well the lateral CA is controlled:

building

Melbourne’s famous back alley ways:

alley graffiti

the very popular Hopetoun Tea Rooms:

alley graffiti


Obviously I have applied some post-processing on the above images to make them a touch more surreal still.

This lens is not for everyone, but does add another very useful tool to a photographer’s kit.

I am looking forward to shooting some Milky Way Astroscapes with it as the f/1.8 aperture plus wide field of view should allow nice long 40-60sec exposures without star trailing.

If you do not like the fish eye effect, there are some de-fishing processing options to flatten the image out to a more natural looking image.


Tropical north Queensland – the Daintree wilderness rainforests, beaches and Cape Tribulation

Written by Gary on October 27th, 2015

This will be the last on my current series of posts of the wet tropics of north Queensland – previous posts were:

Daintree wilderness rainforest is in far north Queensland and as far as mobile phones, TV and internet goes, one is mostly off grid once you cross the ferry on the crocodile infested Daintree River.

It’s tropical climate, relative isolation and unique rainforest flora and fauna and lovely beaches make it a must see destination – see earlier posts on tips on time of year to go, etc.

The road is bitumen up to Cape Tribulation so you will not have issues with normal cars although an SUV is nice to give a bit more ground clearance, especially if you are renting a car. The new  2011 Q5 bridge across Coopers Creek allows all year access to Cape Tribulation (apart from major storm/cyclone/5 yr floods).

The road from Cape Tribulation north to Cooktown has been sealed since 2005 but travel past Cape Trib may NOT be covered by your rental car hire insurance! You can check current road status here.

When calculating drive times, assume an average speed of around 60kph – there are many speed humps to reduce risk of killing southern cassowary birds.

Alexandra Lookout – looking south east towards Snapper Island and the mouth of the Daintree River:

Noah Beach

Golden Orb spider the size of my hand on the Jindalba Boardwalk in the rainforest (Olympus mZD 40-150mm f/2.8 PRO lens on Olympus OM-D E-M1 camera):

Golden Orb spider

There are 3 well maintained short boardwalks which you must do as each give access to different ecologies:

  • Jindalba boardwalk through the rainforest
  • Marrdja boardwalk  through mangrove swamps – very nice and perhaps the most likely place to see a southern cassowary
  • Dubuji boardwalk another coastal walk but this one takes you through tall fan palms

Bushwalks include the very steep walk from Cape Trib to Mount Sorrow for those who are fit – you are advised to start the walk no later than 10am and to allow 6-7 hours.

Swimming holes are available at Cape Trib Grocery Store and at Emmagen Creek north of Cape Trib (take the inland track from Emmagen Beach).

Sea kayaking is available just north of Cape Trib provided by Paddletrek, and also in Cow Bay / Snapper Island in the southern area, provided by Tropical Sea Kayaks.

If you want to snorkel with turtles then Ocean Safari‘s Great Barrier Reef tours take you 20km out to the to Mackay Reef or Undine Reef (25min fast boat ride) and depart from Turtle Rock Cafe at Myall Beach and also from Cape Trib.

There are quite a few nice accommodation options and a few restaurants and cafes and a pub or two, although grocery stores and fuel are not plentiful. Thankfully there are NO fast food chains such as Macdonalds. Make sure you stop for lunch at Lync Haven cafe – very nice lunches and they have some parrots to interact with and caged pythons as well as accommodation. Alternatively, the Whet Cafe Bar and Restaurant makes for a nice lunch or dinner spot near Cape Trib.

Camping in the beach-side camp grounds such as at Noah Beach is popular during the dry season (June-Oct) but be warned, in the wet season it rains hard and for much of the day although I am told it generally stops between 10am and 4pm unless there is a cyclone or tropical low really dumping rain. Also the local nocturnal giant white tailed rat (Uromys caudimaculatus) which can chew through the husk of a coconut, can also chew through tents, plastic, canvas, leather electrical wires and even into cans. They can damage car fan belts and radiator hoses!.

I stayed at the Heritage Lodge and Spa which is well situated in Diwan, half way to Cape Tribulation and near Thornton Beach and Cooper’s Creek. The cottages set within a rainforest environment are very nice indeed although en suites are tiny and there are no baths. The Cooper Creek runs within the site and allows walks and swimming in the crystal clear water. It has a very nice restaurant and a continental breakfast of cereal, toast, juices, fruit is provided.

The lower reaches of Coopers Creek is crocodile territory and boat tours are available from the bridge a couple of times each day – the walk along Thornton Beach to the inlet does make a newbie’s heart stir seeing the crocodile shaped shadows in the water (but these appear to have been sandbars although I didn’t wade in to find out!).

There is a kiosk serving fish and chips and burgers at Thornton Beach and there are some convenient affordable beach cabins opposite (Thornton Beach Bungalows).

Thornton Beach (Olympus mZD 40-150mm f/2.8 PRO lens on Olympus OM-D E-M1 camera):

Noah Beach

Coconut:

Noah Beach

I had been worried about annoying biting insects on the beach such as sandflies (aka midges/midgies which cause persistently itchy allergic reactions to their bites and which are important in the pollination of cocoa plants and thus chocolate!) but in October it seemed there were no nasty bities even without DEET insect repellents except for the occasional March fly in the mangrove beach area of Cape Tribulation (Oct-Nov is apparently the time of march flies in the Atherton Tablelands so I guess it applies on the beaches too).

North of Thornton Beach is the lovely remote Noah Beach with its nice camping ground.

Aerial view of Noah Beach courtesy of Tourism Queensland:

Noah Creek

Cape Tribulation:

Butterfly (Olympus mZD 40-150mm f/2.8 PRO lens on Olympus OM-D E-M1 camera):

butterfly

Lace monitor lizard goanna on the beach (Olympus mZD 40-150mm f/2.8 PRO lens on Olympus OM-D E-M1 camera):

butterfly

Cape Tribulation beach with fisheye lens:

flower

Surreal mangrove beach (Olympus mZD 40-150mm f/2.8 PRO lens on Olympus OM-D E-M1 camera):

surreal mangrove beach

Wild cannonball mango in the fantastic Marrdja Boardwalk through mangrove swamp (Olympus mZD 12-40mm f/2.8 PRO lens on Olympus OM-D E-M5 camera):

cannonball mango

Aerial basket fern (Drynaria rigidula) – home to birds, tree snakes and other animals (Olympus mZD 40-150mm f/2.8 PRO lens on Olympus OM-D E-M1 camera):

aerial fern


Tropical north Queensland – Palm Cove and why a fisheye lens comes in handy

Written by Gary on October 27th, 2015

Continuing on from my holiday tips for the wet tropics of north Queensland and the Atherton Tablelands, this post explores the Palm Cove region north of Cairns.

Palm Cove is one of the most picturesque beaches with its lovely palm trees and towering melaleucas which line the esplanade which separates the beach from the little village which is filled with accommodation options and restaurants.

In October, it was a relatively quiet, friendly and relaxing village and surprisingly, the accommodation apartments do not use insect screens and we had no issues from mosquito bites even though we left the windows open much of the time – I guess the council keeps a tight control on insect populations in the area.

I stayed at Paradise on the Beach apartments and had the pleasure of having a unit which overlooked the beach and had a large double spa bath and kitchenette, although the downside is that it was close to a children’s playground over the road, and at night it was noisy from the patrons of the bar below – if these are not an issue for you, then it was a lovely way to relax and enjoy the beach.

As with all the beaches in the wet tropics, there is a small risk of crocodile attacks if you swim or walk near the edge, although this is much more likely near estuaries and very few if any have occurred on the actual Palm Cove beach.

A bigger risk from Nov-May is the potentially lethal jellyfish stingers, and thus one is advised to only swim within the patrolled swimming area within the stinger nets.

The beaches face east and so sunrise walks are a must and a perfect way to start the day before the sun gets too hot.

Palm Cove with the Samyang 7.5mm fisheye lens:

A fisheye lens is really the only way to capture the palms and melaleucas which give the beach its character. I used the inexpensive manual focus only Samyang 7.5mm f/3.5 fisheye lens on Micro Four Thirds Olympus OM-D E-M1 and E-M5 cameras, although one could use any fisheye lens including the lovely new Olympus mZD 8mm f/1.8 lens.

Palm Cove sunrise

Palm Cove sunrise

Palm Cove sunrise

The towering ancient melaleucas:

Palm Cove melaleucas


Palm Cove as a base to explore

Palm Cove is perfectly situated to explore the region as it is within 20min or so drive from Cairns, the airport and most of the local attractions.

A must do, is visit the Hartley’s Crocodile Adventures which is about 20-30min drive to the north. You need to spend at least 2-3 hours here learning about crocodiles and other tropical wildlife including the southern cassowary bird and snakes. They run a commercial crocodile farm which you can attend a guided tour to learn more about crocodiles, or go on a short cruise in the river and watch them feed crocodiles with the crocodiles jumping 1-1.5m out of the water.

The snake handling and crocodile attack demonstration events are well worth attending, but perhaps the best is indulging in a very tasty crocodile salad lunch at the cafe which I would highly recommend!

Other attractions in the region include:

Pics of the region using the Olympus OM-D and pro zoom lenses:

Walshs Pyramid Hill (the highest freestanding natural pyramid in the world) south of Cairns at sunset from a boat on a “sunset cruise”:

Pyramid Hill Cairns

Mangroves in Cairns at sunset from a boat on a “sunset cruise”:

mangroves Cairns

Mangrove beach near Port Douglas:

mangrove beach near Port Douglas

Mossman Gorge:

mangrove beach near Port Douglas

Rainforest stinging tree (Dendrocnide moroides) leaves – the leaves, stem and fruit are covered in tiny silica hairs which inject neurotoxins causing severe pain which may last for several days and then recur over months! Even the dead leaves can sting and worse can release hairs when disturbed which can then be inhaled! (I presume this is one of them! Olympus mZD 40-150mm f/2.8 PRO lens on Olympus OM-D E-M1 camera):

stinging tree


The Bachelorette – a little photo story from an available light portrait workshop yesterday using the Olympus mZD 75mm f/1.8 lens

Written by Gary on October 25th, 2015

I rarely shoot portraits and so when an opportunity came up for an outdoor available light workshop yesterday on an afternoon in the harsh Australian sun when only crazy people shoot portraits, I just had to attend.

The Australian sun in spring and summer is high in the sky casting dark shadows on eyes and is not easy to work with – most fashion photographers shooting outdoors would only shoot in the early morning or late afternoon to catch a more flattering sun angle or just the glow from the sky after the sun has set.

Why do workshops?

Photography is a life long learning experience and by attending workshops you get to experience new ideas and experiment with them as well as network with like minded people. Another great benefit is that with a few people attending the costs of model and hair and make up artist time becomes more affordable for non-commercial photographers like me and this makes them attractive and a win-win scenario for all concerned.

This workshop was organised by a Melbourne professional photographer, Nelli Huié, who ran an excellent, well organised session and demonstrated several different styles and gave some great tips.

The brilliant actress / model was Kyla Nichole Nelson and the hair and makeup artist was Aneta Nabrdalik – both had their work cut out in the trying sunny conditions.

After perusing my images I decided to create a “Bachelorette” storyline (or perhaps it is more Mills and Boon?) to fit the emotive feel of some of my images I selected from the afternoon – a bit cheesy, but then so it is the reality TV show. The chosen images are partly to show the diversity of what we achieved and also show the talent of Kyla’s ability to morph from one emotion to another whilst still creating aesthetic poses with minimal direction, while I tried to position the camera for best subject and background interplay whilst juggling with exposure (mostly manual exposure mode), white balance and focus.

All images were shot hand held with a Olympus OM-D E-M1 Micro Four Thirds camera with my favourite portrait lens, the Olympus mZD 75mm f/1.8 with available light only – no fill-in flash. The last two images used a diffuser in bright sunlight, the others were achieved with selective placement of the model amongst trees. The 1st image foreground bokeh was generated from out of focus fellow attendees in front of me which I decided to include in the shot.

Post-processing was of RAW files in Adobe Lightroom with editing mainly of removal of blemishes and some local and overall tone edits, but no skin smoothing and no sharpening other than the default sharpen for screen on export from Lightroom. No adjustments to eyes except for some lightening of her eyes in the smiling shot.

Enjoy.. and I hope they inspire you to get out and do some workshops and experiment – look for the light, always observant of how the light falls on your subject and just as important how you choose a background and how you render it with nice bokeh.

The Bachelorette:

Please, please, say yes ….

please say yes

Yes, he said yes!

yes

Today is the day, I can’t wait til he gets here:

optimism

anticipation

Typical guy, late as usual…

late

Now I’m getting worried, he should be here…

late

How could he do this to me?

glassy eyes

I couldn’t bear to live without him

sleeping beauty

Sleeping beauty waiting for another prince to come along:

sleeping beauty